Table of Contents
Chocolate Lava Cake | Instant Pot or Oven – Duo Delight of Simplicity
Growing up in a bustling Moroccan kitchen, the aroma of fresh mint and spices would always drift into the alleyway cafés in Casablanca. In Paris, the pâtissiers taught me that texture is just as essential as flavor. Now, in my New York City home, I blend those memories into a dessert that feels both exotic and home‑comforting—this chocolate lava cake that you can flip from the Instant Pot to the oven in a single kitchen.
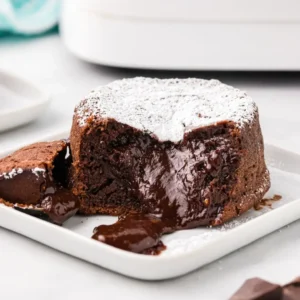
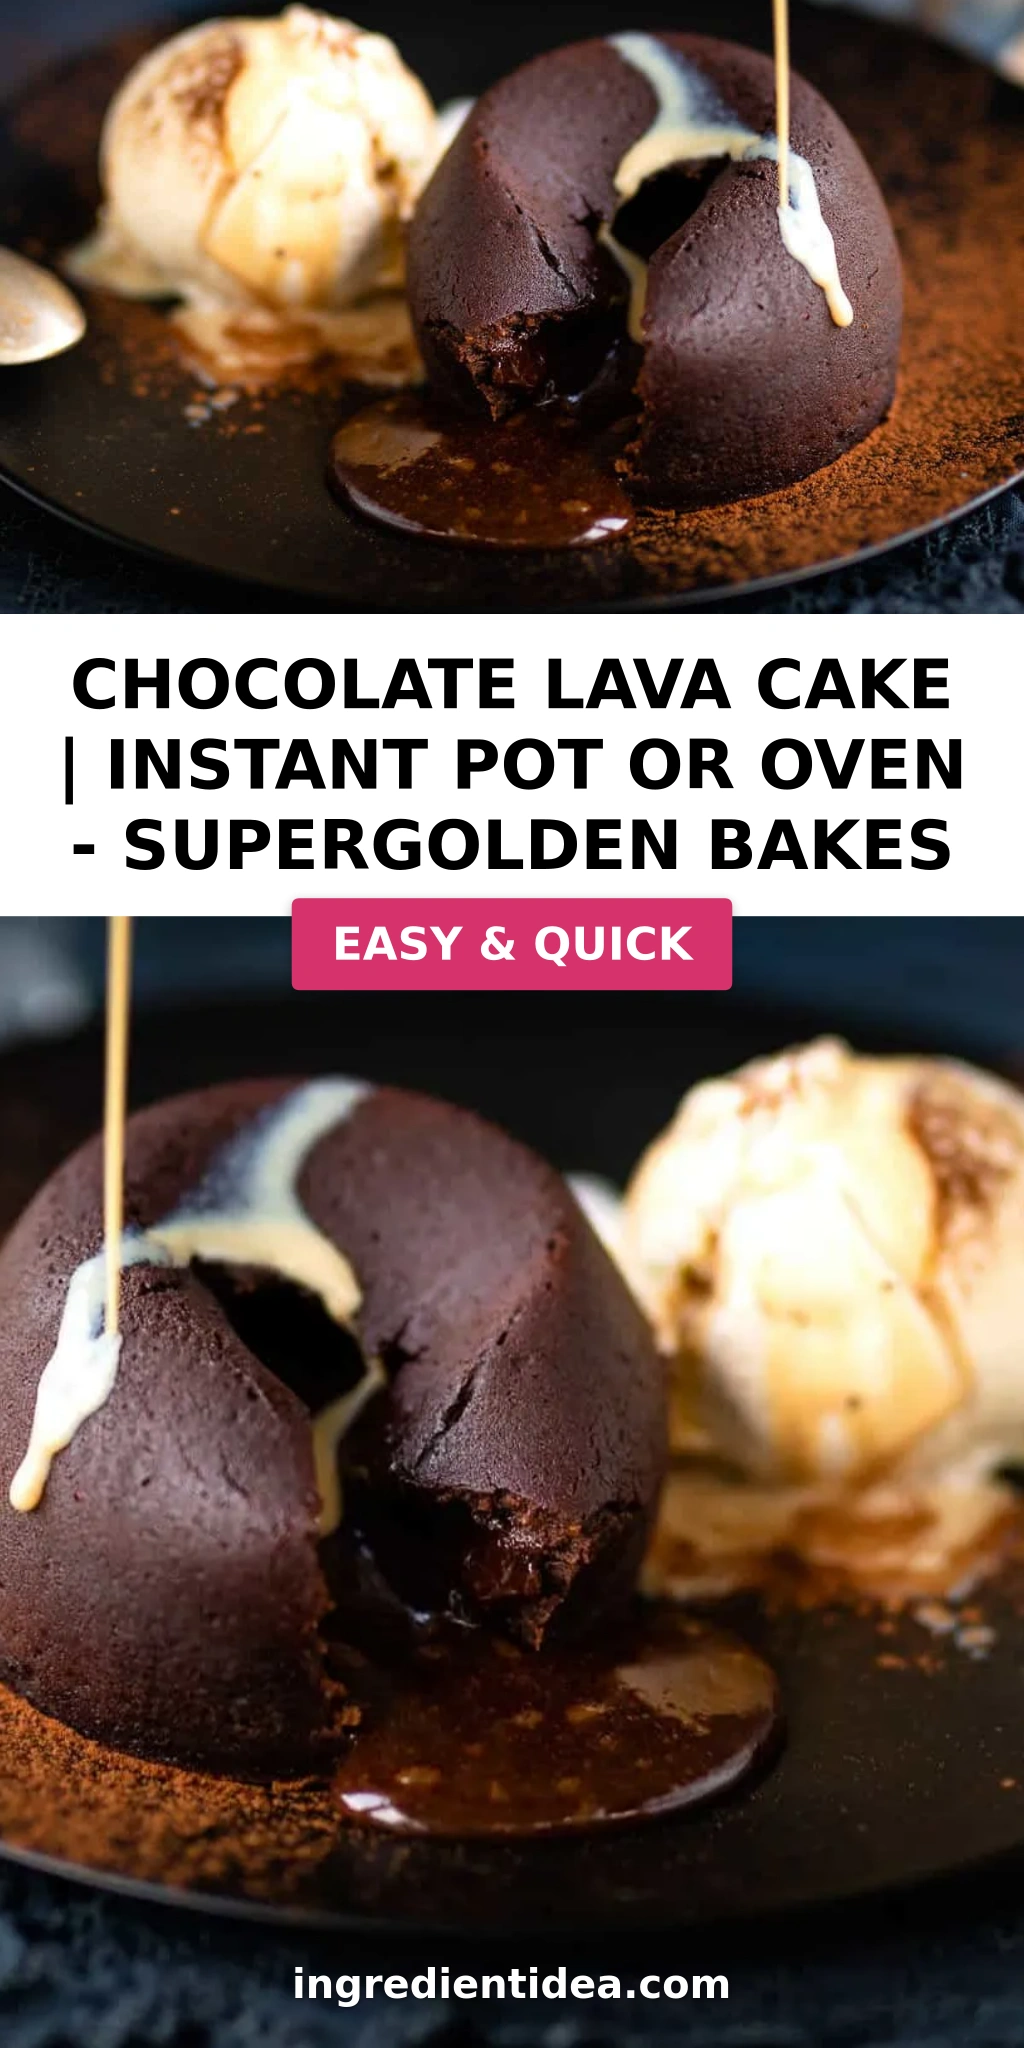
Imagine a glossy, dark chocolate shell that cracks open like a tiny volcano, releasing a rich, molten center that feels like a silky river of cocoa. The batter is airy yet dense, caramelized corners give way to deep, bittersweet nuances, and a hint of espresso peppered with cinnamon brings a Mediterranean warmth to each bite. The moment it melts in your mouth, you’re transported to a dimly lit café on the Left Bank, or the fragrant markets of Marrakesh at dusk.
What sets this recipe apart is the dual‑cook method: whether you’re a fan of the pressure‑cooker’s convenience or the oven’s classic charm, you’ll end up with the same luscious center. My version is streamlined—just 15 minutes of prep—and I’ll share a pro tip that ensures the gooey core never flattens, plus a common mistake to avoid that could ruin the perfect lava pour.
Why This Chocolate Lava Cake | Instant Pot or Oven Recipe Is the Best
The secret to this recipe is in its blend of French pastry precision and Moroccan spice tradition. By starting with high‑quality dark chocolate and infusing a subtle espresso and cinnamon, I create depth that would make any café barista swoon. This unique angle gives the cake a caramelized edge while keeping the interior silky.
Texture matters more than anyone might think. By folding the dry ingredients just until no streaks remain, the batter holds its shape enough to survive the pressure cooker’s steam yet remains soft enough to release instantly in the oven. I’m a stickler for a good “squeeze” test—if the batter holds together but pops when lifted, you’re ready to bake.
For busy New Yorkers, this recipe feels like a labor‑free dessert that doesn’t compromise on decadence. The instant‑pot portion takes only ten minutes at high pressure, while the oven version rounds in 18‑20 minutes. Either way, you’ll get a chocolate masterpiece that’s almost instantly ready, with almost no clean‑up.
Chocolate Lava Cake Ingredients
I source the darkest chocolate from a specialty store in SoHo, and I make it a point to check the % cacao on every bag—my mother would have demanded the highest quality. Then I comb through a list of pantry staples that I usually have stocked next to my espresso machine.
Ingredients List
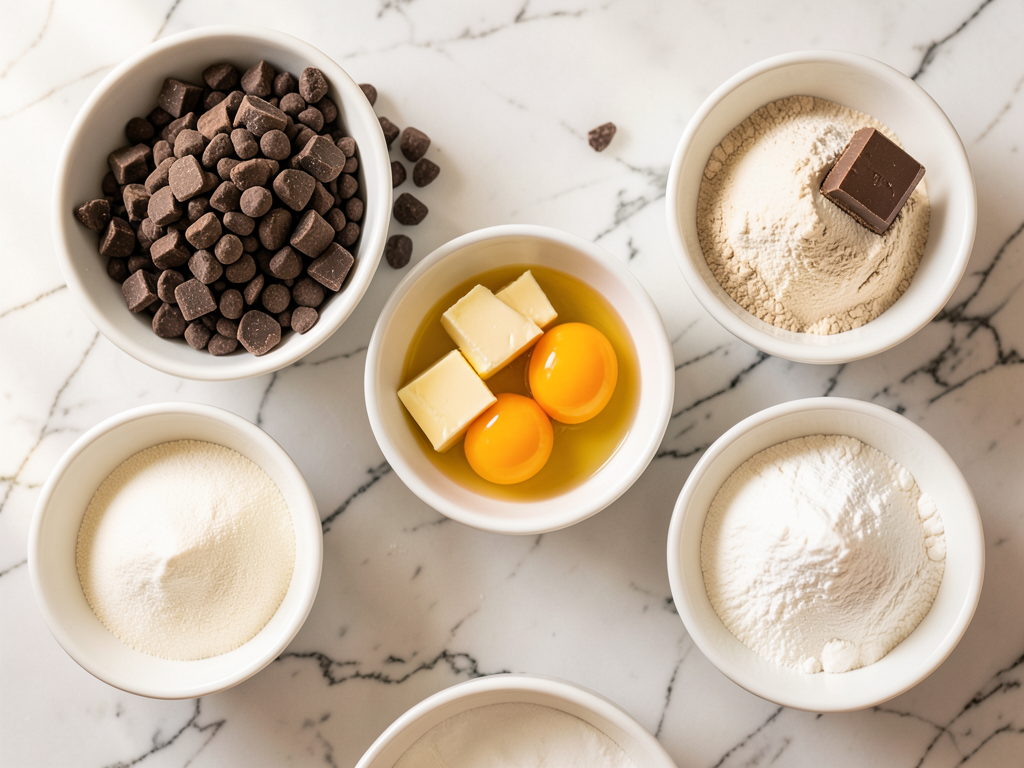
- 1 cup (180g) dark chocolate chips (or chopped dark chocolate)
- ½ cup (113g) unsalted butter (cubed)
- 3 large eggs
- 1 tsp vanilla bean paste (or extract)
- 1 ½ cups (180g) powdered sugar (icing sugar)
- 7 tbsp all‑purpose flour
- 1 tsp instant espresso powder (optional)
- 1 tsp ground cinnamon
- ¼ tsp salt
- 4 tsp cocoa powder (or as needed)
- Melted butter (or cake release spray)
- 2 tbsp Baileys (optional)
- Vanilla ice cream (optional)
Ingredient Spotlight
Dark chocolate (1 cup) is the heart of the dessert, delivering the deepest cocoa flavor. When choosing chocolate, look for a bar that lists cocoa solids first. A small substitution is white chocolate, but the ganache center will become milder and sweeter—great if you want a lighter, sweeter version.
Unsalted butter (½ cup) provides the silky mouthfeel and a subtle caramel flavor. If you’re vegan, try using an equal amount of coconut cream—its higher fat content will mimic the creaminess, though it adds a noticeable coconut note.
Espresso powder (1 tsp) is optional but adds an aromatic coffee undertone that balances the bitterness. A substitute would be strong brewed coffee—use the same volume, but you’ll need to reduce the liquid slightly to keep the batter thick.
| Original Ingredient | Best Substitution | Flavor / Texture Impact |
|---|---|---|
| Dark chocolate chips | White chocolate | Sweeter, less bitter, lighter ganache |
| Unsalted butter | Coconut cream | Creamy with coconut flavor, dairy‑free |
| Espresso powder | Brewed coffee | Similar aroma, slight dilution of batter |
How to Make Chocolate Lava Cake | Instant Pot or Oven — Step-by-Step
Let’s transform those ingredients into a molten masterpiece, starting with a quick chocolate melt before you tackle the pressure cooker or the oven.
Step 1: Melt Chocolate
Combine the chocolate chips and butter in a heat‑proof bowl over a pot of barely simmering water. Stir every 30 seconds until smooth and glossy. This double‑boiler method ensures a silky base. If you’re in a rush, simply microwave in 30‑second bursts, stirring in between.
💡 mia’s Pro Tip: If the chocolate begins to brown, remove it immediately and stir a splash of milk or cream; it will thin the sauce and prevent scorching.
Step 2: Add Eggs & Vanilla
Whisk the eggs and vanilla paste together, then slowly fold into the chocolate mixture. The yolk thickens the batter, creating the tender structure that holds the molten center.
⚠️ Common Mistake to Avoid: Adding eggs too quickly can cause them to scramble in the heat.
Step 3: Fold Dry Ingredients
Sift the flour, powdered sugar, espresso powder, cinnamon, and salt over the wet base. Fold gently until the batter is glossy and free of dry streaks. A clean fold prevents lumps and keeps the texture airy.
💡 mia’s Pro Tip: Use a spatula to fold in a figure‑eight motion, preserving the batter’s leavening.
Step 4: Prep Ramekins
Lightly coat four ramekins or metal pudding molds with cake release spray or melted butter. Dust each with a light dusting of cocoa powder, swirling to cover the interior and give a subtle chocolate rim.
⚠️ Common Mistake to Avoid: Using too much cocoa powder can choke the batter and create a bitter rim.
Step 5: Pressurize Instant Pot
Place a metal trivet in the Instant Pot and add 1 cup of water. Stack the coated ramekins on the trivet, ensuring they fit in a single layer. Set the vent to sealing and cook on high pressure for 10 minutes.
💡 mia’s Pro Tip: If you’re using more than four ramekins, stack them carefully and add a second trivet for stability.
Step 6: Release Steam
Manually release the pressure. If any condensation has condensed on top, blot it dry with a paper towel. Let the cakes rest for a couple of minutes to stabilize before turning them over.
⚠️ Common Mistake to Avoid: Cutting open the ramekins too early; wait until they’re cool enough to handle.
Step 7: Oven Option
Preheat your oven to 400°F. Place the prepared ramekins on a heavy baking sheet and bake for 18-20 minutes. The batter should rise slightly; a firm crust with a jiggle in the center signals doneness.
💡 mia’s Pro Tip: For extra browning, place a small tray of parchment on the middle rack. It gives a crisp outer edge.
Step 8: Air Fryer Option
Preheat the air fryer to 350°F. Cook the ramekins for 10-12 minutes. The air fryer’s circulatory heat creates a slightly crisp top while the inside stays molten.
⚠️ Common Mistake to Avoid: Over‑baking in the air fryer can lead to a rubbery center.
Step 9: Serve & Garnish
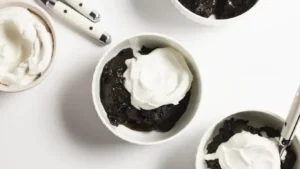
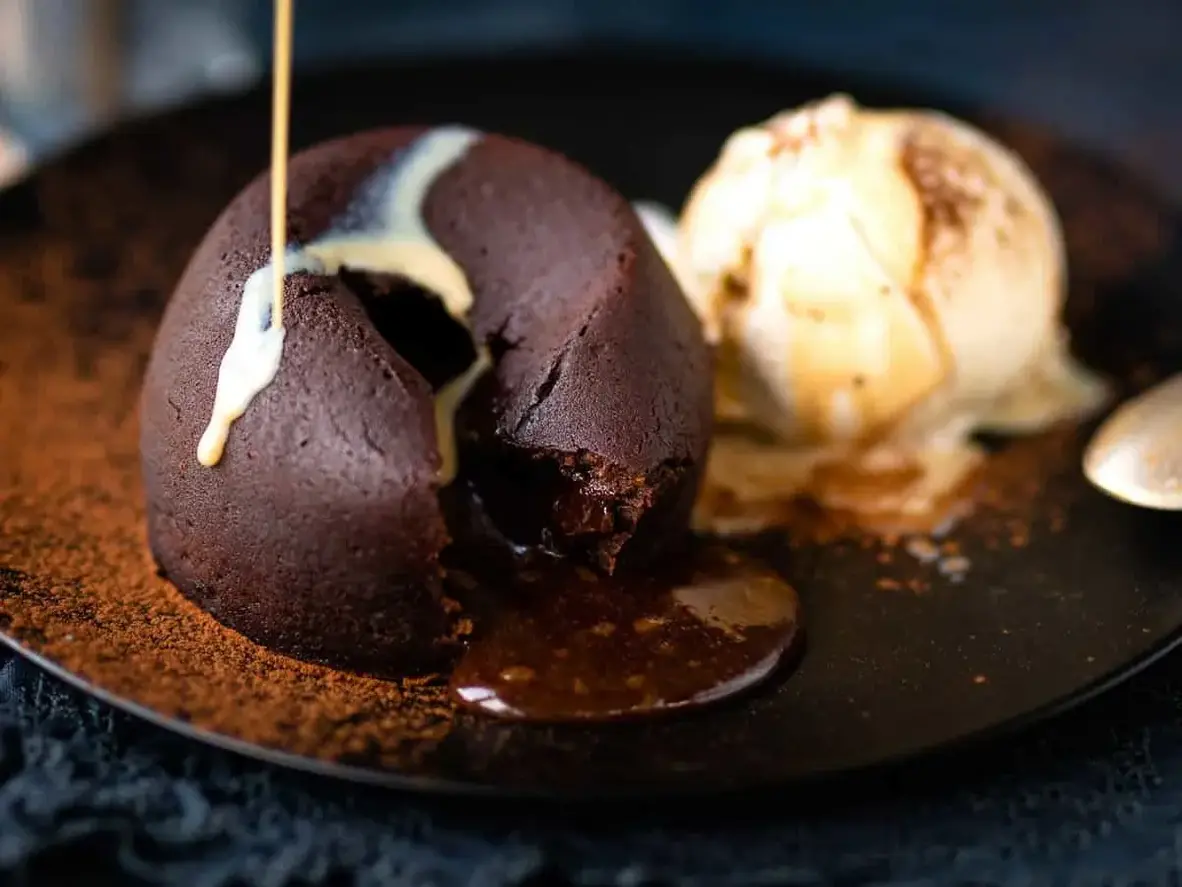
After the cakes have cooled for two minutes, run a knife around the rim, invert onto plates, and serve warm. A scoop of vanilla ice cream or a drizzle of Baileys adds luxury. Finish with a dusting of powdered sugar or a single mint leaf for a fresh contrast.
💡 mia’s Pro Tip: Keep a small bowl of cold milk nearby; dunk a knife in it to clean the blade between each cake for a pristine edge.
| Step | Action | Duration | Key Visual Cue |
|---|---|---|---|
| 1 | Melt chocolate | 5 min | Smooth, glossy sauce |
| 2 | Add eggs & vanilla | 2 min | Thickened batter |
| 3 | Fold dry ingredients | 3 min | Glassy batter, no streaks |
| 4 | Prep ramekins | 5 min | Cocoa‑dusted rim |
| 5 | Pressurize pot | 10 min | Steam released, cakes set |
| 6 | Release steam | Immediate | Condensation disappears |
| 7 | Oven bake | 18‑20 min | Firm rim, molten center |
| 8 | Air fry | 10‑12 min | Crispy top, gooey core |
| 9 | Serve & garnish | As soon as cooled | Glorious melt on plate |
Serving & Presentation
I plate each lava cake on a lightly warmed dish, then drizzle a swirl of cold vanilla ice cream that melts into the chocolate just enough. Sprinkling fresh mint or edible gold leaf gives a luxurious contrast that feels very Parisian. A drizzle of caramel‑spiced coffee sauce, reminiscent of a café au lait, adds an extra layer of decadence.
If you’re a fan of bold flavors, top the cake with a dusting of smoked sea salt and a few crushed pistachios for crunch. For a lighter take, let the ice cream sit on the side of the plate and splash a little espresso liqueur, echoing the subtle espresso in the batter itself.
| Pairing Type | Suggestions | Why It Works |
|---|---|---|
| Side Dish | Fresh mint leaves, grated citrus zest, pistachio brittle | Brings brightness and a textural contrast, lifting the heavy chocolate. |
| Sauce / Dip | Caramelized espresso sauce, salted caramel drizzle, chilled chocolate ganache | Complements the core flavors and adds a silky layer. |
| Beverage | Cold brew coffee, French café au lait, sparkling tea with mint | Balances richness with aromatic bitterness or sweet effervescence. |
| Garnish | Pistachio shards, cocoa nibs, poppy seed dust, edible gold leaf | Gives visual drama and a hint of crunch. |
Make-Ahead, Storage & Reheating
When the city hustle doesn’t allow a fresh bake, I pre‑make these cakes in a glass baking dish, seal them tightly, and refrigerate. They keep crisp on the outside and melt perfectly after reheating, making them an instant dinner party win.
| Method | Container | Duration | Reheating Tip |
|---|---|---|---|
| Refrigerator | Airtight glass dish | 3‑4 days | Reheat 2‑3 minutes in oven 350°F. |
| Freezer | Foil‑sealed silicone molds | 2‑3 months | Thaw 1 hour, bake 14‑16 minutes at 400°F. |
| Make‑Ahead | Ready‑to‑serve paper liners | 1‑2 days | Add water to ramekins and bake 18‑20 minutes. |
When reheating from frozen, I like to add a splash of milk to the batter to keep the chocolate from hardening. A quick stir in the oven or a brief microwave burst does the trick. This way each bite stays as velvety as when freshly baked.
Variations & Easy Swaps
| Variation | Key Change | Best For | Difficulty Impact |
|---|---|---|---|
| Spiced Moroccan Lava Cake | Replace 1 tsp cinnamon with a blend of cumin, paprika, and a pinch of saffron. | Those who love aromatic heat. | Little effort, same difficulty. |
| Gluten‑Free & Dairy‑Free Lava Cake | Use cake flour and almond milk; swap butter for coconut oil. | Allergy‑friendly crowd. | Easy adapt, slightly more moisture. |
| Seasonal Pear & Spice Lava Cake | Add puréed ripe pear and a dash of nutmeg to the batter. | Fall or holiday menu. | Requires extra prep time, same cook time. |
Spiced Moroccan Lava Cake
By swapping cinnamon with a warm blend of cumin, paprika, and a dash of saffron, the sauce picks up the earthy hues typical of Moroccan tagines. The result is a velvet cake that feels like a sweet, fragrant spice bazaar, right in your kitchen.
Gluten‑Free & Dairy‑Free Lava Cake
A simple tweak of using gluten‑free cake flour and swapping butter for shredded coconut oil keeps the batter fluid while ensuring a dairy‑free option. The coconut adds a tropical undertone that pairs wonderfully with the dark chocolate.
Seasonal Pear & Spice Lava Cake
Purée a ripe pear and fold it into the batter, then sprinkle a pinch of nutmeg for an autumnal touch. The natural sweetness of the fruit balances the bitterness of the chocolate, turning the dessert into a seasonal delight.
Can I make chocolate lava cake in the Instant Pot without a springform pan?
Absolutely! The recipe is designed to work in any shallow, oven‑safe ramekin or even a small stainless steel loaf tin. All you need is a trivet so the cups don’t touch the bottom of the pot, which keeps the steam from turning the batter into a solid block. Using a different pan shape just changes the cake’s height but not the molten center, so feel free to experiment with any small container that fits your Instant Pot.
How do I prevent the lava cake from overcooking and losing its molten center?
The key is timing. For the Instant Pot, stick to the 10‑minute high‑pressure cook time and release the pressure manually—don’t wait for natural release, as it can add extra minutes. In the oven, bake precisely 18‑20 minutes; keep an eye on the edge—once it looks set but the center still jiggles, you’re done. Also, letting the cakes cool for a minute or two before inverting allows steam to escape, preventing the chocolate from firming up too quickly.
What can I substitute for eggs in this chocolate lava cake recipe?
If you’re avoiding eggs, ¼ cup of unsweetened applesauce or a flax‑egg (1 tablespoon ground flaxseed mixed with 3 tablespoons water, set for 5 min) can replace each large egg. Another option is ¾ cup of silken tofu blended until smooth, which adds density and a silky mouthfeel. Just remember to reduce the liquid slightly to keep the batter from running too thin, and bake for the same time, adjusting the bake time by about a minute if needed.
How long should I let the lava cake rest before serving for the best texture?
Give the cakes a brief “rescue” period of about 1–2 minutes after removing them from heat. This pause allows any remaining steam to escape and the outer shell to set just enough so that the interior stays completely molten. After this short rest, run a knife around the rim, flip, and serve immediately. If you wait too long, the molten center will begin to solidify, diminishing that signature ooze.
Can I freeze pre‑baked chocolate lava cakes for later use?
Yes, but it’s best to bake the cakes first, cool them completely, and then cover each ramekin tightly with foil or plastic wrap. Store them in the freezer for up to three months. When ready, thaw in the refrigerator overnight and reheat in a preheated 350°F oven for five minutes. The texture stays rich, though the molten core may set slightly; a quick microwave burst can help return it to gooey perfection.
What kind of chocolate works best for the lava center?
For the richest flavor, choose a chocolate bar or chips with at least 70% cacao. A higher cacao percentage offers a deeper, more intense taste and a crispier caramelized rim. If you prefer a sweeter center, opt for 60%–65% chocolate; it blends more smoothly and gives a lighter melt. Stick to dark chocolate, never milk, to keep the classic, bittersweet profile of the lava cake.
Can I add a splash of Baileys or another liqueur to the batter?
Absolutely. Adding 1–2 tablespoons of Baileys or a coffee liqueur subtly enhances depth without interfering with the chocolate’s chemistry. Liqueur should be added after the dry ingredients are incorporated; only a small amount is needed, as alcohol evaporates at high temperatures and does not overheat the batter. The subtle after‑taste will linger and complement the chocolate’s richness.
Do I need to use an Instant Pot to get the perfect lava cake?
No, the oven version produces the same result if baked to 400°F for 18–20 minutes. The Instant Pot is simply a time‑saving alternative that brings convenience to the kitchen. As long as you watch the cooking time and keep the ramekins set on a trivet, the cake will rise evenly, maintain its structure, and still reveal a molten center when inverted.
Share Your Version!
I’d love to hear how you tweak this lava cake—maybe you swapped in a seasonal fruit or swapped the butter for a dairy‑free alternative. Drop a star rating or comment below, and let me know how it turned out. If you photograph the molten wonder, tag me on Instagram or Pinterest with @chefrecipes2 or @exorecipe; I’m always excited to see your creative spins!
From my NYC kitchen to yours — I hope this recipe brings as much warmth to your table as it does to mine. — mia 🧡
Love This Recipe? Save It to Pinterest!
If you enjoyed this Chocolate Lava Cake recipe, don’t let it get lost in your browser tabs! 😄 Pin it now so you can find it again anytime — and explore hundreds more tried‑and‑tested recipes waiting for you on my Pinterest boards.
👉 Follow mia on Pinterest @chefrecipes2
📌 Pin this recipe · 🔁 Re‑pin your favorites · 💬 Tag me when you make it — I love seeing your creations!
Got any questions or a twist you’d love to share? Drop a comment below, and let’s keep this sweet conversation rolling!
Chocolate Lava Cake | Instant Pot or Oven
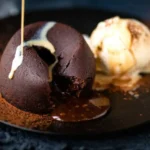
These molten chocolate lava cakes (also known as chocolate fondants) hide a core of gooey chocolate inside their sponge shell. A delicious and easy dessert in your Instant Pot or oven.
Ingredients
- 1 cup (180g) dark chocolate chips (or chopped dark chocolate)
- ½ cup (113g) unsalted butter (cubed)
- 3 large eggs
- 1 tsp vanilla bean paste (or extract)
- 1 ½ cups (180g) cups powdered sugar ((= icing sugar))
- 7 tbsp flour (all purpose / plain)
- 1 tsp instant Espresso powder ((optional))
- 1 tsp ground cinnamon
- ¼ tsp salt
- 4 tsp cocoa powder (or as needed)
- melted butter (or cake release spray)
- 2 tbsp Baileys (optional)
- vanilla ice cream (optional)
Instructions
- Put the chocolate and butter in a bowl and microwave for 30 second bursts, stirring in between, until melted and smooth. Alternatively set the bowl over a pot of barely simmering water and allow the chocolate to melt gradually (double boiler method). Set aside to cool slightly.
- Add the eggs and vanilla. Mix together using a small balloon whisk. The chocolate will thicken.
- Sift the flour, icing sugar, espresso powder, ground cinnamon and salt over the chocolate. Fold together until you have a glossy, thick batter and no dry streaks remain.
- Spray four ramekins or metal pudding molds with cake release or brush with melted butter. Add a scant teaspoon of cocoa powder in each and swirl to cover. Discard any excess cocoa powder. Divide the batter between the prepared ramekins or molds.
- Place the metal trivet in your pressure cooker and add 1 cup / 250ml of water. Place the ramekins on the trivet – you should have enough space to fit them all in a single layer but if not you can stack them.
- Set vent to sealing and cook for 10 minutes at high pressure. Release the steam manually and remove them lava cakes from the cooker. If any condensation has collected on top of the cakes, pat it dry with kitchen paper.
- Leave to cool for a couple of minutes before serving. Carefully invert the lava cakes on plates (the moisture from the pressure cooker makes them really easy to release).
- Preheat your oven to 400°F / 200°C. Place the molds on a heavy baking tray (one that will not warp in the oven) and cook for 18-20 minutes. The lava cakes will rise slightly if they are very soft and squidgy on top you might need to cook them for a couple of minutes more.
- Leave to cool for two minutes. Carefully run a knife around the edge of the molds. Invert onto plates and serve.
- Preheat the air fryer to 350°F / 180°C. Place the molds in the air fryer basket and bake for 10-12 minutes until the lava cakes are set on top with a slight jiggle in the middle.
- Remove the lava cakes from the air fryer basket and leave them to cool for two minutes. Carefully run a knife around the edge of the molds. Invert onto plates and serve.
- Serve warm with a scoop of vanilla ice cream on the side and perhaps a little Baileys drizzled over.
Nutrition
- Calories: 671 kcal
- Sugar: 46 g
- Fat: 40 g
- Carbohydrates: 68 g
- Protein: 9 g
Tried This Recipe? Leave a Comment!
Did you make this recipe? I’d love to hear how it turned out! Please leave a comment and a rating below. Your feedback helps other home cooks and supports cheerychop.com!
For more delicious inspiration, follow me on Pinterest!