Table of Contents
BEST Sweet and Sour Sauce – Easy Homemade Recipe That Beats Store-Bought
I still remember the first time I made a truly great sweet and sour sauce in my own kitchen. It was a chilly Sunday afternoon in my tiny Paris apartment, and I was missing the vibrant, tangy flavors of the street food stalls I’d visited in Marrakech as a child. That’s when it hit me: most store-bought versions are full of high-fructose corn syrup and artificial colors, but a homemade sweet and sour sauce can be clean, bright, and absolutely bursting with flavor. In fifteen minutes, using simple pantry staples, you can whip up a sauce that completely transforms everything from chicken tenders to stir-fries. This isn’t just any recipe—it’s the one my family in New York begs me to make for every gathering.
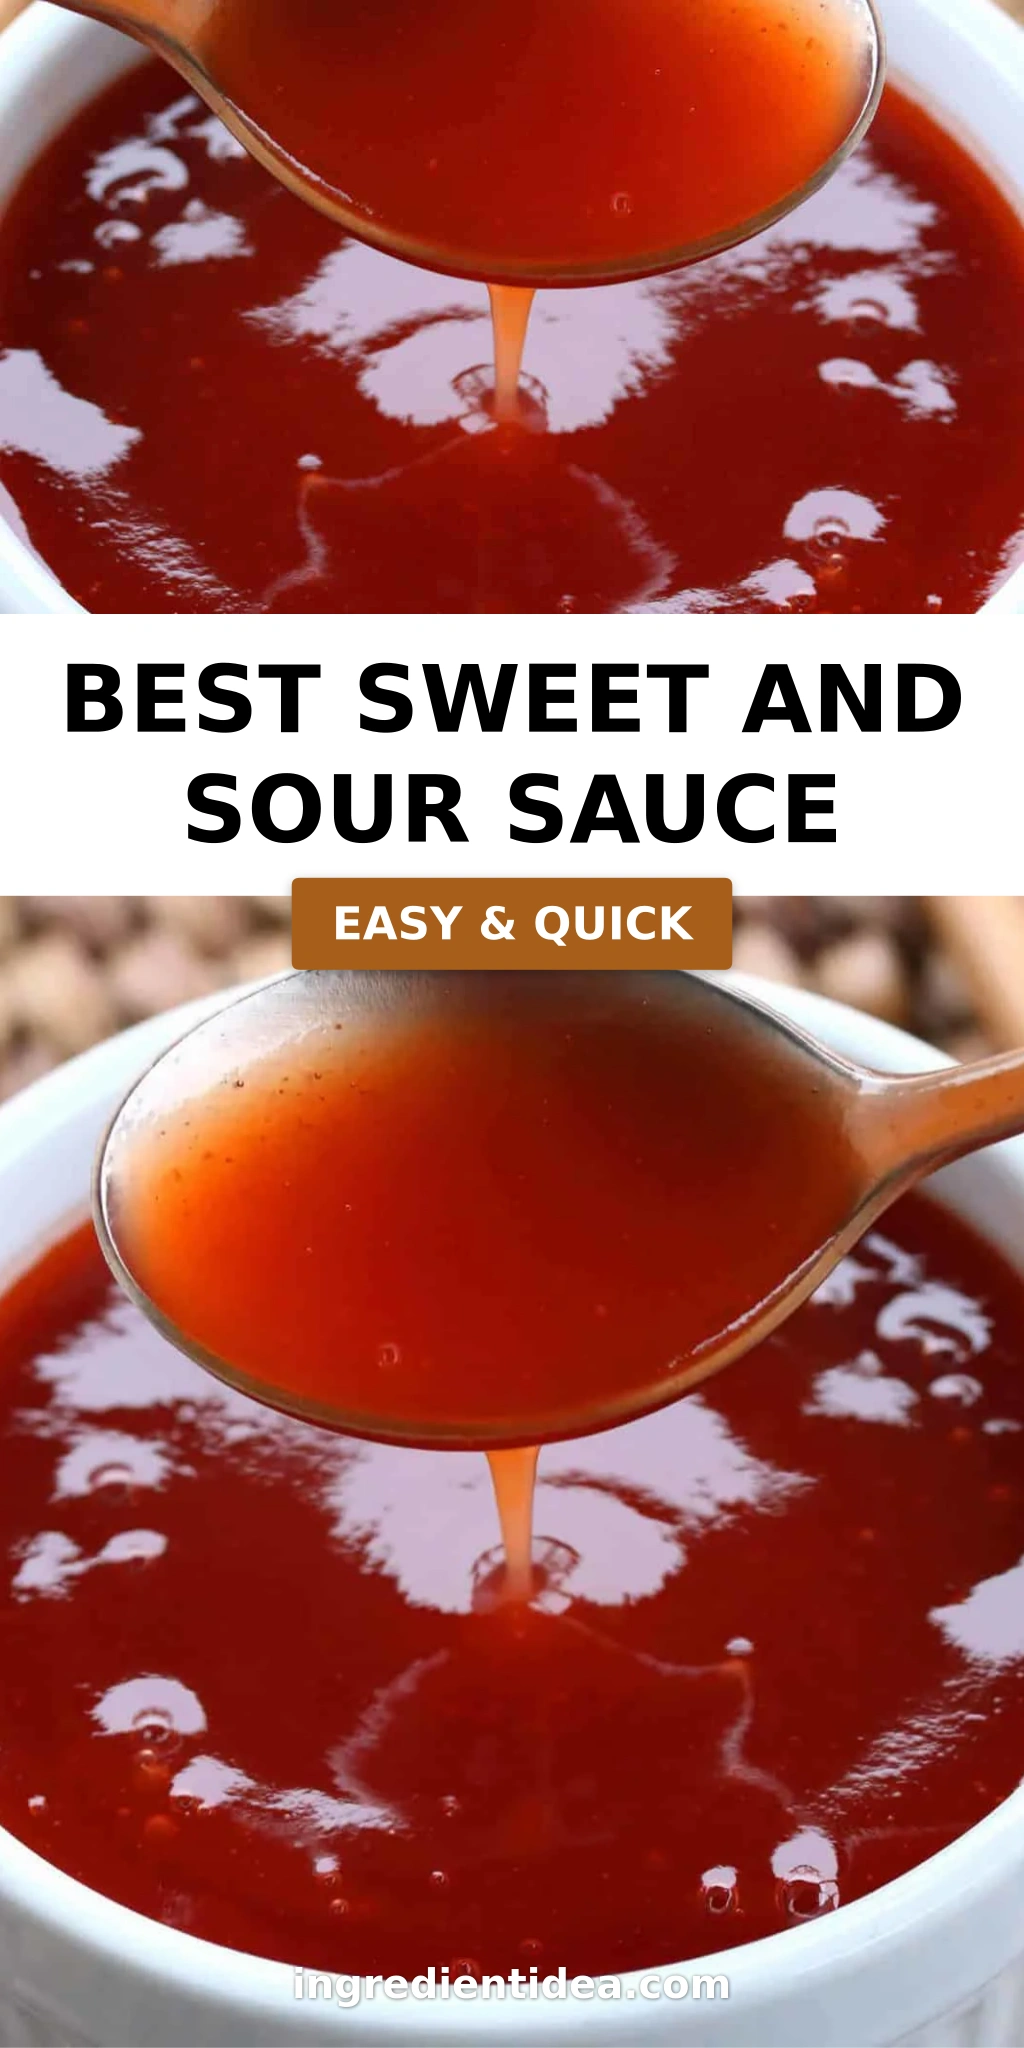
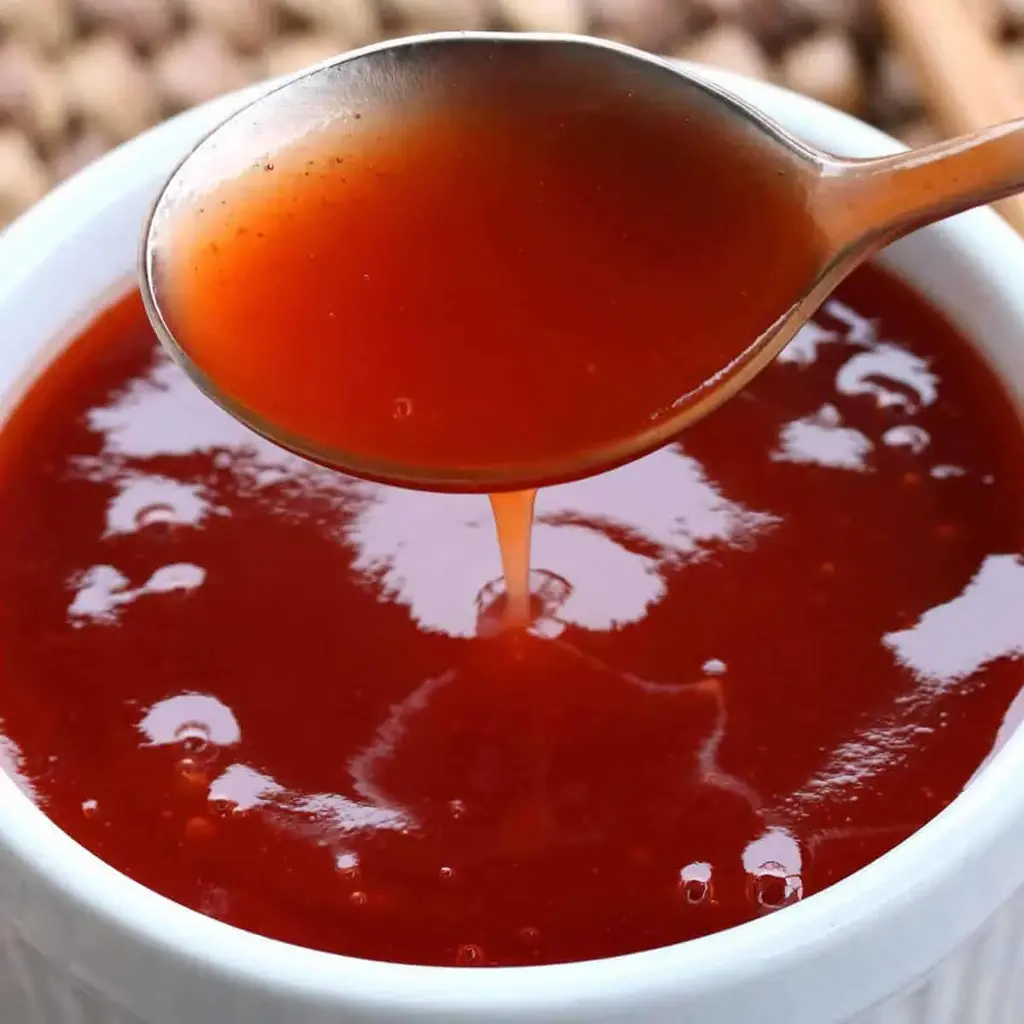
Picture this: the first simmer of pineapple juice and rice vinegar filling your kitchen with a sweet-tart aroma that’s both nostalgic and exciting. The sauce glides off the spoon with a glossy, jewel-like sheen, catching the light like stained glass. As it thickens, you’ll notice the perfect balance—a gentle hit of acidity from the vinegar, rounded out by deep, caramelized brown sugar, and a subtle umami backbone from soy sauce. When you dip a crispy egg roll into it, you get that instant pop of sweet followed by a clean, sharp finish. This is the texture and flavor that makes you close your eyes and smile.
What sets my version apart is the technique I learned during my classical French training—building layers of flavor even in a simple sauce. I start with real pineapple juice instead of just sugar and vinegar, which gives it a natural fruitiness that tastes like sunshine. Plus, I use a cornstarch slurry at the very end to achieve that silky, clingy consistency that doesn’t turn gloppy when it cools. Trust me, once you make this easy sweet and sour sauce from scratch, you’ll never go back to the jarred stuff. And I’ll share one of my secrets: a tiny drop of natural red food coloring gives it that classic restaurant look without any artificial aftertaste.
Why This Sweet and Sour Sauce Recipe Is the Best
The Flavor Secret: Growing up in Morocco, my mother taught me that balance is everything—whether in a tagine or a simple sauce. For this Chinese sweet and sour sauce, I use a 1:1 ratio of pineapple juice to brown sugar as the base, which creates a deep caramelized sweetness without being cloying. The rice vinegar cuts through like a knife, and the ketchup adds both color and a whisper of umami that you’d never guess came from just three tablespoons. It’s the kind of flavor that makes you wonder why you ever bought the bottled stuff.
Perfected Texture: One trick I learned at Le Cordon Bleu in Paris is that the consistency of a sauce can make or break a dish. I cook the base ingredients together before adding the cornstarch slurry, which allows the flavors to meld and concentrate. The result is a sauce that’s thick enough to coat a spoon but still pourable—perfect for dipping, drizzling, or tossing. It won’t separate when it cools, and it doesn’t turn into a gummy mess like some store-bought versions.
Foolproof & Fast: This is genuinely one of the easiest recipes I have on my blog, and I mean that from the bottom of my heart. You don’t need any special equipment—just a saucepan and a whisk. The entire process takes about 15 minutes, and most of that is just letting it simmer. Whether you’re a seasoned home cook or someone who’s never made a sauce from scratch, I promise you can nail this on your first try.
Sweet and Sour Sauce Recipe Ingredients
When I’m shopping for these ingredients at my local farmers market in Union Square or my go-to Asian grocery on the Upper West Side, I always look for quality. Canned pineapple juice from a brand that uses no added sugar is key—I love Dole or a store brand with just juice and water. The rice vinegar should be unseasoned (avoid the seasoned sushi vinegar), and for the brown sugar, I use light brown for a milder molasses flavor. Let me take you through each one carefully.
Ingredients List
- 1 cup canned pineapple juice (see note)
- 3/4 cup packed light brown sugar (OR brown sugar alternative for low-sugar option)
- 1/3 cup rice vinegar (substitute apple cider vinegar if needed)
- 3 tablespoons ketchup
- 2 tablespoons soy sauce or tamari (GF)
- For the Cornstarch Slurry: 1 1/2 tablespoons cornstarch dissolved in 2 tablespoons water
- Optional: 2-3 drops natural red food coloring (I like India Tree or Watkins)
Ingredient Spotlight
Pineapple Juice: This is the heart of the sauce. Canned juice is ideal because it’s consistently sweet and clear—fresh pineapple juice can be too acidic and varies wildly. The juice provides a natural sweetness and acidity that forms the backbone of the flavor. If you’re in a pinch, you can use orange juice, but the result will be tarter and less complex.
Rice Vinegar: This is what gives the sauce its authentic tang. Rice vinegar is milder and slightly sweeter than white vinegar, so it doesn’t overpower the other flavors. If you substitute apple cider vinegar, the sauce will be more pungent—add just 1/4 cup instead of 1/3 and taste as you go.
Ketchup: I know it seems weird, but ketchup is the hidden secret in many classic Chinese-American sweet and sour sauces. It adds a subtle tomato depth that rounds out the sweetness and gives the sauce a beautiful orange-red hue. Use a high-quality ketchup like Heinz or a no-sugar-added brand for the cleanest flavor.
| Original Ingredient | Best Substitution | Flavor / Texture Impact |
|---|---|---|
| Rice Vinegar | Apple Cider Vinegar (use 1/4 cup) | More pungent, slightly fruitier; reduce amount to avoid overpowering. |
| Soy Sauce | Tamari (GF) or Coconut Aminos | Coconut aminos will be sweeter; tamari offers a richer umami. |
| Brown Sugar | Coconut Sugar or Monk Fruit Blend | Coconut sugar adds a deeper caramel note; monk fruit reduces sugar but may crystallize. |
| Ketchup | Tomato Paste + 1 tbsp honey | Less sweet; tomato paste gives a stronger, more savory base. |
How to Make Sweet and Sour Sauce — Step-by-Step
Making this easy sweet and sour sauce is almost too simple. In less than 15 minutes, you’ll have a sauce that tastes like it came from your favorite Chinese takeout spot—only better because you know exactly what’s in it.
Step 1: Combine Base Ingredients
In a small saucepan, whisk together the pineapple juice, brown sugar, rice vinegar, ketchup, and soy sauce until the sugar is almost dissolved. Make sure you’re using a saucepan that’s at least 2 quarts so the sauce doesn’t boil over—it can get bubbly!
💡 mia’s Pro Tip: For an even deeper flavor, let the mixture sit for 5-10 minutes before turning on the heat. The sugar will begin to dissolve naturally, which means a smoother cook and no graininess.
Step 2: Bring to a Boil
Place the saucepan over medium-high heat and stir occasionally. Bring the mixture to a gentle boil—you’ll see bubbles rising around the edges of the pan. This should take about 4-5 minutes. Don’t walk away! Once it boils, it can quickly foam up.
⚠️ Common Mistake to Avoid: Boiling the sauce too vigorously can cause it to scorch on the bottom. Keep the heat medium-high, not high, and stir every 30 seconds to prevent sticking.
Step 3: Add the Cornstarch Slurry
While the sauce comes to a boil, whisk the cornstarch and water together in a small bowl until completely smooth. It should look like a milky liquid with no lumps. Once the sauce is boiling, pour in the slurry while stirring constantly—don’t dump it all in one spot or it will clump.
💡 mia’s Pro Tip: Stir the slurry again right before adding it because cornstarch settles quickly. Stream it in while whisking with your other hand to ensure it incorporates evenly.
Step 4: Simmer and Thicken
Reduce the heat to low and let the sauce simmer for 1-2 minutes, stirring constantly. You’ll notice it starting to thicken immediately—it should coat the back of a spoon. If you’re using red food coloring, stir in a few drops now until you reach your desired color.
⚠️ Common Mistake to Avoid: Overcooking the sauce after adding the slurry can cause it to become rubbery or break down. Once it’s thick and glossy, pull it off the heat immediately.
| Step | Action | Duration | Key Visual Cue |
|---|---|---|---|
| 1 | Whisk base ingredients in saucepan | 2 minutes | Sugar mostly dissolved, no gritty graininess |
| 2 | Bring to a boil over medium-high heat | 4-5 minutes | Bubbles appear around edges; liquid begins to foam |
| 3 | Add slurry while stirring | 30 seconds | Instant thickening; sauce turns glossy |
| 4 | Simmer on low, stirring constantly | 1-2 minutes | Sauce coats back of spoon; smooth and shiny |
Serving & Presentation
This sauce is incredibly versatile—I serve it with everything from crispy spring rolls to sticky-glazed chicken wings. When I’m hosting friends in my NYC apartment, I like to pour it into a small serving bowl and garnish with a few thin slices of fresh pineapple or a sprinkle of sesame seeds for a pop of texture. The sauce looks beautiful drizzled over fried rice or used as a dip for potstickers.
One of my favorite ways to enjoy it is tossed with crispy tofu or shrimp tempura—the glossy sauce coats every nook and cranny. I also love it as a glaze for salmon fillets: simply brush it on during the last 5 minutes of baking for a caramelized, restaurant-quality finish. It reminds me of the sweet-and-sour dishes I used to love at a tiny family-run spot in Paris’s Chinatown (Belleville), but now I make it even better at home.
| Pairing Type | Suggestions | Why It Works |
|---|---|---|
| Side Dish | Fried rice, steamed jasmine rice, rosti potatoes | Neutral base lets the sauce shine without competing flavors |
| Sauce / Dip | Crispy egg rolls, wontons, chicken nuggets, fried fish | Sweet and tangy cuts through fried, crispy textures |
| Beverage | Cold beer (lager or pilsner), jasmine iced tea, fresh lime soda | Crisp, cold drinks balance the warm, tangy sauce |
| Garnish | Thinly sliced green onions, toasted sesame seeds, fresh cilantro | Adds freshness and visual appeal against the glossy sauce |
Make-Ahead, Storage & Reheating
One of the best things about this sweet and sour dipping sauce is how well it keeps—it’s a staple in my fridge for busy New York evenings when I need a quick flavor boost. I often double the recipe and keep it ready to go for the whole week. Just let it cool completely before transferring to a container.
| Method | Container | Duration | Reheating Tip |
|---|---|---|---|
| Refrigerator | Airtight glass jar or bowl | 2-3 weeks | Warm gently in a saucepan over low heat, whisking until glossy |
| Freezer |