Table of Contents
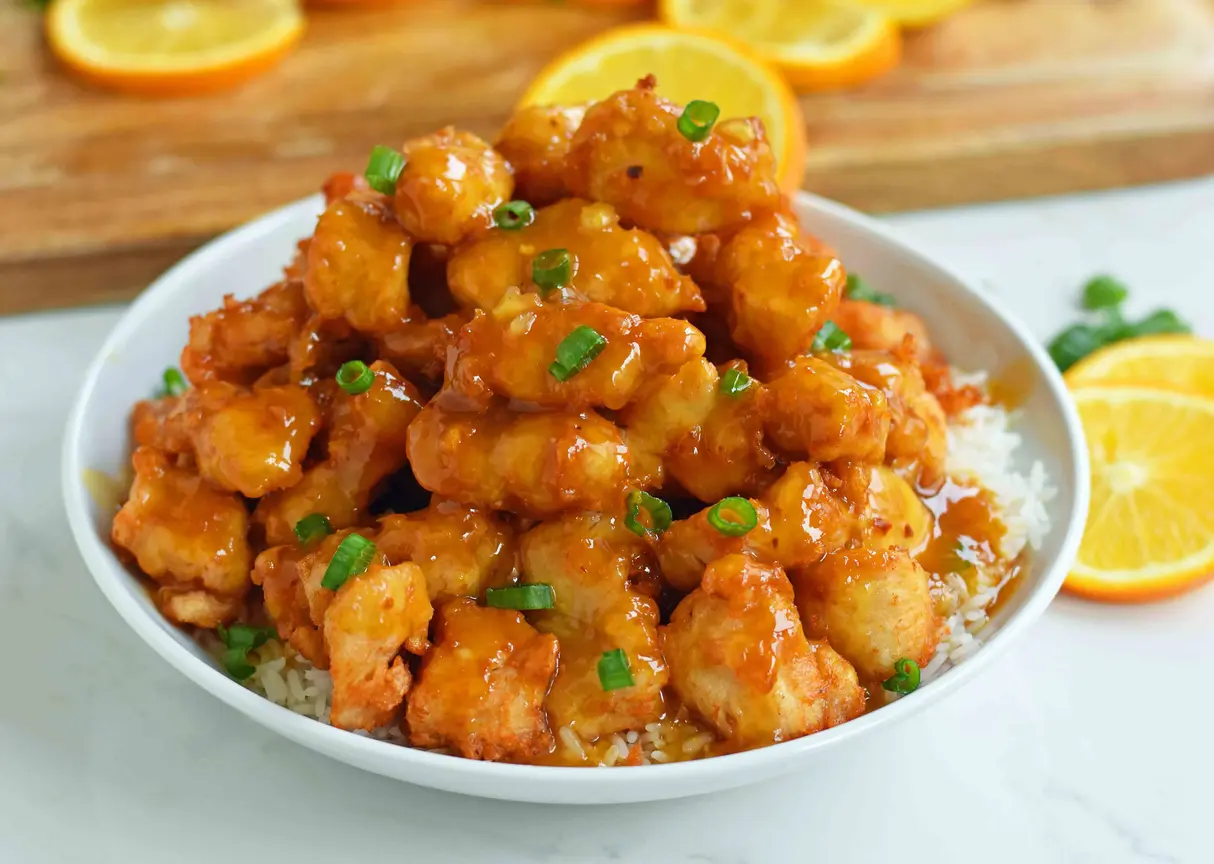
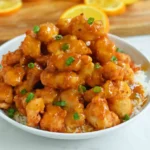
Chinese Orange Chicken: Homemade Orange Chicken, Way Better Than Take-Out!
Growing up in my mother’s kitchen in Marrakech, we often infused everyday dishes with bright citrus and warm spices. It wasn’t until I moved to New York City and started exploring the incredible Chinese-American restaurants here that I discovered the magic of an intensely flavorful orange sauce coating perfectly crispy chicken. I remember my first bite of authentic take-out orange chicken – it was good, but I knew I could elevate it. This recipe for Chinese Orange Chicken is the culmination of that culinary journey. It’s my homemade orange chicken, a dish that captures the vibrant zest and sweet tang that will make you wonder why you ever bothered with delivery. Get ready for a flavor explosion that’s far superior to anything you’ll find at your local takeout spot!
The aroma alone will transport you: you’ll smell the sweet, caramelized orange mingling with a hint of ginger and a whisper of chili heat. Imagine biting into impossibly crispy chicken pieces, each coated in that luscious, glossy orange sauce that clings perfectly without ever becoming soggy. It’s a dance of textures – the crunch of the chicken giving way to tender, juicy meat, all enveloped in a sauce that’s both sweet and subtly savory with a lovely citrusy brightness. This dish is a testament to the power of simple ingredients transformed by classic cooking techniques, a little like the tagines my family would slow-cook back home, infusing flavors deeply. You’ll find that the magic lies in achieving that perfect crisp, a trick I learned in culinary school in Paris that I’ll share with you.
What sets my Chinese Orange Chicken recipe apart is the balance of flavors and the foolproof method for achieving that shatteringly crisp exterior on the chicken. I’ve refined the sauce to be deeply aromatic and perfectly seasoned, avoiding the overly sweet or artificial taste that some versions suffer from. You’ll actually be able to control the consistency and flavor intensity, a far cry from the often one-dimensional sauces you find elsewhere. I’ll guide you through achieving that restaurant-quality crispiness right in your own kitchen, and I’ll also share a common pitfall that many home cooks fall into, making their chicken less than ideal. This recipe is designed to be accessible to home cooks of all levels, promising delicious results every single time.
Why This Chinese Orange Chicken Recipe Is the Best
The secret to my Chinese Orange Chicken lies in how I build the sauce – it’s not just about sweetness! Drawing inspiration from my French culinary training, I focus on deglazing and building layers of flavor. I use fresh orange juice and zest for a brighter, more natural citrus profile, and I carefully balance it with rice vinegar for acidity and a touch of soy sauce for umami depth. The slight heat from red chili flakes cuts through the richness, creating a complex taste that keeps you coming back for more. It’s this thoughtful layering, reminiscent of how my mother would balance spices in Moroccan cuisine, that makes this homemade orange chicken truly exceptional.
Achieving that perfect crispy coating on the chicken is crucial, and it’s a technique I’ve perfected. Instead of just dredging, I use a combination of cornstarch and flour for a beautifully light and crisp crust that holds up to the sauce without becoming soggy. The key is double-frying – a technique often used in professional kitchens for ultimate crunch. I’ll walk you through the exact temperature and timing for frying, ensuring each piece is golden brown and wonderfully crisp on the outside and perfectly tender on the inside. My Paris training taught me the importance of precise cooking for texture, and this method delivers precisely that.
You might think making restaurant-quality orange chicken at home is complicated, but I promise this recipe is surprisingly easy! The steps are straightforward, and the ingredients are readily available at any major US grocery store, even many smaller ones. I’ve streamlined the process so you can whip up this incredible homemade orange chicken on a weeknight with confidence. I’ll guide you on how to get the best results without specialized equipment, ensuring that even if it’s your first time making crispy orange chicken, you’ll be amazed by how delicious and satisfying it turns out. It’s a perfect example of how simple techniques can yield spectacular results.
Chinese Orange Chicken Ingredients
When I’m creating this dish in my New York City apartment kitchen, I love sourcing my produce from local farmers’ markets, especially for the freshest oranges. If I can’t find perfect ones, I grab good quality navel oranges from my local grocery store. For quality chicken, I always opt for boneless, skinless breasts from a trusted butcher or the meat counter. The pantry staples are usually always on hand, a testament to their versatility, much like the spices I always kept stocked in my mother’s pantry back in Morocco.
Ingredients List
- 4 Boneless Skinless Chicken Breasts (about 1.5 lbs), cut into bite-size pieces
- 3 Large Eggs, whisked
- 1/3 cup Cornstarch
- 1/3 cup All-Purpose Flour
- 1/2 teaspoon Salt, plus more to taste
- Vegetable Oil or Canola Oil, for frying (about 3-4 cups)
- 1 cup Fresh Orange Juice (from about 2-3 oranges)
- 1/2 cup Granulated Sugar
- 2 Tablespoons Rice Vinegar (or White Vinegar)
- 2 Tablespoons Soy Sauce (use tamari for a gluten-free dish)
- 1/4 teaspoon Ground Ginger (or 1 teaspoon fresh grated ginger)
- 1/4 teaspoon Garlic Powder (or 2 cloves fresh garlic, minced)
- 1/2 teaspoon Red Chili Flakes (adjust to your spice preference)
- Zest of 1 Orange (for sauce)
- 1 Tablespoon Cornstarch (for sauce thickening)
- 2 Tablespoons Water (for sauce thickening slurry)
- Optional: Fresh Orange Zest and Sliced Green Onions, for garnish
Ingredient Spotlight
Chicken Breast: I use boneless, skinless chicken breasts for this recipe because they cook quickly and provide a tender, lean base for the crispy coating. When shopping in the US, look for plump, pinkish breasts without any bruises. If you prefer a richer flavor and even more tender meat, chicken thighs are an excellent substitute, though they might take a minute longer to cook through.
Fresh Orange Juice & Zest: This is where the magic happens! Using fresh orange juice, not from concentrate, is key for that bright, authentic citrus flavor. I like to use navel oranges, but any sweet orange variety will work. The zest adds an intense burst of orange aroma and flavor that’s crucial in recreating that take-out taste. If you’re really pressed for time, good quality bottled 100% orange juice can be a last resort, but the flavor won’t be quite as vibrant.
Cornstarch: This is a crucial ingredient for both the crispy coating and thickening the sauce. For the coating, it ensures an incredibly light and shatteringly crisp texture. In the sauce, it acts as a binder, emulsifying the liquids into a glossy glaze that clings to the chicken. Make sure to use pure cornstarch, not corn flour, for the best results. For a gluten-free coating, you can use gluten-free all-purpose flour or a rice flour blend along with the cornstarch.
Rice Vinegar: This provides a mild, pleasant tanginess that balances the sweetness of the orange and sugar in the sauce. It’s a staple in many Asian cuisines and offers a cleaner acidity than white vinegar. If you can’t find rice vinegar, a mild white vinegar or even apple cider vinegar can be used in a pinch, though it might slightly alter the overall flavor profile of the homemade orange chicken.
| Original Ingredient | Best Substitution | Flavor / Texture Impact |
|---|---|---|
| Chicken Breasts | Boneless, Skinless Chicken Thighs | Slightly richer, more succulent texture; may require a slightly longer cooking time. |
| Fresh Orange Juice | High-quality 100% Orange Juice (bottled or carton) | Less vibrant, slightly less fresh citrus flavor; can taste a bit sweeter. |
| Rice Vinegar | White Vinegar or Apple Cider Vinegar | Slightly sharper, less nuanced tang. White vinegar is closest; apple cider adds a faint fruitiness. |
| Cornstarch (for coating) | All-Purpose Flour or Rice Flour | All-purpose flour will result in a thicker, slightly less crisp coating. Rice flour can yield a crispier coating. |
How to Make Chinese Orange Chicken — Step-by-Step
Making crispy orange chicken at home is more straightforward than you think. Just follow these steps closely and you’ll have a dish that rivals your favorite Chinese restaurant!
Step 1: Prepare the Orange Sauce
In a medium saucepan, combine 1 cup of fresh orange juice, 1/2 cup of sugar, 2 tablespoons of rice vinegar, 2 tablespoons of soy sauce, 1/4 teaspoon of ground ginger, 1/4 teaspoon of garlic powder, and 1/2 teaspoon of red chili flakes. Bring this mixture to a gentle simmer over medium heat and let it cook for about 3 minutes, allowing the flavors to meld.
💡 mia’s Pro Tip: For an even more intense orange aroma, you can add the zest of one orange to the sauce right at the beginning of simmering. However, I prefer adding most of the zest at the end to keep its bright, fresh fragrance.
Step 2: Thicken the Sauce & Add Zest
In a small bowl, whisk together 1 tablespoon of cornstarch with 2 tablespoons of water to create a smooth slurry. Slowly pour this slurry into the simmering orange sauce, whisking constantly. Continue to cook for another 5 minutes, or until the sauce has thickened to a syrupy consistency that coats the back of a spoon. Once thickened, remove the pot from the heat and stir in the zest of one orange. Set the sauce aside.
⚠️ Common Mistake to Avoid: Adding the cornstarch slurry too quickly or without whisking can result in clumps. Ensure your sauce is simmering gently and whisk continuously as you add the slurry to achieve a smooth, luscious sauce.
Step 3: Prepare the Chicken Coating Station
Set up three shallow dishes or pie plates. In the first, combine 1/3 cup of cornstarch with 1/3 cup of all-purpose flour and a generous pinch of salt. Stir well to combine. In the second dish, whisk the 3 eggs until well combined. The third dish can be your clean plate or a baking sheet where you’ll place the coated chicken.
Step 4: Bread the Chicken Pieces
Take each bite-sized piece of chicken, dip it first into the whisked egg mixture, letting any excess drip off. Then, transfer it to the cornstarch-flour mixture, ensuring it’s fully coated. Gently press the coating onto the chicken. Place the coated chicken pieces onto the clean plate or baking sheet, making sure they don’t overlap too much. Repeat with all chicken pieces.
Step 5: Heat the Oil for Frying
Pour about 2-3 inches of vegetable oil into a heavy-bottomed pot or Dutch oven. Heat the oil over medium-high heat until it reaches 350°F (175°C) on a deep-fry thermometer. Maintaining the correct temperature is crucial for achieving crispy chicken.
💡 mia’s Pro Tip: If you don’t have a thermometer, you can test the oil by dropping a tiny bit of the coating mixture into it. If it sizzles and floats to the top immediately, the oil is ready. Be patient; the right temperature makes all the difference!
Step 6: Fry the Chicken in Batches
Carefully add the coated chicken pieces to the hot oil, working in batches to avoid overcrowding the pot. Overcrowding will lower the oil temperature and result in greasy, less crispy chicken. Fry each batch for 2-3 minutes, turning them occasionally, until they are golden brown and perfectly crisp. Use a slotted spoon or spider strainer to remove the chicken from the oil and place it on a plate lined with paper towels to drain excess oil.
⚠️ Common Mistake to Avoid: Don’t try to fry all the chicken at once. This is the number one reason for soggy or unevenly cooked chicken. Patience and small batches are key to that irresistible crunch.
Step 7: Toss Chicken with Sauce and Serve
Once all the chicken is fried and drained, return it to a large bowl. Pour the prepared orange sauce over the crispy chicken and toss gently to coat each piece evenly. You can reserve a little extra sauce if you’d like to spoon some over rice upon serving. Garnish with fresh orange zest and sliced green onions, if desired, and serve immediately!
| Step | Action | Duration | Key Visual Cue |
|---|---|---|---|
| 1 | Prepare & Simmer Sauce Base | 3 minutes | Gentle simmer |
| 2 | Thicken Sauce & Add Zest | 5 minutes | Syrupy consistency |
| 3 | Set up Coating Station | N/A | 3 shallow dishes ready |
| 4 | Bread Chicken | 5-8 minutes | All pieces coated |
| 5 | Heat Frying Oil | 8-10 minutes | 350°F (175°C) |
| 6 | Fry Chicken (in batches) | 2-3 minutes per batch | Golden brown & crisp |
| 7 | Toss & Serve | 2 minutes | Evenly coated chicken |
Serving & Presentation
This Chinese Orange Chicken is best served immediately while the chicken is at its crispiest. I love to serve it over a fluffy bed of jasmine rice, which is the perfect canvas for that glorious orange sauce. A generous sprinkle of thinly sliced green onions adds a pop of freshness and color, while a bit more orange zest brightens everything up. Think of it as a vibrant plate, a feast for the eyes as well as the palate, much like the colorful spreads we’d have for special occasions in my Moroccan home.
For a truly restaurant-style presentation, serve the chicken in a large bowl and allow guests to spoon it over their rice. You can serve the remaining sauce on the side for dipping or drizzling. A side of steamed broccoli or snap peas adds a healthy, vibrant green contrast and a nice textural element. In New York, we love to blend cuisines, so don’t be afraid to pair this with something unexpected, like a quick cucumber salad for a cooling counterpoint to the sweet and savory flavors.
| Pairing Type | Suggestions | Why It Works |
|---|---|---|
| Side Dish | Jasmine Rice, Steamed Broccoli or Asparagus, Fried Rice | The fluffy rice absorbs the delicious sauce. Steamed vegetables offer a fresh, healthy contrast. |
| Sauce / Dip | Reserve Extra Orange Sauce, Sweet Chili Sauce | Extra orange sauce is always welcome! Sweet chili adds another layer of flavor. |
| Beverage | Unsweetened Iced Tea, Crisp White Wine (like Pinot Grigio), Light Lager | The tea or wine cuts through the sweetness and richness. A light beer offers a refreshing balance. |
| Garnish | Sliced Green Onions, Toasted Sesame Seeds, Extra Orange Zest | Adds visual appeal, freshness, and a nutty crunch. |
Make-Ahead, Storage & Reheating
As a busy New Yorker, I rely on smart prep to get incredible meals on the table. For this Chinese Orange Chicken, you can make the sauce up to 2 days in advance and store it in an airtight container in the refrigerator. You can also cut the chicken and store it, but I highly recommend frying it just before serving for maximum crispiness. Reheating leftovers is possible, but it won’t quite match that glorious just-made crunch.
| Method | Container | Duration | Reheating Tip |
|---|---|---|---|
| Refrigerator | Airtight container | 3 Days (for fried chicken and sauce separately) | Gently reheat sauce on stovetop. Reheat chicken in a single layer on a baking sheet in a 375°F oven for 8-10 minutes, or in an air fryer. Some crispiness may be lost. |
| Freezer | Freezer-safe airtight container | 1-2 Months (fried chicken; sauce separately) | Thaw completely. Reheat chicken as above. The sauce can be gently reheated. Texture will be softer than fresh. |
| Make-Ahead | Airtight containers | Sauce: 2 days in advance. Chicken: Cut, but don’t bread or fry until needed. | Prepare sauce and store. Cut chicken. Fry and toss with reheated sauce just before serving for best results. |
For the best texture when reheating, I highly recommend trying to reheat only the chicken first, then tossing it with the properly reheated sauce. Using an air fryer is fantastic for restoring some of that crispiness to the chicken. If you’re reheating the entire dish after it’s been sauced, it will become softer, so aim to enjoy it fresh for that perfect crunch!
Variations & Easy Swaps
| Variation | Key Change | Best For | Difficulty Impact |
|---|---|---|---|
| Spicy Orange Chicken | Increase red chili flakes, add sriracha to sauce | Heat lovers | Easy |
| Gluten-Free Orange Chicken | Use tamari instead of soy sauce; ensure coating uses gluten-free flour/tamari | Gluten-free diet | Easy |
| Honey-Orange Chicken | Replace half the sugar with honey | Those who love honey | Easy |
Spicy Orange Chicken
For those who like a little more heat, I love to amp up the spice in this dish. You can simply increase the red chili flakes to 1 teaspoon, or even add a tablespoon or two of sriracha to the sauce at the same time you add the cornstarch slurry. This really wakes up the palate and offers a delightful contrast to the sweet orange. It’s a simple tweak that makes a world of difference, much like the pinch of cayenne my mother would add to her couscous on occasion.
Gluten-Free Orange Chicken
Making this delicious dish gluten-free is straightforward. Ensure you use tamari instead of soy sauce, as tamari is naturally gluten-free and has a similar umami profile. For the coating, I recommend using a blend of cornstarch and a gluten-free all-purpose flour mix, or even rice flour on its own, which creates a lovely crispiness similar to the traditional version. This modification is tested and tasted by me, and you’ll hardly notice the difference!
Honey-Orange Chicken
If you adore the taste of honey, you can easily incorporate it into this recipe. Simply replace half of the granulated sugar with honey in the sauce. The honey adds a beautiful floral note and a slightly different sweetness that complements the orange wonderfully. It makes the sauce a touch glossier and adds a comforting depth of flavor, reminiscent of special desserts I learned to make in Paris.
What is the secret to making Chinese orange chicken crispy?
The absolute key to achieving that signature crispiness for homemade orange chicken is a two-fold approach: the coating and the frying method. For the coating, using a mix of cornstarch and flour creates a light, shatteringly crisp crust that holds its own against the sauce. It’s crucial to ensure the chicken is well-coated. The second part is frying: make sure your oil is at the correct temperature (350°F or 175°C) and, most importantly, fry the chicken in small batches. Overcrowding the pot lowers the oil temperature, leading to greasy, soggy chicken instead of the perfectly crisp pieces you’re after.
Can I use chicken thighs instead of chicken breast for orange chicken?
Absolutely! Chicken thighs are an excellent substitute for chicken breasts in this Chinese Orange Chicken recipe. In fact, many chefs prefer them because they are naturally more flavorful and tender due to their higher fat content. They tend to stay incredibly moist even after frying. If you opt for thighs, simply trim any excess fat and cut them into bite-sized pieces. You might need to extend the frying time by a minute or two per batch compared to chicken breast, as they are a bit denser, but the result is a wonderfully succulent and delicious dish.
How do you thicken the orange sauce for Chinese orange chicken?
The best way to thicken the orange sauce for that glossy, clingy texture is by using a cornstarch slurry. You’ll create this by whisking together 1 tablespoon of cornstarch with about 2 tablespoons of cold water in a small bowl until it forms a smooth paste. Then, you’ll slowly pour this mixture into your simmering sauce while whisking continuously. Cook for a few more minutes until the sauce coats the back of a spoon beautifully. It’s a simple technique that ensures your sauce is the perfect consistency to beautifully glaze the crispy chicken.
What is a good substitute for orange juice in orange chicken?
While fresh orange juice is truly ideal for that vibrant citrus flavor, if you find yourself in a pinch, a good quality 100% orange juice from a carton or bottle can work as a substitute. Ensure it’s not from concentrate and has no added sugar, as we control the sweetness in the sauce. For a tangier, more complex citrus flavor, you could also try a mix of half orange juice and half pineapple juice, or even a tablespoon of lime or lemon juice added to standard orange juice. However, be prepared for a slightly different flavor profile.
Can I bake the chicken instead of frying it for a healthier orange chicken?
Yes, you certainly can bake the chicken instead of frying it, though it will significantly change the texture. To get a crispier baked chicken, toss the coated chicken pieces with a little extra oil and arrange them in a single layer on a baking sheet lined with parchment paper. Bake at 400°F (200°C) for 20-25 minutes, flipping halfway through, until golden brown and cooked through. While it won’t achieve the same shatteringly crisp exterior as frying, it’s a much lighter option. You’ll still get a delicious coating with the orange sauce.
How do I make the orange chicken sauce less sweet or more savory?
To adjust the sweetness and savoriness of the orange sauce, start by tasting it before you add the cornstarch slurry. If it’s too sweet, add a splash more rice vinegar or even a squeeze of lemon or lime juice to balance it out. To increase savoriness, a little bit of soy sauce (or tamari for gluten-free) can be added, or you could even incorporate a teaspoon of oyster sauce or fish sauce if you enjoy those deeply savory notes. Remember, the chili flakes also add a savory heat that cuts through sweetness.
Share Your Version!
I truly hope you love this homemade orange chicken as much as I do! It’s a dish that brings me so much joy to make and share. If you whip up this Chinese Orange Chicken recipe, please consider leaving a star rating and a comment below to let me know how it turned out for you. I love hearing your feedback! And if you share a photo of your creation on Instagram or Pinterest, don’t forget to tag me @exorecipe – I absolutely love seeing your culinary adventures!
From my NYC kitchen to yours — I hope this recipe brings as much warmth to your table as it does to mine. — mia 🧡
Love This Recipe? Save It to Pinterest!
If you enjoyed this Chinese Orange Chicken recipe, don’t let it get lost in your browser tabs! 😄 Pin it now so you can find it again anytime — and explore hundreds more tried-and-tested recipes waiting for you on my Pinterest boards.
👉 Follow mia on Pinterest @chefrecipes2
📌 Pin this recipe · 🔁 Re-pin your favorites · 💬 Tag me when you make it — I love seeing your creations!

Chinese Orange Chicken
Chinese Orange Chicken that is way better than take-out!
Ingredients
- 4 Boneless Skinless Chicken Breasts (cut into bite-size pieces)
- 3 Eggs (whisked)
- 1/3 cup Cornstarch
- 1/3 cup Flour
- Salt
- Oil (for frying)
- 1 cup Orange Juice
- 1/2 cup Sugar
- 2 Tablespoons Rice Vinegar (or White Vinegar)
- 2 Tablespoons Soy Sauce (use tamari for a gluten-free dish)
- 1/4 teaspoon Ginger
- 1/4 teaspoon Garlic Powder (or 2 garlic cloves, finely diced)
- 1/2 teaspoon Red Chili Flakes
- Orange Zest (from 1 orange)
- 1 Tablespoon Cornstarch
- Green Onions
- Orange Zest
Instructions
- To make orange sauce:
- In a medium pot, add orange juice, sugar, vinegar, soy sauce, ginger, garlic, and red chili flakes. Heat for 3 minutes.
- In a small bowl, whisk 1 Tablespoon of cornstarch with 2 Tablespoons of water to form a paste. Add to orange sauce and whisk together. Continue to cook for 5 minutes, until the mixture begins to thicken. Once the sauce is thickened, remove from heat and add orange zest.
- To make chicken:
- Place flour and cornstarch in a shallow dish or pie plate. Add a generous pinch of salt. Stir.
- Whisk eggs in shallow dish.
- Dip chicken pieces in egg mixture and then flour mixture. Place on plate.
- Heat 2 -3 inches of oil in a heavy-bottomed pot over medium-high heat. Using a thermometer, watch for it to reach 350 degrees.
- Working in batches, cook several chicken pieces at a time. Cook for 2 – 3 minutes, turning often until golden brown. Place chicken on a paper-towel-lined plate. Repeat.
- Toss chicken with orange sauce. You may reserve some of the sauce to place on rice. Serve it with a sprinkling of green onion and orange zest, if so desired.
Tried This Recipe? Leave a Comment!
Did you make this recipe? I’d love to hear how it turned out! Please leave a comment and a rating below. Your feedback helps other home cooks and supports cheerychop.com!
For more delicious inspiration, follow me on Pinterest!