Table of Contents
Brownie Cookie Recipe: Fudgy, Chewy Chocolate Delights – The Ultimate Indulgence
Oh, the joy of a perfect brownie! The crackly top, the fudgy center, the chewy edges… I’ve always adored them. Growing up in my mother’s kitchen in Marrakech, chocolate was a treasure, reserved for special occasions and always treated with reverence. When I moved to Paris to hone my pastry skills, I learned the art of balancing rich flavors. Now, here in my New York City kitchen, I’ve merged those nostalgic memories with refined techniques, and the result is this incredible brownie cookie recipe. These aren’t just cookies; they’re bite-sized brownies with all the intense chocolate flavor you crave, promising that distinctive crackly crust and a wonderfully fudgy interior. If you’re looking for an easy brownie cookie that truly delivers on all fronts, you’ve found it.
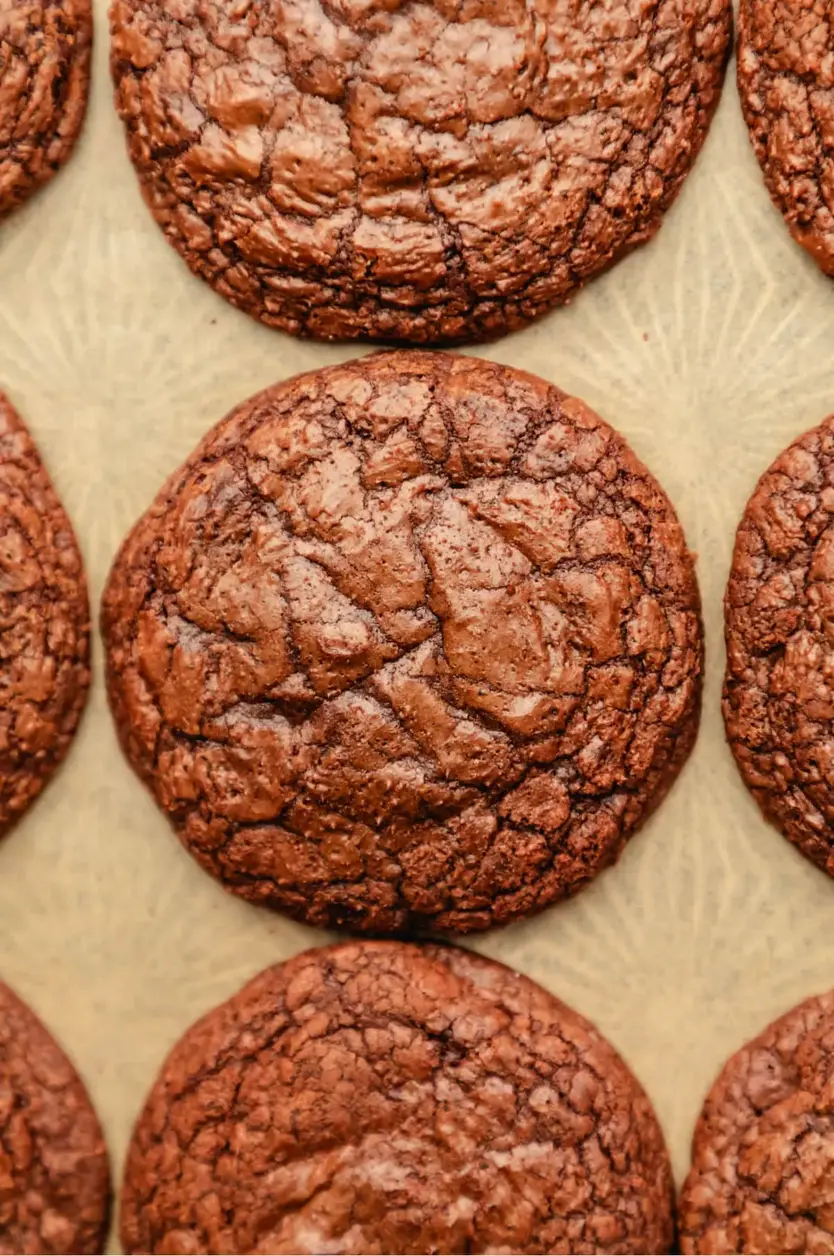
Imagine biting into a soft, deeply chocolatey cookie. You’re greeted first by that signature crinkled surface, giving way to a moist, almost molten center that melts in your mouth. The aroma is pure dark chocolate, a deep, intoxicating scent that fills your kitchen and promises pure indulgence. The edges offer just the slightest chew, a perfect counterpoint to the rich, fudgy heart. This recipe captures the very essence of a decadent brownie, but in a convenient, portable cookie form. It’s the best of both worlds, a testament to the magic that happens when two beloved treats collide. It’s a simple magic, rooted in understanding how a few key ingredients and a crucial technique create something truly spectacular.
What makes this brownie cookie recipe stand out? It’s all about achieving that perfect brownie texture in cookie form. I’ve learned that a specific mixing method and the quality of chocolate are paramount. It’s this attention to detail that elevates these from just another cookie to a truly exceptional treat. I’ll share my secret for that coveted crackly top, a technique I’ve fine-tuned over years of baking. Be warned, though – the hardest part might be stopping at just one! I’ll also highlight a common pitfall that many home bakers encounter, which, once avoided, will guarantee your success with these fudgy brownie cookies every single time.
Why This Brownie Cookie Recipe Is the Best
My journey from the vibrant spice markets of Morocco to the sophisticated patisseries of Paris and finally to the bustling streets of New York has instilled in me a deep appreciation for the nuances of flavor and texture. For this brownie cookie recipe, I’ve leaned into my heritage by selecting high-quality bittersweet chocolate, the kind that speaks of depth and complexity, reminiscent of the rich cocoa my mother would sometimes use in our celebratory pastries. This focus on quality chocolate isn’t just about taste; it’s the foundation of that intense, authentic brownie flavor that makes these cookies utterly irresistible. It’s the heart of these fudgy brownie cookies.
Achieving that elusive brownie texture – the crackly top, the fudgy middle, and the chewy edge – is an art. The key lies in how we treat the eggs and sugar. In my Parisian pastry training, we learned the importance of emulsification and aeration. Whisking the eggs and sugar together for a full five minutes, as this recipe instructs, creates a thick, creamy base. This process not only adds structure but is crucial for developing those signature cracks on top as the cookies bake and cool. It’s a French technique applied to an American classic, ensuring a texture that is both satisfyingly chewy and luxuriously fudgy in every bite.
I designed this brownie cookie recipe to be as straightforward as possible, even with the crucial steps involved. The chilling period for the batter ensures the cookies hold their shape and develop that perfect texture. Plus, using a cookie scoop makes portioning incredibly simple. This recipe is perfect for when you’re craving something intensely chocolatey but don’t have the time for a full-scale brownie bake. It’s proof that delicious, bakery-quality treats can be achieved with minimal fuss, making it a go-to for busy bakers and chocolate lovers alike looking for an easy brownie cookie solution.
Brownie Cookie Recipe Ingredients
When I need specialty ingredients for my baking here in New York, I often find myself at Zabar’s or Murray’s Cheese for excellent chocolate, or even the Union Square Greenmarket for the freshest butter and eggs. This brownie cookie recipe calls for simple, high-quality ingredients that come together beautifully. The true magic is in the ratios and the method, but starting with good components is always the first step to creating something truly special, just like the elaborate tagines my mother would prepare back home.
Ingredients List
- 12 ounces bittersweet chocolate chips (60-70% cacao)
- ½ cup (1 stick) unsalted butter
- 3 large eggs
- 1 cup granulated sugar
- ¼ cup light brown sugar, packed
- 1 tablespoon vanilla extract
- ½ teaspoon baking powder
- ½ teaspoon salt
- ¾ cup all-purpose flour
- ¼ cup unsweetened cocoa powder
- 1 cup pecans, chopped (optional)
- ½ cup mini semisweet chocolate chips
Ingredient Spotlight
Bittersweet Chocolate Chips: The heart of this brownie cookie recipe. I recommend using chips with 60-70% cacao for the best balance of intense chocolate flavor without being overwhelmingly bitter. Look for brands known for their quality. In U.S. grocery stores, Ghirardelli, Guittard, or Callebaut are excellent choices. They melt beautifully and provide that deep, signature brownie taste.
Eggs: Crucial for structure and that desirable chewy texture. Large eggs are standard in most U.S. baking recipes. Their protein helps bind the ingredients, while their yolks add richness and moisture. If you need to substitute, you can use a flax egg (1 tbsp flaxseed meal + 3 tbsp water, let sit for 5 minutes) for a vegan option, though the texture might be slightly less fudgy and the color a bit lighter.
Flour: All-purpose flour provides the necessary structure for our cookies. It’s the workhorse that holds everything together. Make sure to measure it correctly by spooning it into your cup and leveling it off, rather than scooping directly from the bag, which can lead to too much flour. For a gluten-free brownie cookie, a good quality gluten-free all-purpose baking blend (one that contains xanthan gum) is a reliable substitute, usually 1:1.
| Original Ingredient | Best Substitution | Flavor / Texture Impact |
|---|---|---|
| Bittersweet Chocolate Chips (60-70%) | Semisweet Chocolate Chips (70% dark) | Slightly sweeter, less intense chocolate flavor. Still very delicious. |
| Large Eggs | Flax eggs (for vegan) or dairy-free yogurt | Texture may be slightly less fudgy. Vegan option is less rich. |
| All-Purpose Flour | Gluten-Free All-Purpose Blend (with xanthan gum) | Texture might be slightly grittier or denser, depending on the blend. |
How to Make Brownie Cookies — Step-by-Step
Alright, let’s get these magnificent fudgy brownie cookies in the oven! Follow my lead, and you’ll be rewarded with pure chocolate bliss.
Step 1: Melt Chocolate and Butter
Begin by melting the 12 ounces of bittersweet chocolate chips and ½ cup of butter together in a heavy-bottomed saucepan over low heat. Stir constantly until they are completely melted and beautifully combined into a smooth, glossy mixture. This gentle melting process prevents the chocolate from seizing up. Make sure your saucepan isn’t too hot, as scorched chocolate is a flavor no one wants!
💡 mia’s Pro Tip: For an even smoother melt and to completely avoid scorching, you can use a double boiler method. Place the chocolate and butter in a heatproof bowl set over a saucepan of simmering water, ensuring the bottom of the bowl doesn’t touch the water.
Step 2: Cream Eggs and Sugars
In the bowl of a stand mixer fitted with the paddle attachment, combine the 3 large eggs, 1 cup of granulated sugar, and ¼ cup of light brown sugar. Add the 1 tablespoon of vanilla extract, ½ teaspoon of baking powder, and ½ teaspoon of salt. Beat this mixture on high speed for a full 5 minutes. Yes, five minutes! This is a critical step that incorporates air, creating structure and that signature crackly crust we’re after. The batter should become noticeably thick, pale, and creamy.
Step 3: Combine Wet and Dry Elements
Reduce the mixer speed to low. Gradually pour in the melted bittersweet chocolate and butter mixture, mixing until it’s just incorporated. You don’t want to overmix at this stage. Next, add the ¾ cup of all-purpose flour and ¼ cup of unsweetened cocoa powder. Mix on low speed only until no streaks of flour or cocoa powder remain. Overmixing flour can lead to tough cookies, so be gentle!
⚠️ Common Mistake to Avoid: Do NOT overmix the flour and cocoa powder into the batter. Once they are just combined, stop mixing. Overmixing develops gluten, which will make your brownie cookies tough and cakey instead of fudgy and chewy.
Step 4: Add Mix-Ins and Chill
If you’re using them, gently stir in the 1 cup of chopped pecans and the ½ cup of mini semisweet chocolate chips. The batter should now have the consistency of a very thick brownie batter – rich, dense, and deeply chocolatey. Cover the bowl tightly with plastic wrap and chill the batter in the refrigerator for at least 30 minutes. This chilling period is essential for flavor development and to make the batter easier to scoop and help the cookies hold their shape.
Step 5: Scoop and Bake
Preheat your oven to 350°F (175°C). Line two large baking sheets with parchment paper. Using a 1.5-tablespoon cookie scoop, drop rounded portions of the chilled batter onto the prepared baking sheets, leaving about 2 inches between each cookie to allow for spread. Aim for uniform scoops to ensure even baking.
💡 mia’s Pro Tip: For that perfect crackly top, the cookies should appear set around the edges but still look a little wet and glossy in the center when they come out of the oven. Don’t be tempted to overbake them! They will continue to cook and set as they cool on the baking sheet.
Step 6: Cool and Enjoy
Bake the cookies for 8-10 minutes. Once removed from the oven, let them cool on the baking sheets for about 5-10 minutes. During this time, the residual heat will finish cooking the centers, and that beautiful, shiny, crackly crust will form. After they’ve set slightly, you can carefully transfer them to a wire rack to cool completely. The wait is agonizing, I know, but the result is worth it!
| Step | Action | Duration | Key Visual Cue |
|---|---|---|---|
| 1 | Melt Chocolate & Butter | 5-7 mins | Smooth, glossy, well-combined mixture |
| 2 | Cream Eggs & Sugars | 5 mins | Thick, pale, creamy batter |
| 3 | Combine Wet & Dry | 1-2 mins | Just combined, no flour streaks |
| 4 | Add Mix-Ins & Chill | 30+ mins | Thick batter, holds shape after chilling |
| 5 | Scoop & Bake | 8-10 mins | Set edges, slightly wet center |
| 6 | Cool | 5-10 mins on sheet, then rack | Crackly crust forms, edges firm up |
Serving & Presentation
These brownie cookies are so rich and decadent that they barely need anything else. For a classic New York treat, serve them with a tall glass of cold milk – it’s simple, iconic, and utterly satisfying. If you want to elevate them, a dusting of powdered sugar, a sprinkle of flaky sea salt (like Maldon), or even a tiny dollop of raspberry coulis can add a touch of elegance, much like the beautiful pastries I admired in Parisian cafes. They are perfect for an afternoon pick-me-up, a delightful addition to a dessert platter, or a make-ahead treat for unexpected guests.
Presentation-wise, I love arranging them on a simple white platter to let their deep chocolate color shine. For a more festive touch, especially during the holidays, a drizzle of white chocolate or a sprinkle of edible gold glitter can be magical. My mother always said that food should be a feast for the eyes as well as the palate, and a little care in presentation goes a long way. These cookies are humble yet sophisticated, fitting perfectly into any setting, from a casual family gathering to a more formal dessert spread.
| Pairing Type | Suggestions | Why It Works |
|---|---|---|
| Side Dish | Ice cream (vanilla bean or coffee), Fresh Berries | Complements the rich chocolate with cool creaminess or bright fruitiness. |
| Sauce / Dip | Raspberry Coulis, Salted Caramel Sauce | The tartness of raspberry cuts the richness, while caramel adds another layer of indulgence. |
| Beverage | Cold Milk, Espresso, Dark Roast Coffee, Red Wine (e.g., Merlot) | Milk is classic; coffee enhances chocolate notes; red wine provides a sophisticated pairing. |
| Garnish | Flaky Sea Salt, White Chocolate Drizzle, Mint Leaves | Salt enhances flavor, white chocolate adds visual contrast, mint adds freshness. |
Make-Ahead, Storage & Reheating
Life in New York is always on the go, so I appreciate recipes that can be prepped ahead. These brownie cookies are fantastic for that! You can make the dough, chill it, and then scoop out the cookies just before baking. Or, bake them entirely, let them cool, and store them for later. They maintain their delightful fudgy texture beautifully, making them a reliable treat for busy weeks or when you need a last-minute dessert.
| Method | Container | Duration | Reheating Tip |
|---|---|---|---|
| Refrigerator | Airtight container or resealable bag | Up to 5 days | Enjoy at room temp or gently warm in microwave for 5-10 secs. |
| Freezer | Airtight container or freezer bag, with parchment between layers | Up to 3 months | Thaw overnight in fridge, then enjoy as is or warm slightly. |
| Dough (Unbaked balls) | Airtight container or freezer bag | Up to 3 days (fridge), 1 month (freezer) | Bake from chilled or slightly thawed. May need an extra minute or two in the oven. |
When reheating, keep it brief! A few seconds in the microwave is usually enough to bring back that just-baked fudgy texture without drying them out. Sometimes, I like to place a warm cookie on top of a steaming mug of coffee or tea – the gentle steam helps soften them perfectly. For the best texture, I always recommend letting them cool completely before storing, as warm cookies can create condensation within their storage container, leading to a less-than-ideal texture.
Variations & Easy Swaps
| Variation | Key Change | Best For | Difficulty Impact |
|---|---|---|---|
| Double Chocolate Chunk | Add ½ cup more mini chocolate chips or chopped chocolate chunks. | Serious chocolate lovers. | Easy |
| Gluten-Free Brownie Cookie | Use a 1:1 gluten-free baking flour blend. | Those avoiding gluten. | Easy (ensure blend works well) |
| Mint Chocolate Swirl | Add ¼ tsp peppermint extract to batter, swirl in melted white chocolate. | Holiday baking or mint lovers. | Easy to Medium (swirling) |
Double Chocolate Brownie Cookies
For an even more intense chocolate experience, simply add another ½ cup of mini semi-sweet chocolate chips or even some chopped dark chocolate chunks to the batter along with the pecans. This will create pockets of melted chocolate within the already fudgy cookie, making them incredibly decadent. It’s a simple swap that big chocolate fans will adore. This variation is like adding a touch more of that precious ingredient from my childhood, making every bite extra luxurious.
Gluten-Free Brownie Cookies
To make these fudgy brownie cookies gluten-free, I’ve found that a good quality 1:1 gluten-free baking flour blend works wonderfully. Ensure the blend contains xanthan gum. Replace the ¾ cup of all-purpose flour with the same amount of your chosen GF blend. The texture might be slightly different – perhaps a touch denser or with a slightly different crumb – depending on the flour blend you use, but the rich chocolate flavor remains paramount. I tested this extensively, and a Bob’s Red Mill 1-to-1 blend is a reliable option.
Mint Chocolate Brownie Cookies
Add ¼ teaspoon of pure peppermint extract along with the vanilla extract in Step 3. For a beautiful visual and flavor contrast, you can melt about 2 ounces of white chocolate, let it cool slightly, and then drizzle it over the baked cookies before they fully set. Alternatively, you can gently swirl the peppermint extract directly into the cookie batter before adding the mix-ins. This adds a festive touch reminiscent of winter flavors I’ve come to know in New York City, perfect for the holiday season.
What is the difference between a brownie cookie and a regular brownie?
A brownie cookie aims to capture the essence of a traditional brownie—its rich chocolate flavor, fudgy interior, and often a crackly top—but in a more portable, individual cookie format. Regular brownies are typically baked in a pan and cut into squares, resulting in a denser, cake-like or fudgy texture throughout. Brownie cookies, on the other hand, often have slightly chewier edges due to their size and shape, and achieving that classic brownie crackle is a key goal in their recipe. They offer the intense chocolate experience of a brownie in a cookie form, perfect for snacking.
Can I use cocoa powder instead of melted chocolate in brownie cookies?
While you can make chocolate cookies using only cocoa powder, they won’t have the same deep, fudgy texture and intense flavor profile as those made with melted chocolate and butter. My brownie cookie recipe relies on both high-quality bittersweet chocolate and cocoa powder. The melted chocolate provides richness, fat, and that characteristic fudgy quality, while the cocoa powder enhances the chocolate flavor and contributes to the color and structure. Using only cocoa powder will likely result in a more cake-like or drier cookie, rather than the desired fudgy brownie cookie result.
How do you keep brownie cookies from spreading too much?
There are several key factors to prevent brownie cookies from spreading excessively. Firstly, chilling the batter, as this recipe instructs, is crucial. Cold batter is firmer and spreads less during baking. Secondly, ensure your oven temperature is accurate; an oven that’s too cool can cause cookies to spread before they set. Thirdly, avoid over-creaming the eggs and sugar; while key for texture, excessive creaming can incorporate too much air, leading to spread. Lastly, be mindful of the fat content; using slightly less butter or ensuring the chocolate and butter are not overly hot when mixed can help maintain their structure.
Should brownie cookies be soft and chewy or crispy when done?
The ideal brownie cookie should be a delightful combination of textures: chewy around the edges, fudgy and soft in the center, with a distinctive crackly, slightly crisp top. They should not be crispy all the way through. The baking time is critical here; you want to pull them out when the edges are set but the center still looks slightly underbaked and glossy. They will continue to set up as they cool on the baking sheet. Overbaking will result in a dry, cakey, or possibly crispy cookie, losing that desirable brownie-like chewiness and fudgy interior.
What makes the top of brownie cookies crackly?
The signature crackly top on brownie cookies comes from a combination of factors in the batter and the baking process. Firstly, the high ratio of sugar and eggs, which are beaten extensively (as in Step 2 of my recipe), creates a marshmallow-like syrup when heated. As the cookies bake and puff up, the surface dries and cracks. The incorporation of melted chocolate also plays a role, contributing to the density and chewiness which aids in creating those delicate fissures. Finally, cooling the cookies on the baking sheet allows the crackly structure to set and become more pronounced.
Can I make brownie cookies vegan?
Yes, you can adapt this brownie cookie recipe to be vegan! The key is to replace the butter and eggs. For the butter, a good quality vegan butter stick substitute will work well. For the eggs, you can use a flax egg (1 tablespoon ground flaxseed mixed with 3 tablespoons water, let it sit for 5 minutes to thicken) for each egg. You’ll also want to ensure your chocolate chips are dairy-free. The texture might be slightly different – perhaps a bit less rich or fudgy – but you’ll still achieve a delicious chocolate cookie. I’m always experimenting with plant-based baking here in NYC!
How do you achieve a fudgy texture in these cookies?
Achieving a fudgy texture in these brownie cookies is all about the ingredients and method. Using a significant amount of high-quality melted chocolate and butter is paramount, as they create a rich, dense base. The eggs contribute moisture and richness, and it’s crucial not to overbake them – pulling them from the oven when the center still looks slightly underbaked is key. The chilling of the dough also helps concentrate the flavors and moisture, preventing the cookies from becoming dry or cakey. It’s a careful balance that results in that signature melt-in-your-mouth fudgy quality.
What kind of chocolate is best for brownie cookies?
For the best brownie cookie recipe, I highly recommend using good quality bittersweet chocolate chips or a bittersweet chocolate bar chopped into small pieces, with a cacao percentage between 60% and 70%. This range offers a deep, intense chocolate flavor that isn’t overly sweet or bitter. The higher cacao content provides a more profound chocolate experience, reminiscent of a true brownie. While semisweet chocolate can be used, it will result in a sweeter cookie, and milk chocolate would be too sweet and lack the desired depth.
Share Your Version!
I pour my heart into developing and testing these recipes, and seeing your creations brings me so much joy! If you’ve made these fudgy brownie cookies, please consider leaving a star rating and a comment below – your feedback truly helps other bakers. I also absolutely adore seeing your photos! Tag me on Instagram or Pinterest (@exorecipe) when you share your delightful results. I’m always so curious to see how you put your own spin on my recipes; did you try any of the flavour variations, or perhaps discover a new favourite pairing?
From my NYC kitchen to yours — I hope this recipe brings as much warmth to your table as it does to mine. — mia 🧡
Love This Recipe? Save It to Pinterest!
If you enjoyed this Brownie Cookie Recipe, don’t let it get lost in your browser tabs! 😄 Pin it now so you can find it again anytime — and explore hundreds more tried-and-tested recipes waiting for you on my Pinterest boards.
👉 Follow mia on Pinterest @chefrecipes2
📌 Pin this recipe · 🔁 Re-pin your favorites · 💬 Tag me when you make it — I love seeing your creations!

Brownie Cookie Recipe

This brownie cookie recipe is all of the good parts of a brownie- crackly crust, fudgy middles, chewy edges, & intense chocolate flavor -in one little cookie! Also, if check out the how-to video right above the recipe.
Ingredients
- 12 ounces bittersweet chocolate chips (60-70% cacao)
- ½ cup butter
- 3 large eggs
- 1 cup granulated sugar
- ¼ cup light brown sugar
- 1 tablespoon vanilla extract
- ½ teaspoon baking powder
- ½ teaspoon salt
- ¾ cup all-purpose flour
- ¼ cup unsweetened cocoa powder¹
- 1 cup pecans (chopped, optional)
- ½ cup mini semisweet chocolate chips
Instructions
- Melt bittersweet chocolate chips and butter in a heavy saucepan over low heat, stirring constantly until melted and well-combined.
- Remove from heat, and set aside.
- In the bowl of a stand mixer fitted with a paddle attachment, beat the eggs, sugars, vanilla, baking powder, and salt on high speed 5 minutes, or until the batter is thick and creamy. This step is key, so make sure to beat the mixture for the full 5 minutes.
- Reduce the speed to low, and mix in the melted chocolate until well-combined.
- Stir in flour and cocoa powder just until combined.
- Add nuts, if using, and mini chocolate chips. Stir in to combine. The batter should be the consistency of a thick brownie batter at this point.
- Cover the batter, and chill for 30 minutes.
- Preheat oven to 350 F. Line two baking sheets with parchment paper.
- Using a 1.5 tablespoon cookie scoop, drop batter onto the prepared cookie sheets about 2 inches apart.
- Bake cookies 8-10 minutes. The cookie will look set at the edges but still be a little wet looking in the center. Don't overbake, or the cookies won't be crackly and fudgy.
- The shiny, crackly crust will develop as the cookies cool on the baking sheet.
Nutrition
- Calories: 156 kcal
- Sugar: 11 g
- Fat: 9 g
- Carbohydrates: 16 g
- Protein: 2 g
Tried This Recipe? Leave a Comment!
Did you make this recipe? I’d love to hear how it turned out! Please leave a comment and a rating below. Your feedback helps other home cooks and supports cheerychop.com!
For more delicious inspiration, follow me on Pinterest!