Table of Contents
Butterfinger Balls: No-Bake Butterfinger Balls Perfection
Welcome to my kitchen! As a chef who trained in the heart of Paris but carries the vibrant soul of Morocco everywhere I go, I’m always searching for that perfect balance of nostalgia and refined technique. Living here in New York City, I’ve found that my friends are obsessed with the easy Butterfinger balls recipe—a quintessential American treat. Today, I’m sharing my unique take on these chocolate peanut butter balls, refined with a touch of culinary sophistication that makes every bite feel like a gourmet indulgence.
These homemade Butterfinger candy balls hit every sensory note: the initial snap of the hardened dark chocolate shell, followed by a velvety, creamy peanut butter center punctuated by the addictive, toffee-like crunch of real Butterfinger bars. When you fold in those graham cracker crumbs, you get a beautiful complexity of texture. It reminds me of the intricate layered desserts of my Moroccan childhood, yet it uses simple, accessible ingredients you can find at any local bodega or supermarket.
Don’t let the simplicity fool you; there’s an art to getting that perfect gloss on the chocolate. In this guide, I’ll show you how I balance the sweetness with just a hint of salt, ensuring these decadent morsels aren’t just sweet but truly crave-able. I’ll share my top tips on avoiding common mistakes, like chocolate seizing, so you can host your next soirée with total confidence. Let’s create some magic in the kitchen together!
Why This Butterfinger Balls Recipe Is the Best
The secret to my version is the controlled ratio of peanut butter to graham crackers. Many recipes become too dense or oily; by using a standard commercial peanut butter (the kind that stays emulsified), I ensure the balls hold their shape perfectly without sacrificing that signature creamy mouthfeel I perfected during my pastry training.
Texture is everything in high-end pastry. By chilling the peanut butter center completely before dipping, we create a thermal shock when it hits the melted chocolate. This technique allows the chocolate to set instantly with a brilliant, professional-style finish that makes these look like they were boxed up by a chocolatier in Manhattan.
Finally, this is the ultimate time-saver dessert. It’s entirely no-bake, requiring only a freezer and a microwave for tempering. It’s the perfect, stress-free project for a weeknight when you’re craving something elevated yet comfortingly familiar to enjoy after a busy day in the city.
Butterfinger Balls Ingredients
I usually source my peanut butter and candy bars from the bustling markets near my apartment. You don’t need fancy ingredients, just good-quality ones. Keep in mind, the texture of the center depends on these exact ratios!
- 4 tablespoons softened butter
- 1 teaspoon vanilla extract
- 8 ounces chocolate bark or chips
- ½ cup crushed Butterfinger bars
- 1 cup powdered sugar
- 1 cup creamy peanut butter
- ¾ cup graham cracker crumbs
- Optional: Sea salt or festive sprinkles
How to Make Butterfinger Balls — Step-by-Step
Step 1: Prepare the Dough
Blend the peanut butter and softened butter until uniform. 💡 mia’s Pro Tip: Ensure your butter is completely at room temperature so it incorporates without lumps.
Step 2: Chilling
Scoop the mixture into balls and freeze for 30 minutes. ⚠️ Common Mistake to Avoid: Don’t skip the chill time! If the centers are too soft, they will fall apart in the warm chocolate.
How do you crush Butterfinger bars without making a mess?
The best way is to place the candy bars inside a heavy-duty freezer bag, squeeze the air out, and seal it tight. Then, use a wooden rolling pin to gently tap and roll over the bars. This contains all those sticky, flaky crumbs inside the bag, keeping your NYC kitchen counters clean and organized!
Can I use natural peanut butter?
I strongly recommend against using all-natural peanut butter for this recipe. Natural varieties tend to separate and have too much oil, which prevents the dough from firming up properly. Use a conventional, no-stir creamy peanut butter to ensure your balls maintain a smooth, professional structure that stays firm at room temperature.
How long do they need to chill?
For the best results, chill the formed dough balls for at least 30 to 45 minutes in the freezer. They need to be very firm to the touch before you dip them into the warm chocolate. This ensures that the chocolate shell sets quickly and uniformly without melting the delicate peanut butter center underneath.
What is the best way to store them?
Store your Butterfinger Balls in an airtight container in the refrigerator for up to two weeks. Keep a piece of parchment paper between layers if you are stacking them. If you want to keep them longer, they freeze beautifully for up to three months; just let them come to room temperature briefly before serving.
Can I use milk instead of dark chocolate?
Absolutely! You can use milk chocolate or semi-sweet chocolate based on your preference. Dark chocolate provides a lovely contrast to the sweetness of the peanut butter and candy, but milk chocolate offers a classic, sweeter candy-bar flavor. Both work perfectly, just ensure you use high-quality melting chocolate for the best texture and finish.
Love This Recipe? Save It to Pinterest!
Pin it now so you can find it again anytime!
I hope you love these treats! Leave a comment below with your favorite way to serve them!
From my NYC kitchen to yours — I hope this recipe brings as much warmth to your table as it does to mine. — mia 🧡

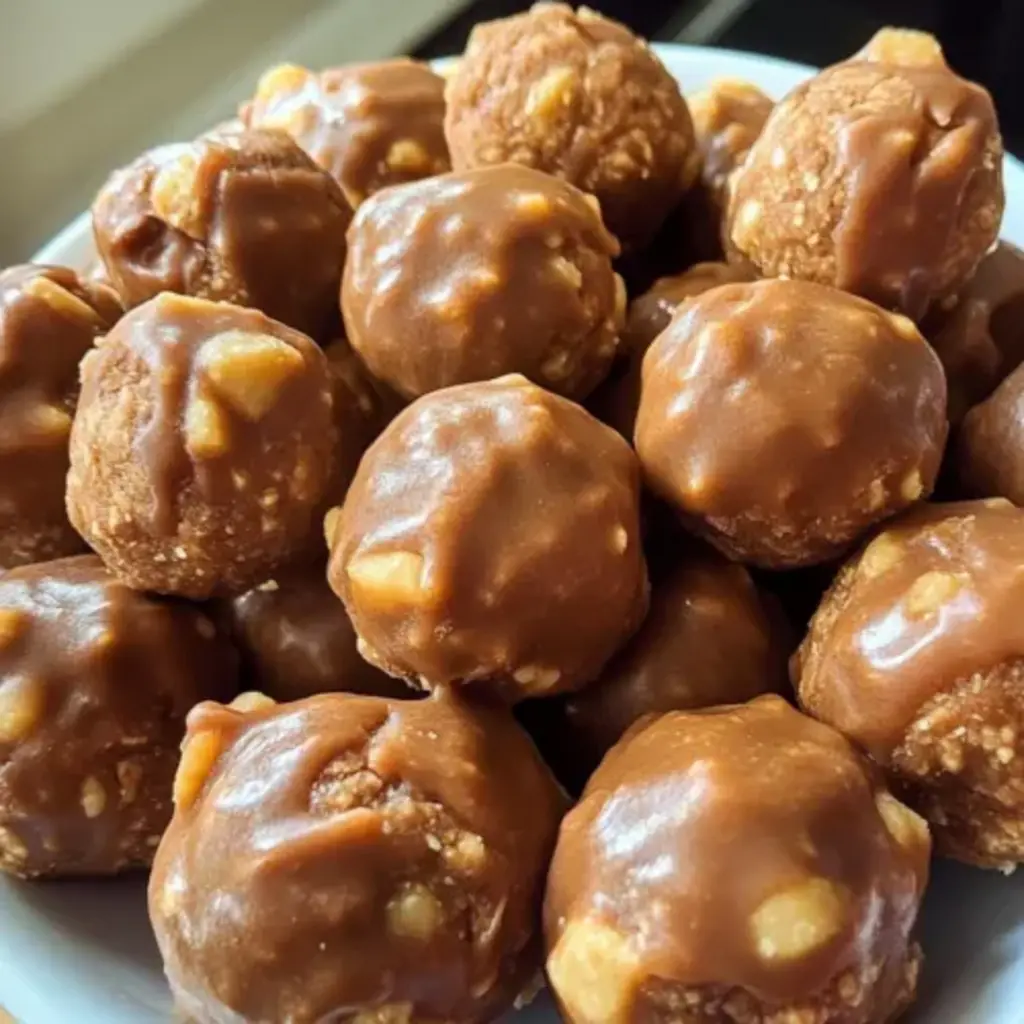
Butterfinger Balls
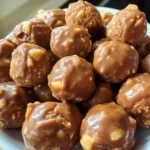
Indulge your taste buds with these irresistible Butterfinger Bliss Balls, where creamy peanut butter harmoniously melds with the crunch of graham crackers and Butterfinger candy bars, all cloaked in sumptuous melted chocolate. Perfect for social soirées and festive occasions, these heavenly morsels will vanish before you know it!
Ingredients
- 4 tablespoons softened butter (½ stick)
- 1 teaspoon vanilla extract
- 8 ounces chocolate bark or chocolate chips
- ½ cup Butterfinger bars (crushed)
- 1 cup powdered sugar
- 1 cup peanut butter (avoid all-natural varieties)
- ¾ cup crumbs from graham crackers
- Optional garnishes: additional crushed Butterfinger bars (festive sprinkles, or coarse sea salt)
Instructions
- Prepare the Dough: In a mixing bowl, combine the peanut butter and softened butter. Use an electric or stand mixer set to medium speed and blend until the mixture is creamy and uniform.
- Add Aromatic Notes: Incorporate the vanilla extract and blend thoroughly.
- Sweeten the Deal: Gradually add the powdered sugar in increments, blending at a low speed. Don't forget to scrape down the sides of the bowl to ensure even mixing.
- Crunch Time: Gently fold in the graham cracker crumbs and crushed Butterfinger bars.
- Shape 'em Up: Align a large cookie sheet with parchment paper. Scoop out approximately 1 to 1½ tablespoons of the dough, roll into neat balls, and place on the cookie sheet.
- Chilling Phase: Freeze the dough balls on the sheet for roughly 30 minutes until they are completely firm.
- Melting the Chocolate
- Chocolate Symphony: Once the dough balls are chilled, proceed to melt the chocolate. Utilize a microwave-safe bowl and heat in 30-second spurts at 50% power, stirring in between each interval. Be cautious not to overheat; some lumps should remain and will melt as you stir.
- Coat and Decorate: Submerge each chilled ball into the luscious melted chocolate. You can fully coat them or leave a bit of the peanut butter mixture exposed.
- Finishing Touches: Add a sprinkle of additional crushed Butterfinger bars, holiday-themed sprinkles, or a dash of flaky sea salt for that extra pop.
- The Grand Finale: Allow the chocolate to solidify completely before indulging in your Butterfinger Bliss Balls.
Tried This Recipe? Leave a Comment!
Did you make this recipe? I’d love to hear how it turned out! Please leave a comment and a rating below. Your feedback helps other home cooks and supports cheerychop.com!
For more delicious inspiration, follow me on Pinterest!