Table of Contents
Chicken Chimichangas (Baked or Fried) – Easy Recipe

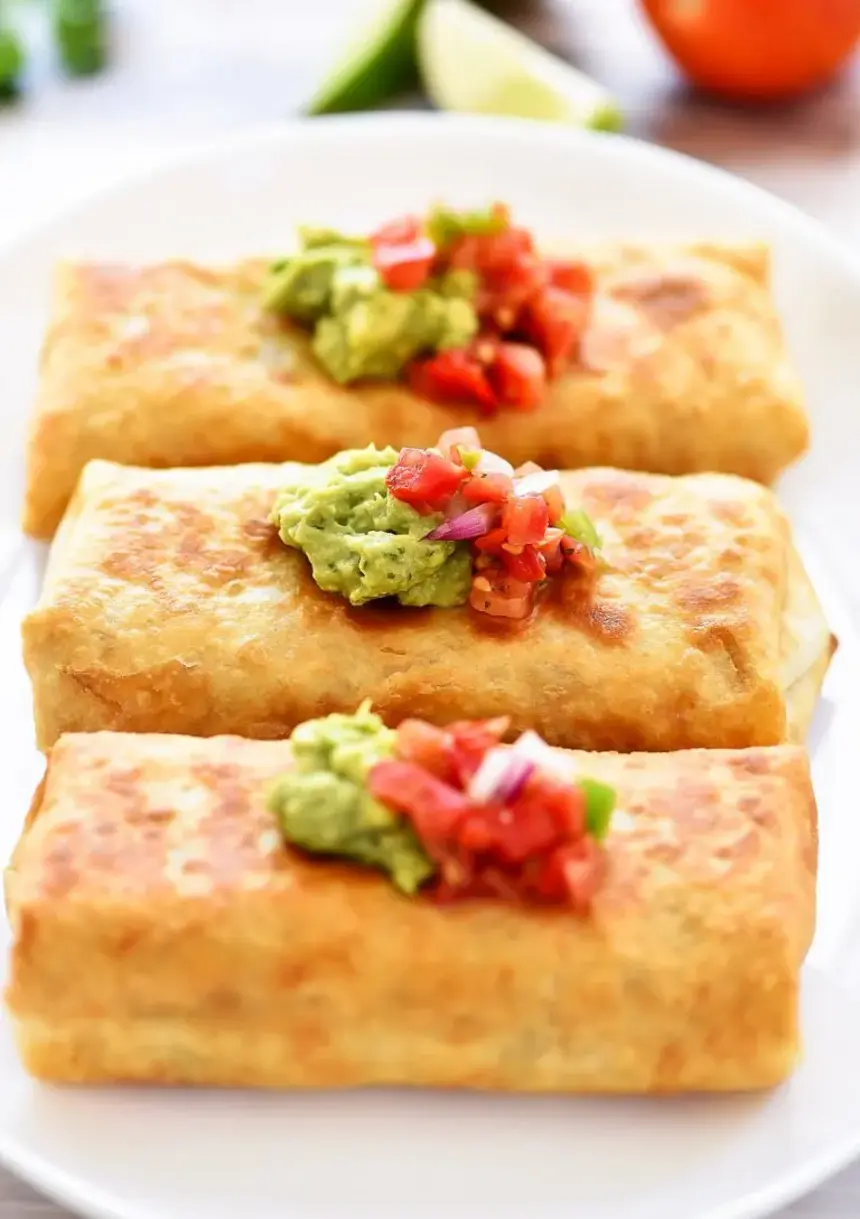
Let me tell you about the first time I made Chicken Chimichangas in my tiny NYC apartment. I had just returned from a weekend trip to a little taquería in Brooklyn that served the most incredible crispy tortillas overflowing with seasoned chicken and melted cheese. I knew right then that I had to recreate that magic at home. These Chicken Chimichangas are everything I love about Tex-Mex comfort food — crunchy golden exteriors, a warm savory filling, and that glorious moment when you cut into one and the cheese pulls in long ribbons. Whether you choose to make Baked Chicken Chimichangas for a lighter meal or Fried Chicken Chimichangas for that classic deep-fried indulgence, this Easy Chicken Chimichangas recipe delivers restaurant-quality results every single time.
Imagine this: a warm flour tortilla wrapped around tender shredded chicken seasoned with chili powder, cumin, and garlic, then packed with Monterey Jack cheese. The whole thing is crisped to perfection — either in a hot skillet of oil or baked until golden in the oven. The aroma alone will have everyone hovering around the kitchen. Growing up in Morocco, my mother often made stuffed pastries that crackled when you bit into them, and that same satisfying crunch is what I chase in every chimichanga I make. My French culinary training taught me the importance of balance and precision, so I carefully layer each spice so the chicken shines without being overwhelmed. These Homemade Chicken Chimichangas are the kind of meal that turns a regular Tuesday into something special.
I have tested this Best Chicken Chimichangas recipe dozens of times — through trial and error in my own kitchen — so you can skip the guesswork. I will show you exactly how to fold, fry, and bake them so they hold together beautifully and come out crisp every time. Whether you are looking for a Quick Chicken Chimichangas weeknight dinner or planning to impress guests with Restaurant style Chimichangas, this guide has you covered. I also share my favorite make-ahead tips so you can prep these for busy evenings. If you love bold Mexican flavors, be sure to check out my Easy Beef Enchiladas for another crowd-pleasing dinner idea. Let me walk you through everything you need to know to make these Authentic Chicken Chimichangas shine.
Why This Chicken Chimichangas Recipe Is the Best
The real secret behind these Chicken Chimichangas is the way I season the shredded chicken. Instead of relying on a single chili powder, I build the flavor layer by layer — starting with sautéed white onion and garlic, then adding oregano, cumin, and just the right amount of heat from diced green chilies. This is a technique I learned during my years working in a Parisian kitchen, where even the simplest fillings were treated with care. The result is a savory, aromatic chicken mixture that tastes far more complex than the short ingredient list suggests. Every bite of these Copycat Chimichangas recipe delivers that deep, rounded flavor you expect from a great taquería, but made right in your own kitchen.
Texture is everything with Chicken Chimichangas, and I have perfected the balance between a crisp shell and a moist, tender filling. The tortillas are warmed so they become pliable, then filled generously and rolled tightly so nothing leaks out during cooking. Whether you choose to deep fry or bake, the exterior turns beautifully golden while the inside stays juicy and cheesy. If you are making Baked Chicken Chimichangas, a light spray of oil on the tops helps them brown evenly. For Fried Chicken Chimichangas, I recommend holding each one seam-side down with tongs for the first few seconds so the seal sets immediately. That little trick comes from years of trial and error — and it makes all the difference.
This recipe is also incredibly forgiving for home cooks of any skill level. The filling comes together in about ten minutes, and if you use a rotisserie chicken, you save even more time. I have made these Chicken Chimichangas with Monterey Jack cheese dozens of times, and I have tested substitutions for every ingredient so you can adapt based on what is in your fridge. Whether you are feeding a crowd on game day or meal-prepping for the week, these chimichangas freeze beautifully and reheat like a dream. For another Mexican favorite that works well for batch cooking, try my Homemade Salsa Verde — it is the perfect topping for these chimichangas.
Chicken Chimichangas Ingredients
I source most of my ingredients from the Union Square Greenmarket and my local spice shop in NYC. The quality of your spices and cheese really does matter here — fresh cumin and a good block of Monterey Jack make these Chicken Chimichangas taste noticeably better. Whenever I visit the market, I grab extra green chilies and cilantro, because once you start making these, you will want them on repeat. Let me walk you through every ingredient so you know exactly what to look for.
Ingredients List
- 1 to 2 cups vegetable oil, divided
- 1/2 cup diced white onion
- 2 teaspoons minced garlic
- 1/2 Tablespoon chili powder
- 1/4 teaspoon oregano
- 1/2 teaspoon ground cumin
- 4 cups cooked, shredded chicken (a rotisserie chicken works perfect for this)
- 1 teaspoon salt
- 1/2 teaspoon pepper
- 1 can (4 ounces) diced green chilies
- 8 (burrito-size) flour tortillas, warmed
- 2 cups shredded Monterey Jack cheese
- salsa, sour cream, guacamole, pico, lettuce, etc.
Ingredient Spotlight
The shredded chicken is truly the heart of these Chicken Chimichangas. I love using a rotisserie chicken from the grocery store because it is already seasoned and incredibly moist. Just remove the skin, shred the meat with two forks, and you are ready to go. If you have leftover roasted chicken or cooked chicken breasts, those work beautifully too. The key is to warm the chicken through with the spices so it absorbs all the flavor.
Monterey Jack cheese is my top choice for Chicken Chimichangas with Monterey Jack cheese because it melts so smoothly without becoming greasy. Its mild, buttery flavor pairs perfectly with the spiced chicken. You can also use a Mexican blend, pepper jack for heat, or even cheddar in a pinch. Just avoid pre-shredded cheese if possible — it contains anti-caking agents that prevent smooth melting.
Burrito-size flour tortillas are essential for wrapping these generously filled chimichangas. They need to be large enough to hold a full half-cup of filling plus cheese, and they must be warmed before folding so they do not crack. I warm mine in the microwave wrapped in a damp paper towel for about 30 seconds. If you prefer gluten-free tortillas, look for large gluten-free wraps that are pliable enough to fold without breaking.
| Original Ingredient | Best Substitution | Flavor / Texture Impact |
|---|---|---|
| Shredded chicken | Shredded pork or jackfruit (vegan) | Pork adds richness; jackfruit changes texture but works with spices |
| Monterey Jack cheese | Pepper jack, cheddar, or vegan shreds | Pepper jack adds heat; cheddar is sharper; vegan shreds melt differently |
| Flour tortillas | Gluten-free wraps or corn tortillas | Corn tortillas are smaller and more fragile; gluten-free wraps vary |
| Diced green chilies | Chopped jalapeño or bell pepper (mild) | Jalapeño adds more heat; bell pepper is sweeter and milder |
How to Make Chicken Chimichangas — Step-by-Step
Making these Chicken Chimichangas is easier than you might think. I have broken down every stage so you can follow along with confidence, whether you are frying, baking, or even air-frying. Let us get started.
Step 1: Prepare Oil and Oven
In a large cast iron or heavy-bottom skillet, pour in enough vegetable oil to fill it about 2 inches deep. Heat the oil over low heat, aiming for 375 degrees F. This slow heating is important — it gives the oil time to reach a steady temperature so your Chicken Chimichangas fry evenly. While the oil heats, preheat your oven to 375 degrees F and grease a large baking sheet with nonstick spray. This dual preparation allows you to either fry or bake your chimichangas depending on your preference.
💡 Lora’s Pro Tip: Use a deep-fry or candy thermometer to monitor the oil temperature. If the oil is too cool, the tortillas absorb grease and turn soggy. Too hot, and the outside burns before the cheese melts inside. 375°F is the sweet spot for perfectly crispy Chicken Chimichangas.
Step 2: Cook the Chicken Filling
In a separate large skillet, heat 2 tablespoons of vegetable oil over medium-high heat. Add the diced white onion and cook until it softens and turns translucent, about 3 minutes. Stir in the minced garlic, chili powder, oregano, and cumin, cooking for about a minute until the spices become fragrant. Add the 4 cups of shredded cooked chicken, season with salt and pepper, then stir in the diced green chilies. Continue cooking the mixture for another 5 minutes, stirring occasionally, until everything is thoroughly heated and the flavors have melded together. Set the filling aside while you prepare the tortillas.
⚠️ Common Mistake to Avoid: Do not skip toasting the spices. Adding chili powder, cumin, and oregano directly to the hot oil and onion releases their essential oils, intensifying their flavor. If you add them too late or without heat, the Chicken Chimichangas filling can taste flat and dusty rather than vibrant and aromatic.
Step 3: Warm and Fill Tortillas
Warm the burrito-size flour tortillas in the microwave for about 30 seconds, wrapped in a damp paper towel, so they become soft and flexible. Place one tortilla on a clean work surface and spoon about 1/2 cup of the chicken mixture into the center. Top with about 3 tablespoons of shredded Monterey Jack cheese. Fold the sides of the tortilla over the filling, then fold the bottom flap over the sides and roll the whole thing up tightly. Place each finished chimichanga seam side down on a large plate or platter and repeat with the remaining tortillas and filling.
💡 Lora’s Pro Tip: Do not overfill your tortillas. A generous half-cup of filling plus cheese is plenty. If you pack them too full, the tortilla can tear during folding or cooking, and the filling may leak out into the oil or onto the baking sheet. Tight, neat rolls make for the prettiest and most reliable Chicken Chimichangas.
Step 4: Fry or Bake
For Fried Chicken Chimichangas: Using tongs, lower one chimichanga at a time into the hot oil, seam side down. Hold it gently with the tongs for the first 15 seconds to help the seal set so it does not open during frying. Cook until golden brown on the first side, about 1 to 2 minutes, then carefully flip and fry the other side until equally golden. Transfer the fried chimichangas to a paper towel-lined plate to drain excess oil. For Baked Chicken Chimichangas: Place the wrapped chimichangas on the greased baking sheet with the seam side down. Spray the tops lightly with nonstick cooking spray. Bake in the preheated oven for 20 to 30 minutes, turning once halfway through, until the tortillas are golden brown and crisp.
⚠️ Common Mistake to Avoid: For the fried version, do not crowd the pan. Fry one or two chimichangas at a time so the oil temperature stays steady. Adding too many at once drops the temperature drastically, resulting in greasy, soggy Chicken Chimichangas instead of the light, crispy texture you want. Patience pays off here.
Step 5: Serve and Enjoy
Transfer your cooked Chicken Chimichangas to serving plates or a large platter. Let them rest for about two minutes before cutting — this helps the cheese set slightly so the filling stays intact when you slice into them. Top with your favorite garnishes like salsa, sour cream, guacamole, pico de gallo, shredded lettuce, or fresh cilantro. Serve warm and watch everyone reach for seconds.
💡 Lora’s Pro Tip: For a beautiful presentation, drizzle crema or sour cream over the top and sprinkle with chopped cilantro and crumbled cotija cheese. A squeeze of fresh lime juice right before serving brightens all the flavors and gives your Homemade Chicken Chimichangas that restaurant-style finish.
| Step | Action | Duration | Key Visual Cue |
|---|---|---|---|
| 1 | Heat oil & preheat oven | 10–15 min | Oil reaches 375°F; oven fully preheated |
| 2 | Cook chicken filling | 10 min | Onion softened; spices fragrant; chicken heated through |
| 3 | Warm tortillas & fill | 8–10 min | Tortillas pliable; rolls tight and neat |
| 4 | Fry or bake | 2–4 min fry / 20–30 min bake | Deep golden brown on all sides |
| 5 | Rest, garnish & serve | 2 min rest | Cheese slightly set; toppings fresh |
Serving & Presentation
Serving these Chicken Chimichangas is where you can really have fun. I like to arrange them on a large platter with individual bowls of salsa, sour cream, guacamole, and pico de gallo so everyone can customize their own plate. A handful of shredded lettuce, a drizzle of crema, and a scatter of fresh cilantro make the presentation pop. In my NYC home, I often serve these alongside Mexican rice and refried beans for a complete feast that feels like a celebration.
The contrast between the crunchy tortilla and the cool, creamy toppings is what makes every bite so satisfying. I always include a few lime wedges on the side — a bright squeeze of citrus cuts through the richness of the cheese and the savory chicken. If I am hosting friends, I sometimes set up a chimichanga bar with multiple toppings and let everyone build their own plate. It is effortless entertaining that always gets rave reviews.
| Pairing Type | Suggestions | Why It Works |
|---|---|---|
| Side Dish | Mexican rice, refried beans, cilantro lime rice | Absorbs extra sauce and rounds out the meal |
| Sauce / Dip | Salsa verde, crema, chipotle ranch, enchilada sauce | Adds moisture, heat, and tangy contrast |
| Beverage | Margarita, cold beer, agua fresca, horchata | Cuts through richness and refreshes the palate |
| Garnish | Cilantro, cotija cheese, lime wedges, pickled jalapeños | Adds color, acidity, and a salty finish |
Make-Ahead, Storage & Reheating
Living in NYC means my schedule is always full, so I rely on make-ahead meals that save time without sacrificing flavor. These Chicken Chimichangas are perfect for prepping in advance. You can assemble them completely, then refrigerate or freeze them until you are ready to cook. I often make a double batch on Sunday so I have a quick dinner ready for busy weeknights.
| Method | Container | Duration | Reheating Tip |
|---|---|---|---|
| Refrigerator | Airtight container, layered with parchment | Up to 4 days | Reheat in a 375°F oven for 10–12 minutes to restore crispness |
| Freezer | Freezer-safe bag or container, wrapped individually | Up to 3 months | Bake from frozen at 375°F for 25–30 minutes, no need to thaw |
| Make-Ahead | Baking dish, covered tightly with foil | Up to 24 hours in advance | Assemble, refrigerate, then bake just before serving — add 5 minutes to bake time |
To reheat leftover Chicken Chimichangas, skip the microwave if you can — it makes the tortilla soft and chewy instead of crisp. Instead, place them on a baking sheet in a 375°F oven for about 10 minutes, or until the exterior is crunchy again. If you are reheating from frozen, bake them straight from the freezer, adding a few extra minutes. This method keeps the texture remarkably close to fresh, which is why I always recommend making extra.
Variations & Easy Swaps
One of the things I love most about this recipe is how flexible it is. Whether you need a gluten-free option, want to try a different protein, or are looking for a dairy-free version, these Chicken Chimichangas adapt beautifully. Here are my favorite variations.
| Variation | Key Change | Best For | Difficulty Impact |
|---|---|---|---|
| Gluten-Free | Large gluten-free tortillas or wraps | Those with gluten sensitivity | Easy — same method, different tortilla |
| Vegetarian | Black beans, sweet potatoes, or jackfruit | Meat-free meals | Easy — adjust filling only |
| Spicy Chorizo | Replace chicken with cooked chorizo | Bold, smoky flavor lovers | Easy — crumble and cook chorizo first |
Gluten-Free Chicken Chimichangas
For a gluten-free version, swap the flour tortillas with large gluten-free wraps. Look for brands that are sturdy and pliable — some gluten-free tortillas crack easily when folded. Warm them thoroughly before filling so they bend without breaking. The filling itself is naturally gluten-free, so this is an easy adaptation. I tested this for a friend with celiac disease, and she said these were the best Chicken Chimichangas she had eaten in years. Serve with certified gluten-free salsa and you have a completely safe and delicious meal.
Vegetarian Black Bean Chimichangas
To make a vegetarian version, replace the shredded chicken with a mixture of seasoned black beans, roasted sweet potatoes, and sautéed onions. The beans provide protein and creaminess, while the sweet potatoes add a subtle sweetness that balances the spices. I like to mash about half the beans for a texture that mimics the shredded chicken filling. This variation is just as satisfying as the original and works beautifully for Meatless Monday dinners.
Chorizo and Potato Chimichangas
For a bold flavor twist, swap the shredded chicken for cooked Mexican chorizo and diced potatoes. Brown the chorizo in a skillet, then add small diced potatoes and cook until tender. The spicy, smoky chorizo pairs beautifully with the Monterey Jack cheese and creates a completely different but equally delicious chimichanga. This is my go-to variation when I want something heartier, and it always disappears fast at gatherings.
Share Your Version!
I hope you love these Chicken Chimichangas as much as I do. If you make them, please leave a star rating and a comment below — I read every single one and love hearing how the recipe turned out in your kitchen. Did you fry or bake? What toppings did you choose? Your feedback helps other readers decide which route to take.
Tag me on Instagram or Pinterest @ingredientidea when you share your photos. I love seeing your beautiful creations and featuring them in my stories. And if you have a question about a substitution or a technique, just ask — I am always here to help. From my NYC kitchen to yours — I hope this recipe brings as much warmth to your table as it does to mine. — Lora 🧡
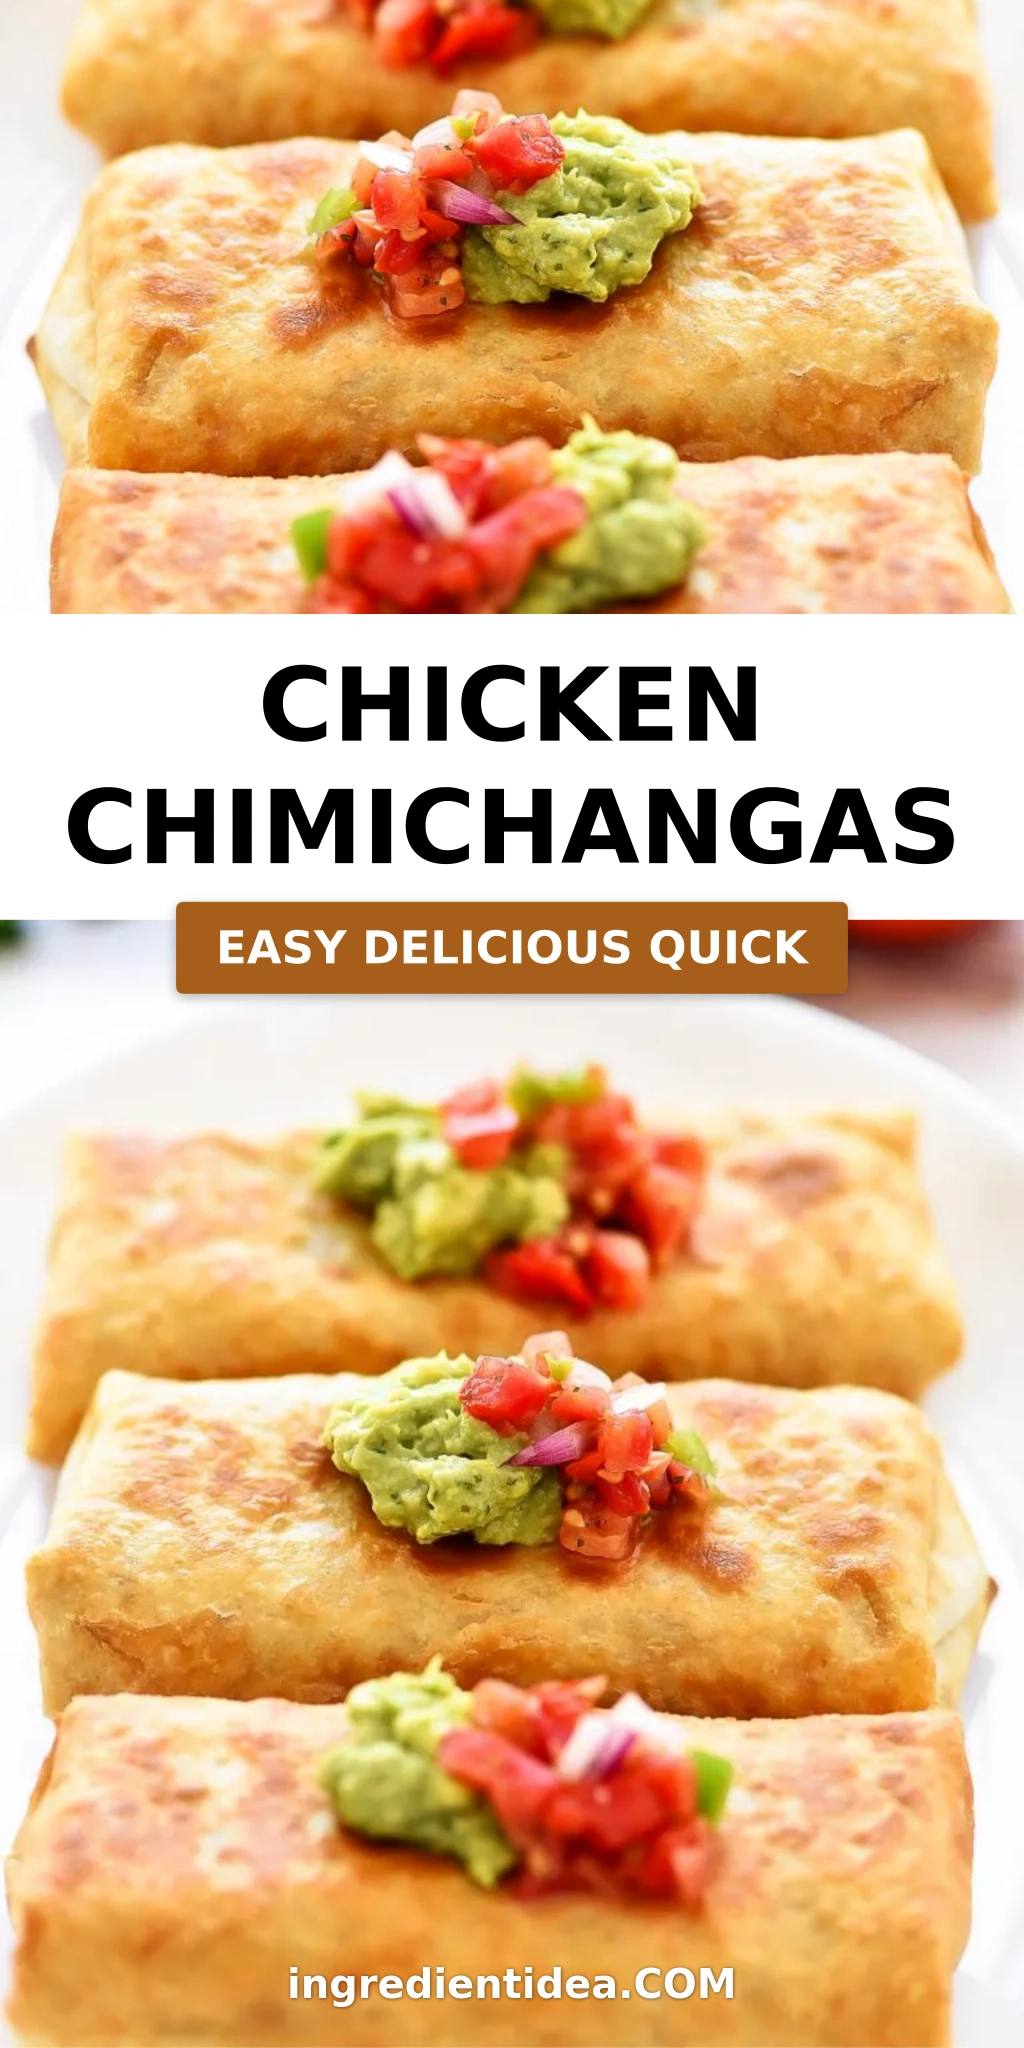
Love This Recipe? Save It to Pinterest!
If you enjoyed this Chicken Chimichangas recipe, don’t let it get lost in your browser tabs! 😄 Pin it now so you can find it again anytime — and explore hundreds more tried-and-tested recipes waiting for you on my Pinterest boards.
👉 Follow Lora on Pinterest @ingredientidea📌 Pin this recipe · 🔁 Re-pin your favorites · 💬 Tag me when you make it — I love seeing your creations!
What is the difference between a chimichanga and a burrito?
The main difference between a chimichanga and a burrito is that a chimichanga is fried or baked until crispy, while a burrito is typically served soft and wrapped. A chimichanga starts out assembled just like a burrito — with a flour tortilla wrapped around a savory filling — but then it is either deep fried or oven baked to achieve a golden, crunchy exterior. The word “chimichanga” is thought to come from Spanish meaning “thingamajig” or “trinket,” and legend says it was created by accident when a burrito fell into a deep fryer. So every Chicken Chimichangas recipe is essentially a crispy, fried burrito. The texture contrast between the crunchy shell and the soft, cheesy interior is what makes chimichangas so irresistible, while burritos remain entirely soft and pliable.
Can you bake chimichangas instead of frying?
Absolutely! Baking is a fantastic alternative to frying, and this recipe includes instructions for both Baked Chicken Chimichangas and Fried Chicken Chimichangas. To bake, simply place your assembled chimichangas on a greased baking sheet with the seam side down, spray the tops lightly with nonstick cooking spray, and bake at 375°F for 20 to 30 minutes, flipping once halfway through. The result is a beautifully golden, crisp exterior with significantly less oil than the fried version. Baked Chicken Chimichangas are lighter but still wonderfully crunchy, especially if you brush a little oil on the tortillas before baking. Many readers in my community prefer the baked method for weeknight dinners because it is hands-off and cleanup is much easier. Both methods deliver delicious results — it really comes down to your preference and how much time you have.
What kind of cheese is best for chimichangas?
Monterey Jack cheese is my top recommendation for Chicken Chimichangas with Monterey Jack cheese because it melts beautifully into a smooth, creamy layer without becoming greasy or stringy. Its mild, buttery flavor complements the seasoned chicken without overpowering it. Pepper jack cheese is a great option if you want extra heat, while cheddar adds a sharper, more pronounced flavor. A Mexican blend of shredded cheeses also works wonderfully. I recommend buying a block of cheese and shredding it yourself at home. Pre-shredded cheese often contains potato starch or anti-caking agents that prevent it from melting as smoothly, which can affect the texture of your chimichangas. For the best melt and flavor, always shred your own cheese.
How do you keep chimichangas from getting soggy?
The key to keeping Chicken Chimichangas from getting soggy lies in three important steps. First, make sure your chicken filling is well-drained and not overly wet — if you use a rotisserie chicken or cooked chicken, there should not be excess liquid. Second, warm your tortillas before filling so they become pliable and less likely to absorb moisture from the filling. Third, and most importantly, cook the chimichangas immediately after assembling them, and serve them right away. If you are frying, maintain the oil at a steady 375°F so the tortilla crisps quickly rather than absorbing oil. For Baked Chicken Chimichangas, a light spray of oil on the surface helps create a golden crust. If you need to hold them before serving, place them on a wire rack in a warm oven rather than stacking them, which traps steam and softens the exterior.
Can you freeze chicken chimichangas?
Yes, Chicken Chimichangas freeze exceptionally well, which makes them perfect for meal prep. To freeze, assemble the chimichangas completely but do not cook them yet. Wrap each one individually in plastic wrap, then place them in a freezer-safe bag or container. They will keep for up to 3 months in the freezer. When you are ready to cook, there is no need to thaw — just place the frozen chimichangas on a greased baking sheet, spray lightly with oil, and bake at 375°F for 25 to 30 minutes, or until golden brown and heated through. You can also fry them from frozen, but add an extra minute or two to the cooking time. Frozen and reheated, these Chicken Chimichangas taste remarkably close to fresh, with a crisp exterior and a warm, cheesy center. I always recommend making a double batch so you have a stash ready for busy nights.
How long do chicken chimichangas last in the fridge?
Cooked Chicken Chimichangas will last in the refrigerator for up to 4 days when stored properly in an airtight container. I recommend layering them with parchment paper so they do not stick together. For the best texture, reheat them in a 375°F oven for about 10 to 12 minutes rather than using the microwave, which tends to make the tortilla soft and chewy. If you have assembled but not yet cooked the chimichangas, you can refrigerate them for up to 24 hours before frying or baking. Just keep them covered tightly with plastic wrap or foil so the tortillas do not dry out. Leftover Chicken Chimichangas are a fantastic lunch the next day — just reheat and add fresh toppings for a meal that tastes almost as good as the original.
Can I use corn tortillas for chimichangas?
You can use corn tortillas for Chicken Chimichangas, but there are a few things to keep in mind. Corn tortillas are smaller and more brittle than flour tortillas, so they are more likely to crack when folded and rolled. To minimize breakage, warm the corn tortillas thoroughly — either in a dry skillet or wrapped in a damp towel in the microwave — until they are very pliable. You may need to use two corn tortillas per chimichanga, overlapping them slightly, to create a large enough surface for the filling. The flavor of corn tortillas is earthier and more pronounced than flour, which adds a different but delicious dimension to the dish. If you are looking for an Authentic Chicken Chimichangas experience, flour tortillas are the traditional choice, but corn tortillas can work beautifully with careful handling.
What should I serve with chicken chimichangas?
Chicken Chimichangas pair wonderfully with a wide variety of sides and toppings. Classic accompaniments include Mexican rice, refried beans, or cilantro lime rice to round out the meal. For toppings, I love offering salsa, sour cream, guacamole, pico de gallo, shredded lettuce, and fresh cilantro so everyone can customize their plate. A drizzle of crema or a sprinkle of cotija cheese adds a finishing touch. When it comes to beverages, a cold margarita, a crisp beer, or a refreshing agua fresca like horchata or hibiscus complements the bold flavors beautifully. If you are serving these for a party or family dinner, set up a chimichanga bar with all the toppings and let guests build their own plates. It is interactive, fun, and always a hit.
Are chimichangas Mexican or Tex-Mex?
Chimichangas are widely considered a Tex-Mex creation, though their exact origin is debated. The most popular story credits a restaurant in Arizona called El Charro, where a burrito was accidentally dropped into a deep fryer in the 1920s, and the crispy result became known as a chimichanga. While deep-fried tortillas exist in various Mexican regional cuisines, the specific combination of a large flour tortilla filled with seasoned meat, cheese, and chilies, then fried until golden, is characteristic of Tex-Mex cooking. Today, Chicken Chimichangas are beloved across the United States and beyond, appearing on menus from casual taquerías to upscale Southwestern restaurants. They represent the delicious fusion of Mexican ingredients and American innovation, and this Easy Chicken Chimichangas recipe honors that tradition while keeping the preparation accessible for home cooks.
Can I make chicken chimichangas in an air fryer?
Yes, you can absolutely make Chicken Chimichangas in an air fryer, and it is a fantastic way to achieve a crispy exterior with very little oil. To air fry, preheat your air fryer to 375°F. Lightly spray or brush the assembled chimichangas with oil on all sides. Place them in a single layer in the air fryer basket — do not overcrowd, as this prevents proper air circulation. Cook for 8 to 12 minutes, flipping halfway through, until the tortillas are golden brown and crisp. The exact time will depend on the size of your air fryer and how many chimichangas you cook at once. Air-fried Chicken Chimichangas are every bit as crunchy as the fried version, with the added bonus of using significantly less oil and being quicker than the oven method. This is my go-to method when I am making just a few for myself on a busy weeknight.
Chicken Chimichangas
Chicken Chimichangas are stuffed with flavorful shredded chicken and Monterey Jack cheese. You can make these two ways: baked or fried!
Ingredients
- 1 to 2 cups vegetable oil, divided
- 1/2 cup diced white onion
- 2 teaspoons minced garlic
- 1/2 Tablespoon chili powder
- 1/4 teaspoon oregano
- 1/2 teaspoon ground cumin
- 4 cups cooked, shredded chicken ((a rotisserie chicken works perfect for this) )
- 1 teaspoon salt
- 1/2 teaspoon pepper
- 1 can (4 ounces) diced green chilies
- 8 (burrito-size) flour tortillas, warmed
- 2 cups shredded Monterey Jack cheese
- salsa, sour cream, guacamole, pico, lettuce, etc.
Instructions
- In a large, cast iron OR heavy-bottom skillet, pour in enough vegetable oil to fill it 2 inches full of oil. Heat oil over low heat. (This will be the oil you fry the chimichangas in. The oil needs to slowly reach about 375 degrees F.)
- Preheat oven to 375 degrees F. Grease a large baking sheet with nonstick spray. Set aside.
- In a separate large skillet, heat 2 tablespoons of vegetable oil over medium-high heat. Add the diced onion and cook until slightly softened. Add in garlic, chili powder, oregano and cumin. Stir and cook until fragrant, about 1 minute. Add the shredded, cooked chicken. Season with salt and pepper. Stir in the green chilies and continue to stir and cook mixture for another 5 minutes, or until thoroughly heated. Set aside.
- Warm tortillas in the microwave. On each tortilla, add about 1/2 cup of the chicken mixture into the center. Top with 3 tablespoons of the shredded Monterey jack cheese. Fold sides over the mixture, then fold bottom over the sides and roll up. Place folded chimichangas, seam side down on a large plate/platter, and repeat with remaining tortillas.
- Using tongs, lower one chimichanga at a time, into the hot oil, seam side down. (*It is helpful to hold them with the tongs while they are in the oil to prevent them from opening.*) Carefully fry chimichanga until golden brown on both sides; about 1 to 2 minutes. Transfer the fried chimichangas onto a paper towel lined plate to soak up grease.
- Place the wrapped chimichangas onto a lightly greased baking sheet. Spray the tops with non-stick spray. Bake in preheated oven for 20 to 30 minutes, or until golden brown.
- Serve chimichangas warm with your favorite toppings. Enjoy!
Tried This Recipe? Leave a Comment!
Did you make this recipe? I’d love to hear how it turned out! Please leave a comment and a rating below. Your feedback helps other home cooks and supports cheerychop.com!
For more delicious inspiration, follow me on Pinterest!