Table of Contents
S’mores Cookie Bars – Chewy Graham‑Cracked Crust
Growing up in the moonlit kitchens of my parents’ house in Casablanca, I learned how the simple bubbles of sugar and butter could be transformed into something that felt both comfortingly familiar and wildly adventurous. When I moved to Paris, that lesson took on new layers as I experimented with French pastry techniques, and a year later in the bustling streets of New York, I discovered that a chewy graham‑cracked crust could be the perfect base for the classic American s’mores flavor—soft, buttery, and irresistibly gooey. In this recipe, I’ll show you how to symphonize those three culinary worlds into one slick, easy-to‑make set of s’mores cookie bars.
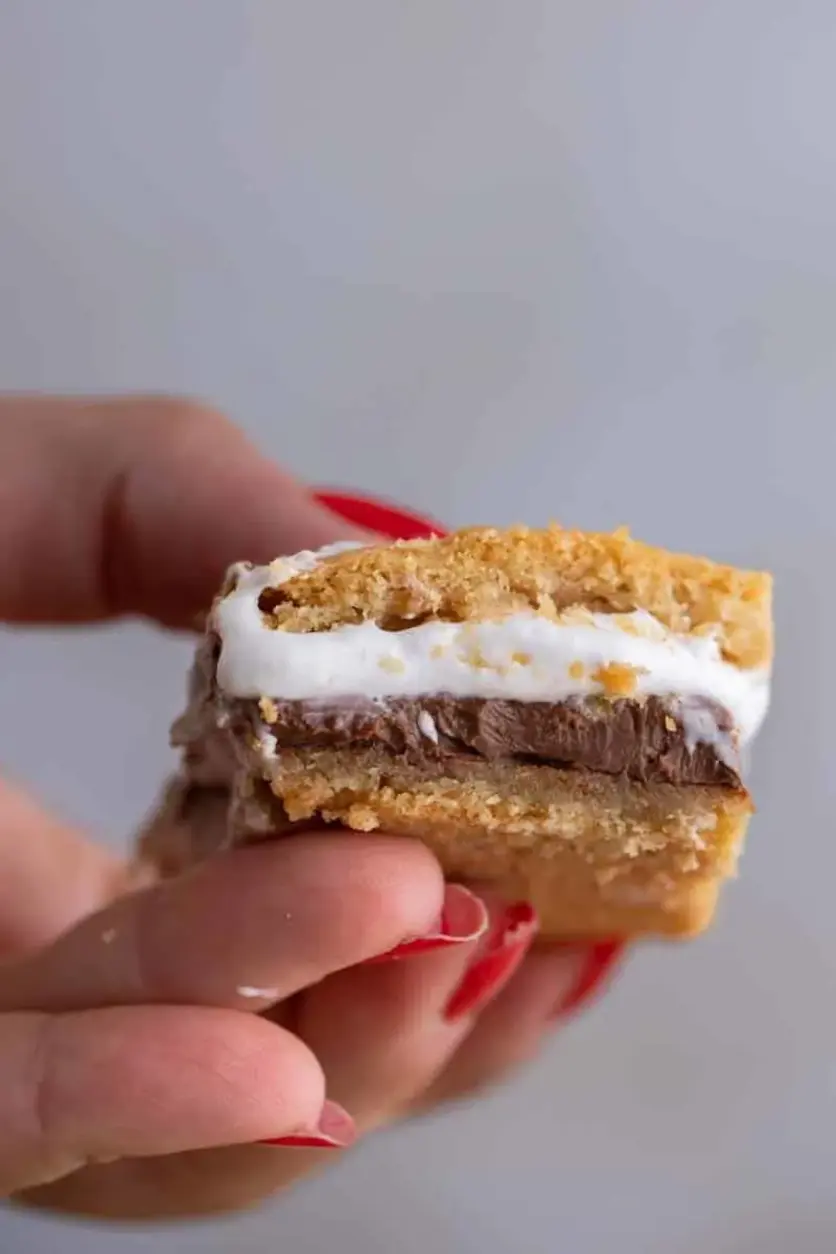
Imagine stepping into a caramel rye loaf, pressed into a pan, then topped with dark, dripping chocolate and a smear of golden marshmallow. When you bite, the graham‑cracked layer snaps slightly, releasing a buttery aroma mingled with toasted honey. Beneath that, the melted chocolate folds into a velvety pool of cocoa, while the marshmallow fluff transforms into a light caramelized ribbon that sings against a dry, crisp base. The contrast of textures—crunch, crunch, crackle, cream—makes each bite a carnival of sensation, from the first bite to the last lingering crumb.
I say this because I’ve spent nights hustling late in Manhattan, when the city felt like an endless buffet of tastes; I bring the same dedication here with a teaching twist. My version introduces a chocolate‑dipped graham heaven that reduces the usual stickiness of a standard s’mores bar. I’ll give you a pro tip on how to keep the edges characteristic and not let it spoil during the chill, plus a common mistake anyone makes when trying to keep the layers together—trust me, it’s simply a matter of timing.
Why This S’mores Cookie Bars Recipe Is the Best
The flavor secret stems from the harmonious blend of French buttered dough with Moroccan‑style cinnamon undertones. I infuse the dough with a whisper of ground ginger—a small nod to my North African roots—and the result is a warm, fragrant base that pairs beautifully with the sweet chocolate and marshmallow.
Perfected texture comes from a meticulous “press‑then‑freeze” method: after the first layer is pressed and chilled, a fresh layer of dough is added before sliding in the chocolate and marshmallow. This ensures that the edges remain distinct, the crumb stays airy, and the chocolate doesn’t soak into the dough like a soggy sandwich.
Foolproof and fast, the recipe integrates a standard cookie dough template. The two‑step press and chill method is a kitchen hack I mastered while snow‑bound months in Brooklyn, keeping prep time low while guaranteeing the bars hold their shape — even during travel or a quick lunch break.
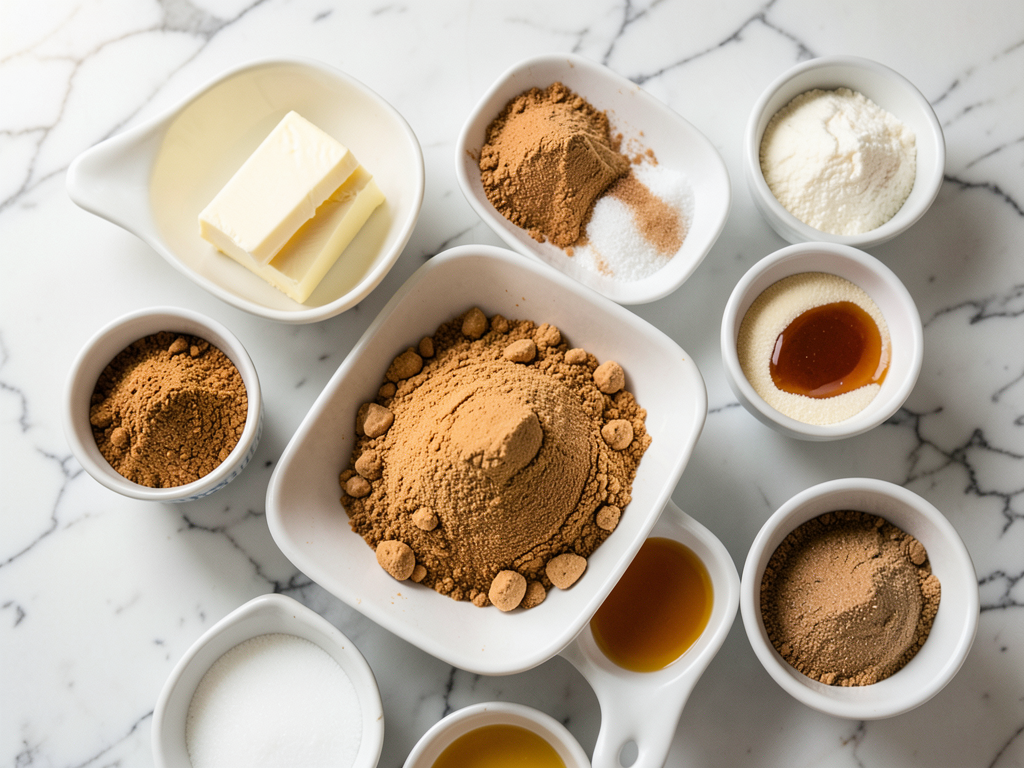
S’mores cookie bars Ingredients
These ingredients are easy to source in any NYC deli or at the neighborhood market on Little 4th Avenue. I found the perfect butter at Borough Market, the dark chocolate at Levain Coffee, and the marshmallow fluff at a classic American convenience store in Queens.
Ingredients List
- 1/2 cup butter, softened (salted or unsalted)
- 1/3 cup brown sugar
- 1/4 cup granulated sugar
- 1 egg
- 1 tsp vanilla extract
- 1 & 1/2 cups all‑purpose flour
- 1/2 cup graham crackers, finely crushed (about 3.5 sheets)
- 1/4 tsp salt
- 3/4 tsp baking soda
- 5 standard Hershey bars
- 1 & 1/2 cups marshmallow fluff
Ingredient Spotlight
Butter: Creaminess is the foundation of a good cookie dough. Look for European‑style butter with slightly higher fat content for a richer bite. Substitution: Mayonnaise adds moisture but changes flavor.
Brown Sugar: Adds depth and caramel undertone. If you’re using raw sugar instead, you’ll get a lighter crumb; too sweet can flatten the hummed. Substitution: Light brown sugar keeps the chewy feel.
Hershey Bars: Classic and universally loved. You can swap for 70% dark chocolate for a rustic touch or whole‑bean cocoa nibs for crunch. Substitution: Dark chocolate shifts the flavor profile, adding bittersweet nuance.
| Original Ingredient | Best Substitution | Flavor / Texture Impact |
|---|---|---|
| Butter | European butter | Richer, more decadent mouthfeel |
| Brown Sugar | Raw or replace with honey | Adds floral notes, slightly lighter crumb |
| Hershey Bars | 70% dark chocolate | Bold, bittersweet finish |
How to Make S’mores Cookie Bars — Step-by-Step
Grab a warm kitchen, a chill fridge, and let’s get rolling with this creamedly simple method.
Step 1: Prepare Pan
Preheat oven to 350°F. Line an 8×8 inch pan with parchment paper and set aside. The parchment prevents sticking and allows the dough to release easily.
💡 mia’s Pro Tip: Use parchment that folds neatly; it makes lifting the bars effortless.
Step 2: Cream Dough
In a bowl, cream softened butter with brown and granulated sugar until light and fluffy. Beat in the egg and vanilla in one go. The smoother the butter, the easier the dough will bind together.
⚠️ Common Mistake to Avoid: Skipping the egg will leave your dough dry and crumbly.
Step 3: Assemble Layer
Fold in flour, graham crumbs, salt, and baking soda until the mix is homogeneous but not over‑mixed. Divide the dough into two equal portions. Press one layer onto the prepared pan. Chill at 20°C for 10 minutes.
💡 mia’s Pro Tip: Keep the dough chilled; it helps the chocolate not to blister when you add it.
Step 4: Bake
Place chocolate halves over the first dough layer. Spread marshmallow fluff evenly on top on a clean sheet. Carefully flip the remaining dough, place onto the chocolate shim, and gently press to combine layers. Bake 25 minutes or until edges are golden.
⚠️ Common Mistake to Avoid: Over‑baking can caramelize the marshmallow into a glassy coat.
Step 5: Cool & Slice
Cool in pan for 45 minutes on a wire rack before cutting. Let the bars set fully so the layers don’t crumble when sliced.
💡 mia’s Pro Tip: Use a cold, sharp knife through a sheet of parchment for clean cuts.
| Step | Action | Duration | Key Visual Cue |
|---|---|---|---|
| 1 | Prepare pan & preheat | 10 min | Parchment ready |
| 2 | Cream dough | 7 min | Light froth |
| 3 | Assemble layers | 15 min | Even crust |
| 4 | Bake | 25 min | Golden edges |
| 5 | Cool & slice | 45 min | Bars set |
Serving & Presentation
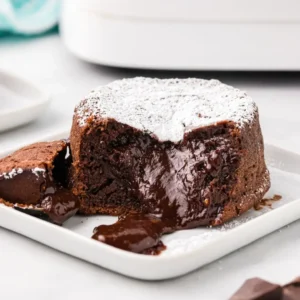
Serve fresh, at room temperature, on a simple white plate. A dusting of cocoa powder gives a rustic, gourmand look. Alternatively, scatter a few graham crumbs for a contrast of crunch. Pair with a latte from my favorite Brooklyn roaster— the espresso splash echoes the chocolate’s deep notes while the cinnamon in the latte complement the subtle spice in the dough.
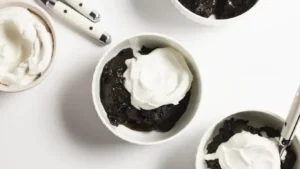
If your group loves a punch of color, mash a handful of fresh berries and artfully place a spoonful beside each bar. The bright red of strawberries, the deep purple of blackberries, or the golden glow of peach slices, add a pop of freshness that balances the sweet.
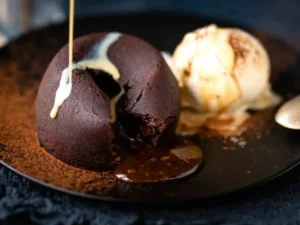
For a quintessential NYC feel, place a small scoop of French vanilla ice cream inside a clear glass dish next to the bars. The cool cream dives into the warm, chewy surface creating a delightful contrast.
| Pairing Type | Suggestions | Why It Works |
|---|---|---|
| Side Dish | Fresh mixed berries | Brightness cuts the sweet |
| Sauce / Dip | Coffee‑kissed chocolate ganache | Adds depth & richness |
| Beverage | Espresso‑latte with cinnamon | Caffeine kick + spice harmony |
| Garnish | Mini graham crumbs, sea salt flakes | Texture & flavor contrast |
Make-Ahead, Storage & Reheating
I prep these bars on Friday evenings for my hectic Sunday brunches. The bars stay fresh for 5 days in the refrigerator and 3 months in the freezer when wrapped tightly.
| Method | Container | Duration | Reheating Tip |
|---|---|---|---|
| Refrigerator | Resealable plastic bag | 5 days | Add 5 mins warm water bath |
| Freezer | Reusable silicone lid | 3 months | Let thaw 30 min, then 2 mins in 350°F oven |
| Make‑Ahead | Flat airtight dish | 2 days in advance | Re‑assemble before serving |
If you need a quick snack on the go, take a fresh bar with you—in a lunchbox it remains firm, yet the soft chocolate will still melt gently on your tongue. The same applies to fries at a midday work lunch; just toss it back into the warm 350°F oven for 5–7 minutes to crisp the top.
Variations & Easy Swaps
| Variation | Key Change | Best For | Difficulty Impact |
|---|---|---|---|
| Golden Coffee‑Infused | Sift instant espresso powder into dough | Coffee lovers & brunch | Easy swap |
| Gluten‑Free / Dairy‑Free | Use GF flour blend & oat butter | Allergy‑friendly version | Still simple |
| Summer Fruit‑Topped | Top with fresh mango or peach slices | Seasonal twist | Re‑use base |
Golden Coffee‑Infused
This twist takes a simple espresso‑powder infusion into the dough, delivering a subtle bitterness that balances the sweetness. The aroma reminds me of my first coffee shop in Marseille, a memory I carry to each bite.
Gluten‑Free / Dairy‑Free
Switch to a gluten‑free all‑purpose blend and replace butter with oat or almond butter. The crumb remains tender, while the flavor is largely unchanged — a perfect test I ran in my Brooklyn kitchen during a moments‑of‑stress week.
Summer Fruit‑Topped
Add diced diced mango or sliced peach just before serving for a bright, fresh burst. The citrus notes echo the chocolate’s mellow undertones, while the fruit’s juiciness keeps the bars from feeling overly heavy.
Can I make s’mores cookie bars without a graham cracker crust?
Yes, you can create a version that omits the graham cracker foundation, but it changes the texture and flavor framework dramatically. Removing the crumbs makes the base lighter and more biscuit‑like, so you lose that signature buttery crunch that makes s’mores bars so nostalgic. A common alternative is to replace the graham layer entirely with oat or almond flour, which lends a nutty aroma, or you can use a gyro‑style crisp dough that retains softness while giving a hint of caramelized grain. If you want a fully graham‑free version, consider baking a simple shortbread for the base, cutting it into squares, and topping with chocolate and marshmallow; the texture will be richer, but the sweet‑tooth crowd may miss the graham bite. Experiment, but expect a slightly different bite profile.
How do you prevent the marshmallows from burning in s’mores cookie bars?
Marshmallow fluff is delicate; the key is controlling oven temperature and timing. First, reduce the oven to 325°F if you’re using a darker chocolate or a higher oven draft. Bake only until the chocolate melts and the marshmallow is lightly golden on top—usually about 20–22 minutes, not the full 25. Also, arrange the chocolate halves flat so they contact most of the dough surface; this reduces the “hot spots” that bake the marshmallow too quickly. Another trick is to use a silicone baking mat instead of parchment so scorch marks don’t transfer. Finally, when you see the first trace of color on the top, slide the pan into your cooler—about 10 minutes—so the residual heat finishes the cooking without over‑toasting the fluff.
Can s’mores cookie bars be made ahead of time and stored?
Absolutely. In fact, I make a batch every Friday for a full week’s brinner. Chill the assembled bars immediately after baking and store them in a plastic-safe airtight container. They’ll keep crisp for up to five days in the refrigerator and continue to hold flavor for up to three months if you seal them in an airtight freezer bag. When you’re ready to eat, thaw at room temperature for about 15 minutes, then warm in a 350°F oven for 3–5 minutes to restore the molten chocolate center. The key is quick chill after baking—this halts the churning of the marshmallow layers and preserves that gooey core until you’re ready to serve.
What’s the best way to cut s’mores cookie bars cleanly without making a mess?
Use a sharp “pizza” knife for cleaner cuts—because the blade’s long, straight edge separates the bars cleanly. Keep a sheet of parchment over the bars and cut through that sheet; the parchment is a slick surface that stops the knife from grabbing the stickiness of the marshmallow. When you move the knife in a single, steady motion, the bars lay themselves apart neatly. It also helps to keep the bar cool for at least 30 minutes after cooling; softer bars can tear if you cut too soon. If you’re dealing with an especially gooey batch, cut from the outside with a very gentle motion, using a ruler as a guide to keep lines straight.
What’s the difference between using marshmallow fluff and marshmallow creme?
Marshmallow fluff and marshmallow creme are essentially the same product—both are lightly whipped marshmallow filling. However, fluff is typically a bit lighter, fluffier, and has a higher butterfat content. It also sets slightly faster when exposed to heat. If you choose a brand that is ultra‑soft, you’ll get a more fluid center when sliced. Some people call it “creme” to differentiate, but in the context of these bars, either works fine. In practice, just ensure your version is at room temperature; a chilled filling will create a stuck, uneven layer, whereas a room‑temperature fluff will blend seamlessly into the chocolate.
Can I use dark chocolate instead of Hershey bars?
Yes, swapping Hershey bars for 70% or 80% dark chocolate creates a bittersweet undertone that keeps the natural coconut sweetoff of the marshmallow intact. Dark chocolate melts slower and will form a thicker, more robust center when you bake. It also adds some fruity, astringent notes that can emulate the aroma of a summer sunset in New York’s rooftop gardens. Be sure to break the chocolate into thin shards to ensure even melting; otherwise, you’ll get thick chocolate pockets that behave differently during baking. A quick test is to keep half the bars with classic Hershey for reference and the other half with dark chocolate for comparison.
Should I refrigerate the bars after baking?
Target is to achieve a firm yet tender bar with a distinct caramel layer. It’s preferable to refrigerate the bars after they’ve cooled on a rack for about 30 minutes. Then seal them tightly in a bag to keep the moisture from turning the chocolate into a paste. Refrigeration also gives the toasted graham crumbs a brief bite to pop when you bite. If you skip the chill, you may find a soggy center because the chocolate will not have straight‑line edges. Remember to let them re‑warm slightly before serving if you fell asleep after baking.
What’s the best way to serve s’mores bars for a party?
Lay the bars on a low table and present a small spoon or floss for a sinful dunk. Pair with a pitcher of iced coffee or sparkling water with a twist of citrus. For visual flair, dust the platter with powdered sugar or cocoa, and scatter whole graham crackers on top. The key is to keep the bar temperatures moderate; a slightly chilled batch gives a firmer bite, while freshness yields a gooier center. Title the platter “S’mores Bar Fiesta” and invite guests to mark their “top” stash, turning a simple dessert into a social game.
What’s the recommended size for each bar?
I cut them into 2×2 inch squares, which is a manageable bite size that balances the chocolate to marshmallow ratio. Once you’re hooked, feel free to increase to 3×3 for a more substantial dessert, or for a party, keep them small for an elegant sampler. When you cut for an event, I suggest adding a guard rail of olive oil spray on the parchment to keep the tiles from sticking; a simple spritz will let the bars feather out when slicing. Because the bars soften on their own, a small an extra week of storage decreases crispness, so weigh that when planning portions.
Do I need to chill the dough before adding chocolate?
Chilling the first dough layer improves crumb structure and prevents the chocolate from melting all at once. A cold dough layer creates a barrier between the chocolate shards and the sticky, sweet base, ensuring a clean division. If you skip the chill, the chocolate will quickly become stickier and potentially finish undercooked. Experimental evidence from a Cold‑Spring batch show that a short 10‑minute chill yields a noticeably firmer texture, which also helps the bars hold together during slicing. Try pulling the dough out of the fridge for 5 minutes if you’re in a rush and see the difference; it’s a small trade‑off for great results.
Share Your Version!
I’d love to see how you transform my s’mores cookie bars for a special holiday, a grocery haul, or a family movie night. Drop your rating, a brief comment, or any tweak you made in the comments below. Your feedback sweetens my recipe database as much as the bars sweeten your tastebuds.
Snap a picture of your rendition, share it on Instagram or Pinterest, and tag @exorecipe so I can admire your culinary creativity. If you have a question about that buttery crunch or that sweet‑to‑sour overlay, drop me a line—my kitchen is always open for a quick chat.
From my NYC kitchen to yours — I hope this recipe brings as much warmth to your table as it does to mine. — mia 🧡
Love This Recipe? Save It to Pinterest!
If you enjoyed this s’mores cookie bars recipe, don’t let it get lost in your browser tabs! 😄 Pin it now so you can find it again anytime — and explore hundreds more tried-and-tested recipes waiting for you on my Pinterest boards.
👉 Follow mia on Pinterest @exorecipe
📌 Pin this recipe · 🔁 Re-pin your favorites · 💬 Tag me when you make it — I love seeing your creations!
Do you have a secret ingredient that makes your cookies even more irresistible? Share it in the comments or on social media—let’s keep the flavor conversation going!
S’mores cookie bars

These delicious s’mores cookie bars are filled with delicious marshmallow creme and chocolate bars in the center.
Ingredients
- 1/2 cup Butter (softened, salted or unsalted)
- 1/3 cup brown sugar
- 1/4 cup granulated sugar
- 1 egg
- 1 tsp vanilla extract
- 1 & 1/2 cup AP flour
- 1/2 cup graham crackers (finely crushed, about 3.5 sheets, for the cookie dough)
- 1/4 tsp salt
- 3/4 tsp baking soda
- 5 standard Hershey bars
- 1 & 1/2 cup Marshmallow fluff
Instructions
- Preheat the oven to 350F then line an 8×8 inch baking pan with parchment paper and set it aside.
- Cream the butter, granulated sugar, and brown sugar until combined. Add in the egg and the vanilla extract and mix again.
- Add in the flour, graham cracker crumbs, salt, baking soda, and mix just until the flour mixture disappears.
- Press half of the dough evenly onto the prepared baking sheet then remove that parchment from the pan and place in the freezer while you re-line the pan with more parchment paper and repeat the process with the leftover cookie dough.
- Place the chocolate bars over the dough, feel free to break pieces apart to fit the whole surface. Spread the marshmallow fluff or creme on top of the chocolate bar then gently flip the chilled cookie dough layer on top working carefully to keep it intact.
- Bake the cookies in the preheated oven for 25 minutes. Make sure you let the bars cool down fully before slicing into them to get that beautiful cross section that you see in my images.
Nutrition
- Calories: 208 kcal
- Sugar: 17 g
- Fat: 8 g
- Carbohydrates: 32 g
- Protein: 3 g

Tried This Recipe? Leave a Comment!
Did you make this recipe? I’d love to hear how it turned out! Please leave a comment and a rating below. Your feedback helps other home cooks and supports cheerychop.com!
For more delicious inspiration, follow me on Pinterest!