Table of Contents
Brown Butter Chocolate Chip Cookies: The Secret to Chewy Perfection
Oh, these brown butter chocolate chip cookies! They transport me back to my mother’s kitchen in Morocco, where the air was always thick with the scent of butter caramelizing, a foundational aroma that hinted at the magic to come. While her couscous was legendary, her simple butter cookies were a childhood delight. Decades later, living in bustling New York City, I’ve transformed that memory into what I believe are the ultimate chewy chocolate chip cookies. My journey through pastry school in Paris taught me the precision of technique, but it’s the bold flavors you find on every NYC street corner that inspire me to push boundaries. This recipe takes the humble chocolate chip cookie and elevates it with the nutty, complex depth of browned butter, a shortcut to incredible flavor that requires no mixer and no chilling time whatsoever. Get ready for your new favorite homemade cookie!
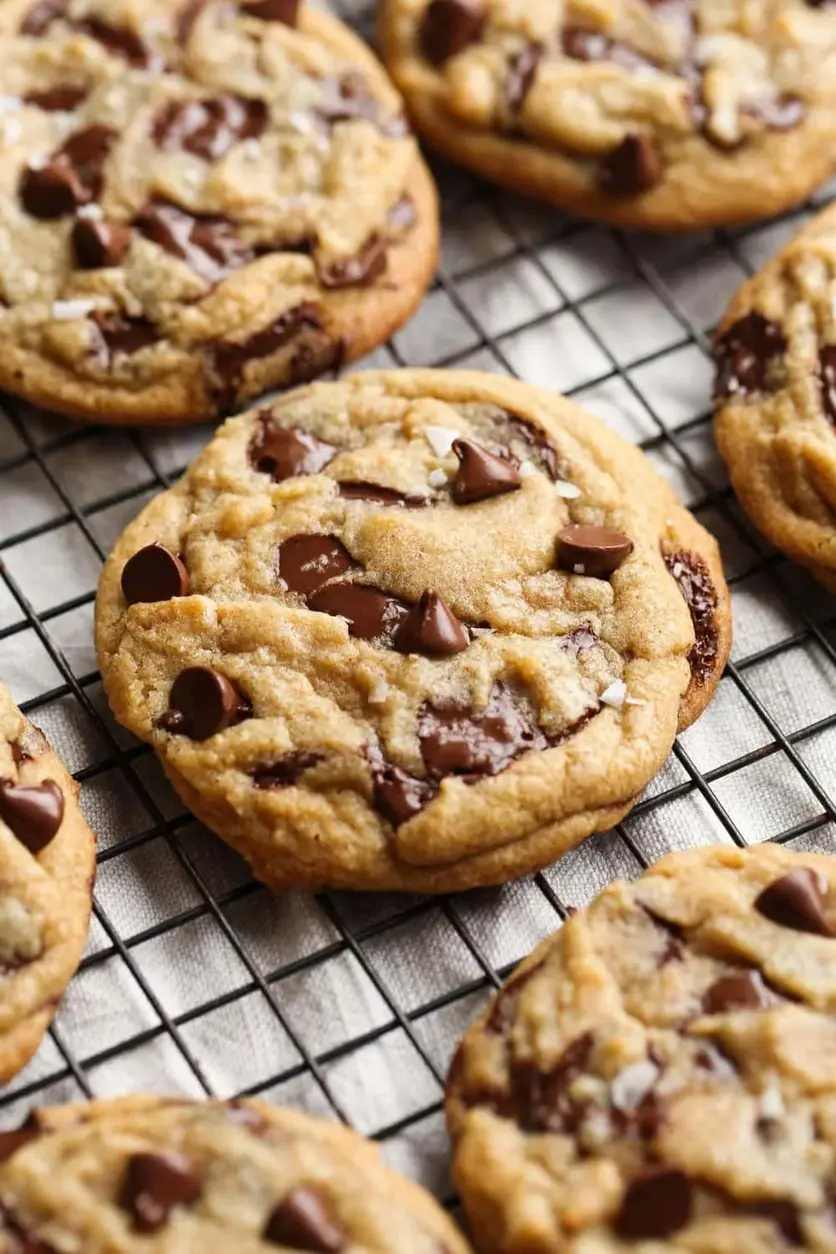
Imagine biting into a cookie that’s perfectly crisp around the edges, yet delightfully soft and chewy at its center. The aroma alone is intoxicating – a rich, toasted, nutty perfume that’s miles away from plain butter. That toasty richness comes from the Maillard reaction, the same magic that browns meat and caramelizes onions, but here it’s coaxed from simple butter. We’ll achieve this with a straightforward stovetop method, letting the butter transform into a gorgeous amber liquid. Paired with the sweetness of brown and granulated sugars, the richness of eggs, and the comforting hug of vanilla, these cookies are pure bliss. A pinch of sea salt on top? Utter perfection. This is the kind of deeply satisfying, best homemade cookie experience that makes an ordinary Tuesday feel like a celebration.
What sets this recipe apart isn’t just the sensational flavor profile, but its sheer simplicity and speed. As a professional cook with a love for sharing delicious food, I understand the tyranny of time. That’s why I’ve perfected this method to deliver maximum flavor with minimal effort. You won’t find any complicated steps or long chilling periods here! We’re using a simple whisk and a bowl, and the browned butter magic happens in minutes. I’ll share my trick for achieving those perfectly domed, bakery-style tops and tell you about one common mistake that can lead to flat, sad cookies. Get ready to unlock the secret to soft chocolate chip cookies that are both incredibly easy and utterly irresistible.
Why This Brown Butter Chocolate Chip Cookies Recipe Is the Best
The heart of this recipe, my friends, is the brown butter. It’s a technique I learned early on in pastry school in Paris, often used in delicate sablés and financiers to impart a sophisticated, nutty depth that plain butter just can’t replicate. Browning butter transforms it from a simple fat into an intensely flavored ingredient, adding notes of caramel, toast, and hazelnut. This step is non-negotiable for achieving that unmistakable, complex flavor in these chewy chocolate chip cookies. It’s a chef’s secret weapon for elevating humble baked goods into something truly extraordinary, and it’s surprisingly easy to master. The aroma alone will convince you!
Now, let’s talk texture. The goal here is that perfect balance: beautifully golden and slightly crisp edges yielding to a tender, chewy, almost gooey center. We achieve this through a combination of ingredients and technique. The ratio of brown sugar to granulated sugar is crucial for chewiness, while the specific baking time – pulling them just as the centers look set but not fully baked – ensures they continue to cook slightly on the hot baking sheet, locking in that soft texture. I’ve also found that using a cookie scoop of a consistent size helps ensure even baking, preventing some cookies from overbaking while others remain underdone.
This recipe is a testament to how simple ingredients and a touch of technique can create something truly spectacular without demanding hours in the kitchen. There’s no need for a stand mixer, and critically, no chill time required! You can go from craving cookies to enjoying them in about 30 minutes. This makes it perfect for impromptu dessert cravings, busy weeknights in my New York City apartment, or even for baking with kids. The browning of the butter is the most involved step, and I’ll guide you through it so it’s foolproof. You’ll be amazed at how quickly you can whip up the best homemade cookies.
Brown Butter Chocolate Chip Cookies Ingredients
Whenever I’m in NYC, my favorite place to source my butter and flour is from the local markets, like Union Square Greenmarket, where I often find amazing artisanal butter. For specialty ingredients like good quality chocolate chips or flaky sea salt, I adore browsing the aisles at places like Eataly or Zabar’s. This recipe is designed to be as accessible as possible, using ingredients you can find in any well-stocked supermarket across the US. But remember, the quality of your butter truly shines through here, so use the best you can find!
Ingredients List
- 1 cup (2 sticks) salted butter
- 1 cup packed light brown sugar
- 1/2 cup granulated sugar
- 2 large eggs
- 2 teaspoons pure vanilla extract
- 1 teaspoon baking soda
- 1 teaspoon coarse sea salt, plus more for finishing
- 2 1/2 cups all-purpose flour
- 2 cups semi-sweet chocolate chips
Ingredient Spotlight
Salted Butter: While I usually prefer unsalted butter, the recipe calls for salted butter to simplify things and add a subtle saltiness that complements the deep flavor of the browned butter. If you only have unsalted, no worries! Just add an extra 1/4 teaspoon of salt to the dough and omit the finishing salt. In the US, you’ll find brands like Land O’Lakes or Challenge readily available, both of which work beautifully. The browning process intensifies its inherent flavor, making it the star.
Light Brown Sugar: This is crucial for achieving that signature chewy texture and adding moisture to the cookies. Its molasses content contributes a lovely caramel note that plays so well with the browned butter. Look for brands like Domino or C&H in your local grocery store. Make sure it’s packed firmly into the cup when measuring for accuracy, as this impacts the cookie’s moisture content and chewiness.
Semi-Sweet Chocolate Chips: For this recipe, I love the classic semi-sweet chocolate chips. They offer a balanced sweetness that doesn’t overpower the browned butter. Brands like Ghirardelli, Nestlé Toll House, or Guittard are excellent choices found in most US supermarkets. If you prefer a darker, more intense chocolate flavor, feel free to swap in dark chocolate chips or even chunks of good quality dark chocolate.
| Original Ingredient | Best Substitution | Flavor / Texture Impact |
|---|---|---|
| Salted Butter | Unsalted Butter + 1/4 tsp salt | Slightly less nuanced buttery flavor, requires added salt control. |
| Light Brown Sugar | Dark Brown Sugar | Deeper molasses flavor, chewier cookie, might be slightly more moist. |
| Semi-Sweet Chocolate Chips | Dark or Milk Chocolate Chips | Dark: more intense chocolate, less sweet. Milk: sweeter, creamier chocolate pockets. |
| All-Purpose Flour | A 1:1 gluten-free blend with xanthan gum | Texture might be slightly less chewy, more tender. Ensure blend is designed for baking. |
How to Make Brown Butter Chocolate Chip Cookies — Step-by-Step
Making these cookies is a joy, and I promise, it’s easier than you think!
Step 1: Melt and Brown the Butter
In a medium saucepan (about 7-quart) over medium heat, melt the 1 cup of salted butter. Once melted, continue to cook, swirling the pan or stirring constantly. Watch as the butter foams, then subsides. Tiny brown flecks will appear at the bottom, and a rich, nutty aroma will fill your kitchen. This process, known as *beurre noisette* in French patisserie, takes about 5-7 minutes. Stop when the butter turns a beautiful deep amber color and smells toasty. Be careful not to burn it!
💡 mia’s Pro Tip: Use a light-colored saucepan and keep a close eye on the butter. The color change from golden to amber happens quickly. The nutty aroma is your best guide!
Step 2: Cool the Browned Butter
Immediately remove the saucepan from the heat. Pour the browned butter into a heatproof bowl (like a glass measuring cup or a ceramic bowl) to stop the cooking process. Let it cool for about 20 minutes. It should be warm but not piping hot when you proceed to the next step; this prevents the eggs from scrambling and ensures a smooth dough.
Step 3: Preheat the Oven
While the butter is cooling, preheat your oven to 350°F (175°C). Having the oven at the correct temperature before you start mixing the dough is key for consistent baking and the best texture.
Step 4: Prepare the Baking Sheets
Line two large baking sheets with parchment paper or silicone baking mats. This prevents the cookies from sticking and helps them bake evenly. Parchment paper is my preferred method for easy cleanup, especially after a busy baking session in my NYC kitchen.
💡 mia’s Pro Tip: For perfectly round, bakery-style cookie tops, use a large cookie scoop (about 3-tablespoon size). Gently press any stray chocolate chips back into the dough balls before baking. You can also gently smooth the tops with a slightly damp finger.
Step 5: Combine Wet and Sugar Ingredients
Pour the cooled browned butter into a large mixing bowl. Add the light brown sugar and granulated sugar. Whisk vigorously until well combined. Then, add the two large eggs, one at a time, whisking well after each addition. Stir in the vanilla extract, baking soda, and the 1 teaspoon of coarse sea salt. Mix until everything is smooth and emulsified.
Step 6: Add the Flour
Add the 2 1/2 cups of all-purpose flour to the wet ingredients. Using a rubber spatula or a wooden spoon, stir until the flour is just incorporated and the dough starts to come together. Be careful not to overmix at this stage; we want tender cookies, not tough ones.
⚠️ Common Mistake to Avoid: Overmixing the dough after adding the flour. This develops the gluten too much, which can lead to tough, dense cookies instead of soft and chewy ones.
Step 7: Mix in the Chocolate Chips
Finally, fold in the 2 cups of semi-sweet chocolate chips. Distribute them evenly throughout the dough. This is the moment of truth – pure chocolatey anticipation!
Step 8: Scoop the Dough
Using a large cookie scoop (approximately 3 tablespoons in size), scoop out portions of dough. Place them onto the prepared baking sheets, leaving about 2 inches of space between each cookie to allow for spreading. This recipe typically yields about 24 cookies, depending on the scoop size.
Step 9: Bake the Cookies
Bake for 10 to 12 minutes, or until the edges of the cookies are lightly golden brown and the centers appear set but still soft. They should look slightly underbaked in the very middle, as they will continue to set on the hot baking sheet.
Step 10: Cool the Cookies
Remove the baking sheets from the oven. Let the cookies cool on the baking sheets for 5 minutes. This allows them to firm up enough to be moved without falling apart. After 5 minutes, carefully transfer the cookies to a wire rack to cool completely.
Step 11: Finish with Sea Salt
While the cookies are still warm on the wire rack, if desired, sprinkle a small amount of flaked sea salt over the tops. This enhances the chocolate flavor and balances the sweetness beautifully, a trick I often use in my North African-inspired dishes as well.
| Step | Action | Duration | Key Visual Cue |
|---|---|---|---|
| 1 | Melt and Brown Butter | 5-7 minutes | Deep amber color, nutty aroma |
| 2 | Cool Browned Butter | 20 minutes | Warm, not hot |
| 3 | Preheat Oven | N/A | 350°F (175°C) |
| 4 | Prepare Baking Sheets | N/A | Lined with parchment |
| 5 | Combine Wet & Sugars | Whisking | Smooth and emulsified |
| 6 | Add Flour | Stirring | Dough comes together, no dry streaks |
| 7 | Mix in Chips | Folding | Evenly distributed |
| 8 | Scoop Dough | Portioning | Even balls, 2 inches apart |
| 9 | Bake | 10-12 minutes | Golden edges, set centers |
| 10 | Cool on Sheet | 5 minutes | Cookies firm up |
| 11 | Finish with Salt | Optional | Flakes on warm cookies |
Serving & Presentation
There’s something incredibly satisfying about a warm, freshly baked chocolate chip cookie. I love serving these slightly warm, with a glass of cold milk or a hot cup of coffee. In New York, we have such diverse coffee culture, from the espresso bars of Little Italy to the cozy cafes in the West Village; a cookie like this feels right at home. For an extra touch, especially if serving guests, I’ll arrange them on a rustic wooden board, perhaps with a few extra chocolate chips artfully placed nearby, and never forget that sprinkle of flaky sea salt for that pop of texture and flavor contrast.
The subtle nutty notes from the browned butter make these cookies wonderfully versatile. They pair beautifully with richer flavors, much like the complex spices you find in Moroccan cuisine. Think about serving them with a scoop of high-quality vanilla bean ice cream for a classic treat, or perhaps a salted caramel sauce drizzled over the top. If you’re feeling adventurous, a dark chocolate ganache could be a divine dipping sauce. They are also fantastic with a bold espresso or a cardamom-infused tea, bringing a touch of my heritage to the table.
| Pairing Type | Suggestions | Why It Works |
|---|---|---|
| Side Dish | Best served on their own as a delightful snack or dessert. | These cookies are a star on their own and don’t typically need a side dish. |
| Sauce / Dip | Salted Caramel Sauce, Dark Chocolate Ganache | The richness complements the browned butter and chocolate, adding decadent layers of flavor. |
| Beverage | Cold Whole Milk, Bold Espresso, Earl Grey Tea | Milk provides a classic contrast; espresso cuts through the sweetness; tea offers a sophisticated, aromatic pairing. |
| Garnish | Flaked Sea Salt, Mini Chocolate Chips, Toasted Pecans | Enhances texture and flavor complexity; adds visual appeal and a nutty crunch. |
Make-Ahead, Storage & Reheating
As a busy New Yorker, I’m a big believer in having delicious treats on hand. Brown butter chocolate chip cookies are fantastic for making ahead because they store so well. You can bake a big batch on Sunday and have them ready for my afternoon tea or a late-night craving throughout the week. The flavors actually deepen and improve after a day or two!
| Method | Container | Duration | Reheating Tip |
|---|---|---|---|
| Refrigerator | Airtight container or cookie tin | Up to 7 days | Enjoy at room temperature or lightly warm in microwave (10-15 sec). |
| Freezer | Freezer-safe bag or container, with parchment layers | Up to 3 months | Thaw on counter; enjoy as is or briefly warm. |
| Make-Ahead Dough | Wrapped tightly in plastic wrap, then in foil or a freezer bag | Dough can be refrigerated for up to 3 days or frozen for up to 3 months. | If refrigerated, let sit at room temp for 30 mins before scooping. If frozen, thaw on counter or bake from frozen (add 1-2 mins to bake time). |
For that ‘just baked’ experience, I love to briefly warm my cookies. Pop one or two in the microwave for about 10-15 seconds – just enough to make the chocolate chips melty again and the cookie wonderfully soft. Alternatively, place them on a baking sheet in a warm oven (around 300°F/150°C) for about 3-5 minutes. This also crisps them up slightly if that’s your preference. For frozen dough, if baking directly from frozen, I typically add an extra 1-2 minutes to the baking time and watch them carefully.
Variations & Easy Swaps
| Variation | Key Change | Best For | Difficulty Impact |
|---|---|---|---|
| Triple Chocolate Chip Dream | Add 1 cup of dark chocolate chunks and 1/2 cup of white chocolate chips. | Serious chocolate lovers. | None. |
| Gluten-Free & Dairy-Free Adaptations | Use a 1:1 gluten-free flour blend; substitute dairy-free butter and dairy-free chocolate chips. | Dietary restrictions. | Slightly less chewy with GF flour, texture may vary with DF butter. |
| Seasonal Flourishes like Spiced Pecan | Add 1 cup of toasted pecans and 1/2 tsp cinnamon to the dough. | Fall and winter baking. | Adds a nutty crunch and warm spice notes. |
Triple Chocolate Chip Dream
For those days when you simply cannot have too much chocolate, this variation is pure indulgence. By adding a generous amount of dark chocolate chunks alongside the semi-sweet chips, you introduce deeper, more complex chocolate notes. The texture contrast between chips and chunks is divine. This is also where you could strategically place a few white chocolate chips for pockets of creamy sweetness. It’s a nod to the decadent desserts you can find in Parisian bakeries, amplified for your home kitchen.
Gluten-Free and Dairy-Free Adaptations
I’ve tested this recipe extensively for my friends with dietary needs. For gluten-free, I recommend a good quality 1:1 baking blend that contains xanthan gum, like Bob’s Red Mill Gluten Free 1-to-1 Baking Flour. For dairy-free, swap the butter for a plant-based butter alternative that bakes well (my favorite is Miyoko’s Kitchen). Ensure your chocolate chips are also dairy-free. The texture might be slightly softer or more tender, but the rich, browned butter flavor remains the star.
Seasonal Flourishes like Spiced Pecan
As the seasons change here in NYC, so do my baking inspirations. In the fall and winter, I love adding warm spices. Toasting 1 cup of chopped pecans until fragrant and adding them to the dough along with 1/2 teaspoon of cinnamon or a pinch of nutmeg creates a wonderfully cozy cookie. This reminds me of the spices used in traditional Moroccan pastries, giving these classic American cookies a subtle, international flair. The toasted nuts add a delightful crunch that complements the chewy texture.
What does browning the butter do for chocolate chip cookies?
Browning the butter, a technique known as *beurre noisette* in French cuisine, transforms its flavor significantly. It removes moisture and toasts the milk solids, introducing complex nutty, caramel-like, and toasty notes that plain melted butter lacks. This deepens the overall flavor profile of the cookies, making them more sophisticated and intensely delicious. It’s the secret weapon for achieving that rich, irresistible taste in brown butter chocolate chip cookies.
Do I need to chill the dough for brown butter chocolate chip cookies?
Absolutely not! That’s one of the best parts of this specific brown butter chocolate chip cookie recipe. The browning of the butter and the careful balance of ingredients mean you don’t need to chill the dough. You can go from mixing the dough to baking the cookies in under an hour, making them perfect for when a cookie craving strikes suddenly. This shortcut doesn’t compromise flavor or texture one bit.
Can I substitute regular butter for brown butter in chocolate chip cookies?
While you *can* substitute regular melted butter, it will significantly change the flavor profile of your chocolate chip cookies. You will miss out on the nutty, caramel-like depth that browned butter provides. The magic of this recipe lies in that flavor transformation. If you must substitute, use regular melted unsalted butter and add about 1/4 teaspoon of salt to compensate for the lack of salt in browned butter. However, I highly recommend trying the browned butter for the best results!
How do you keep brown butter chocolate chip cookies from spreading too much?
To prevent your brown butter chocolate chip cookies from spreading too much, ensure your oven is accurately preheated to 350°F (175°C). Using parchment paper or a silicone baking mat on your baking sheets helps control spread. Scooping the dough onto the sheet leaves about 2 inches between cookies. For extra insurance against spreading, you can chill the scooped dough balls for 15-20 minutes before baking, though this recipe is designed to minimize spreading even without chilling due to the browned butter’s properties.
Why are my brown butter chocolate chip cookies flat?
Flat cookies can be caused by several factors. If your butter was too hot when mixed with sugar and eggs, it can lead to excessive spreading. Also, overmixing the dough after adding flour can activate too much gluten, making it less stable. Using too much sugar or not enough flour are also common culprits. Ensure your oven temperature is correct; a too-low temperature can cause premature spreading before the cookie sets. This recipe is formulated for chewiness, so always measure your ingredients precisely!
Can I use different types of chocolate chips?
Absolutely! While the recipe calls for semi-sweet chocolate chips for a classic flavor balance, feel free to experiment. Dark chocolate chips or chunks will offer a more intense, less sweet chocolate experience that pairs beautifully with the browned butter. Milk chocolate chips will yield a sweeter, creamier cookie. You can even mix different types, like dark and white chocolate, for a fun variation. Just ensure you are using about 2 cups total for the right chocolate-to-dough ratio.
How long can I store browned butter chocolate chip cookies?
These cookies store remarkably well. Once completely cooled, keep them in an airtight container or a cookie tin at room temperature. They will stay deliciously chewy and soft for up to 5-7 days. The flavors often meld and deepen even further after the first day, making them perfect for making ahead. You can also freeze them for up to 3 months in a freezer-safe container or bag, layered between parchment paper.
What is the best way to re-warm these cookies?
To recapture that ‘fresh from the oven’ warmth and gooeyness, I recommend a quick microwave session. Place a cookie on a microwave-safe plate and heat for 10-15 seconds – just enough to slightly soften the chocolate chips and warm the cookie through without making it tough. Alternatively, you can place them on a baking sheet in a preheated oven at 300°F (150°C) for about 3-5 minutes. This method also helps to crisp up the edges if you prefer that texture.
Share Your Version!
I truly pour my heart into every recipe I share, and I would be absolutely delighted to see how your brown butter chocolate chip cookies turn out! Please, if you make them, leave a star rating and your thoughts in the comments below. It helps other bakers immensely. And if you share a photo on Instagram or Pinterest, please tag me @exorecipes – I absolutely adore seeing your creations come to life in your kitchens! I’m always curious: did you try any fun variations, perhaps inspired by a flavor you love from one of the vibrant NYC neighborhoods?
From my NYC kitchen to yours — I hope this recipe brings as much warmth to your table as it does to mine. — mia 🧡
Love This Recipe? Save It to Pinterest!
If you enjoyed this Brown Butter Chocolate Chip Cookies recipe, don’t let it get lost in your browser tabs! 😄 Pin it now so you can find it again anytime — and explore hundreds more tried-and-tested recipes waiting for you on my Pinterest boards.
👉 Follow mia on Pinterest @chefrecipes2
📌 Pin this recipe · 🔁 Re-pin your favorites · 💬 Tag me when you make it — I love seeing your creations!

Brown Butter Chocolate Chip Cookies

This is my go-to chocolate chip cookie recipe. Not only do you not need to use a mixer, there is no chill time needed getting depth of flavor from the brown butter and sea salt.
Ingredients
- 1 cup salted butter
- 1 cup light brown sugar
- 1/2 cup granulated sugar
- 2 large eggs
- 2 teaspoons vanilla extract
- 1 teaspoon baking soda
- 1 teaspoon coarse sea salt
- 2 1/2 cups all purpose flour
- 2 cups semi-sweet chocolate chips
Instructions
- In a medium saucepan (7- quart) over medium heat melt the butter and bring it to a boil. Once it starts boiling swirl the pan, or stir constantly until the butter passes the foamy phase and becomes a deep amber color.
- Remove from heat and allow butter to cool for 20 minutes.
- While the butter is cooling preheat the oven to 350°F.
- Line a baking sheet with parchment paper and set aside.
- Add the light brown sugar, granulated sugar, eggs, vanilla, baking soda, and salt into the cooled butter and stir to combine using a rubber spatula or wooden spoon.
- Stir in the flour until the dough comes together and the ingredients are evenly incorporated.
- Finally mix in the chocolate chips.
- Using a large cookie scoop (3 tablespoon sized), scoop the dough out onto the lined baking sheet, 2 inches apart. *See note in the post for my trick to pretty cookie tops!
- Bake the cookies for 10 12 minutes until the edges are lightly golden and the centers are just set.
- Remove the baking sheet from the oven and allow the cookie to cool for 5 minutes on the baking sheet before transferring them to a wire rack to cool completely.
- If desired, sprinkle a small amount of flaked sea salt on top of the cookies as they are cooling.
Nutrition
- Calories: 263 calories
- Sugar: 23 g
- Fat: 13.5 g
- Carbohydrates: 34.4 g
- Protein: 3.3 g
Tried This Recipe? Leave a Comment!
Did you make this recipe? I’d love to hear how it turned out! Please leave a comment and a rating below. Your feedback helps other home cooks and supports cheerychop.com!
For more delicious inspiration, follow me on Pinterest!