Table of Contents
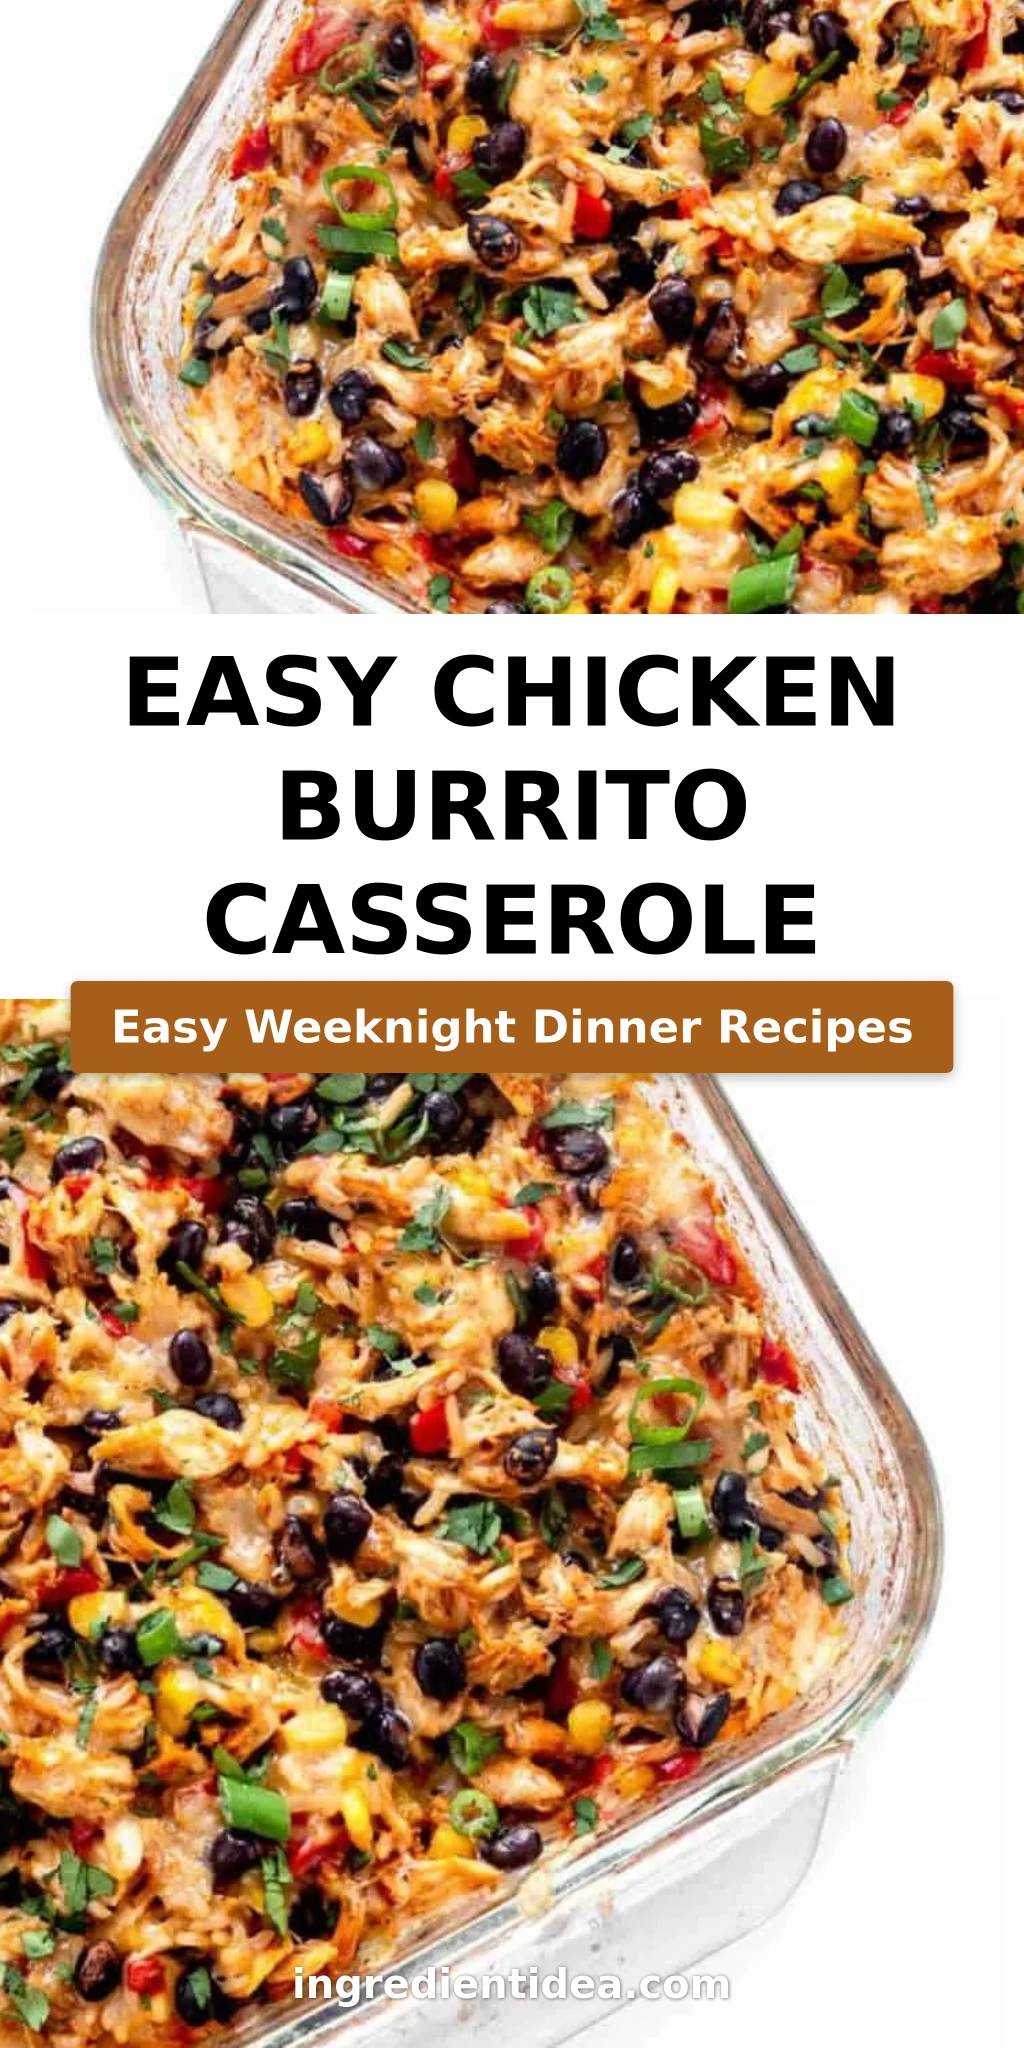
Easy Chicken Burrito Casserole – A One-Dish Mexican Dinner Your Family Will Love
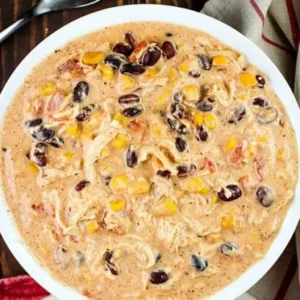
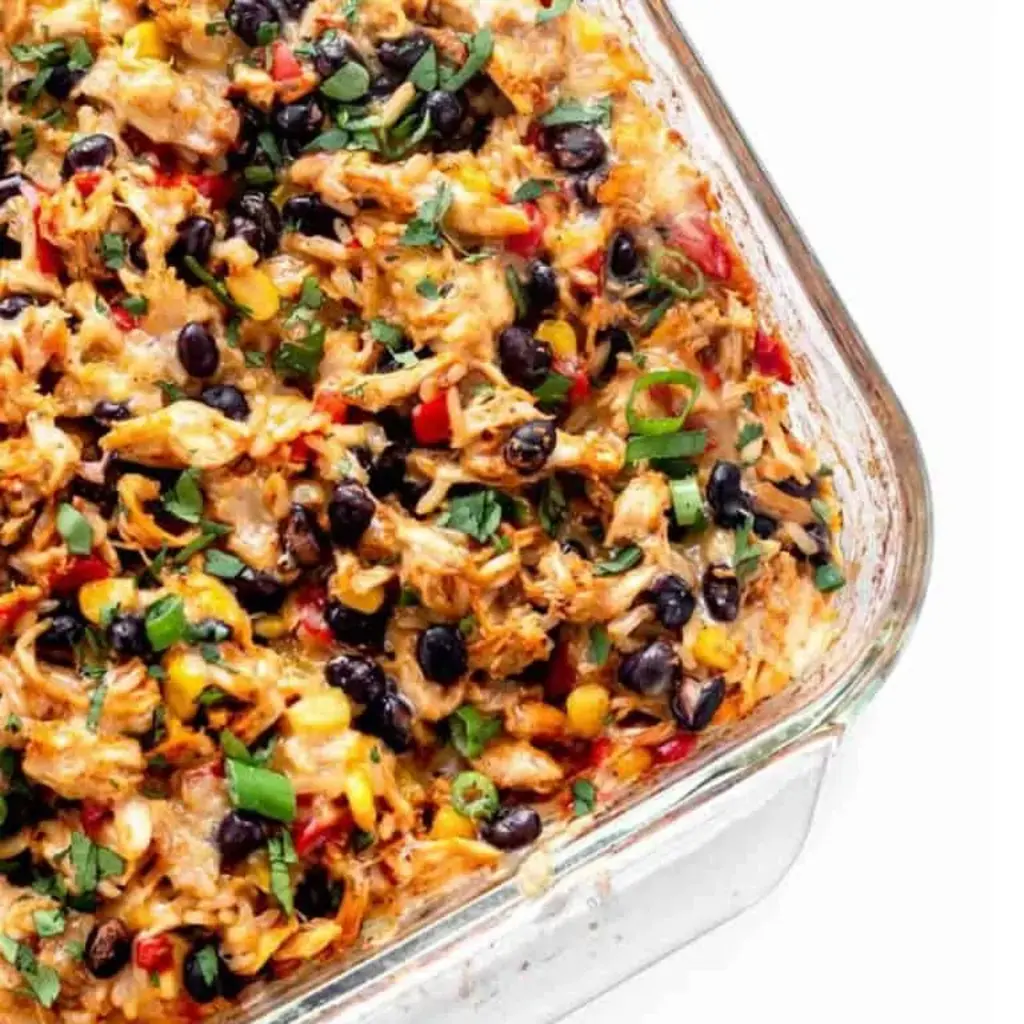
I still remember the first time I made a chicken burrito casserole in my tiny New York City kitchen. It was a snowy February evening, and I was craving the bold, comforting flavors of the Mexican food carts I would pass on my way to work. Growing up in Morocco, my mother always taught me that the best meals are the ones that bring the whole family together around one dish. That same spirit is what fuels this easy chicken burrito casserole — it’s a true one-pan wonder that delivers all the taste of a loaded burrito without the fuss of rolling each one individually. With layers of tender shredded chicken, creamy black beans, sweet corn, and perfectly cooked rice, all topped with bubbly Monterey Jack cheese, this is the weeknight dinner you’ve been looking for.
The moment you pull this burrito casserole recipe from the oven, the aroma hits you — smoky fajita seasoning mingling with mild green chiles and a hint of cayenne. The rice has absorbed every bit of seasoned broth, becoming plump and flavorful. The cheese melts into a golden crust that gives way to a hearty, saucy interior. Each spoonful is a perfect balance of textures: the slight bite of bell pepper and onion, the pop of corn, the creaminess of black beans, and the juicy shredded chicken. It’s like a warm, cozy blanket for your taste buds — the kind of meal that makes you close your eyes and sigh after the first bite.
What sets this Mexican chicken casserole apart from other baked casseroles is the method. Instead of pre-cooking the rice or using canned soups, you’ll whisk together a simple broth mixture with tomato paste and green chiles, pour it over uncooked rice and aromatics, and let the oven do all the work. I learned this layering technique during my pastry training in Paris — sometimes the simplest processes yield the most complex flavors. One common mistake I see home cooks make is skipping the foil cover in the first stage of baking; covering traps steam and ensures the rice cooks evenly without drying out. Stick with me and you’ll have a foolproof, flavorful chicken burrito bake that will earn a permanent spot in your dinner rotation.
Why This Easy Chicken Burrito Casserole Recipe Is the Best
The Flavor Secret – This recipe leans on a homemade-style fajita seasoning blend (or your favorite store-bought mix) for layers of cumin, chili powder, and garlic. Combined with the umami from tomato paste and the mild heat of green chiles, every bite is deeply seasoned. I add a touch of cayenne for a gentle warmth — optional, but it’s a little nod to the spice markets of Marrakech I used to visit as a girl.
Perfected Texture – Parboiled brown rice is the unsung hero here. It holds its shape beautifully even after a long, slow bake and doesn’t turn mushy like white rice can. The foil-covered bake allows the rice to steam gently until tender, then we uncover it for a final blast of heat to melt the cheese into that irresistible golden crust. Trust me — the texture is spot on every time.
Foolproof & Fast – Once you’ve prepped your shredded chicken (leftover from a roast chicken or a rotisserie bird works like a dream), this easy chicken casserole comes together in under 20 minutes of hands-on time. No browning, no boiling, no multiple pans. Just one dish, a whisk, and a spoon — exactly the kind of low-stress cooking my busy NYC schedule demands.
Easy Chicken Burrito Casserole Ingredients
Whenever I’m buying ingredients for this burrito casserole recipe, I head straight to my local farmers market in Union Square for the produce, then grab the rest from my neighborhood bodega. Back in Paris, I learned to appreciate fresh, simple ingredients — and this dish is a beautiful tribute to that philosophy. Let me walk you through what you’ll need.
Ingredients List
- 1/2 cup finely diced onion
- 1 red bell pepper (diced)
- 1 cup uncooked parboiled long-grain brown rice (can also use long grain white rice)
- 3 tablespoons fajita seasoning (homemade or store-bought)
- 1/8 teaspoon cayenne pepper (optional)
- 1 cup corn kernels (frozen)
- 1 14 ounce can low sodium black beans (drained and rinsed)
- 5 cups shredded chicken
- 3 cups reduced sodium chicken broth
- 1 4 ounce can mild green chilies
- 1 tablespoon olive oil
- 2 tablespoons tomato paste
- 1 1/4 cups shredded Monterey Jack cheese
Ingredient Spotlight
Parboiled Brown Rice – This is the backbone of the dish. Parboiled rice (also called converted rice) has been steamed before milling, so it stays separate and firm after cooking. In a casserole, it’s much more forgiving than regular brown rice, which can take forever to cook, or white rice, which can turn sticky. You can use long-grain white rice as a substitute, but reduce the baking time by about 10 minutes and keep a close eye on the liquid absorption.
Fajita Seasoning – I make my own blend with chili powder, cumin, smoked paprika, garlic powder, onion powder, and a pinch of oregano. It’s fresher than most store-bought mixes and I can control the salt. If you’re buying a packet, look for one without added sugar or MSG. This seasoning is the secret to the deep, smoky flavor that makes the casserole taste like it’s been simmering for hours.
Monterey Jack Cheese – This cheese melts beautifully without becoming greasy. Its mild, buttery flavor complements the spices without overwhelming them. For a sharper kick, you can swap half the Jack for shredded cheddar or pepper Jack. Avoid pre-shredded cheese if possible — it contains anti-caking agents that prevent smooth melting. Grate your own from a block — it takes two minutes and makes a real difference.
| Original Ingredient | Best Substitution | Flavor / Texture Impact |
|---|---|---|
| Parboiled brown rice | Long-grain white rice | White rice cooks faster, softer; reduce bake time by 10 mins. |
| Monterey Jack cheese | Cheddar or pepper Jack | Cheddar gives sharper flavor; pepper Jack adds heat. |
| Shredded chicken | Canned chicken or tofu | Canned chicken works in a pinch; crumbled tofu for vegetarian. |
| Fajita seasoning | Taco seasoning (adjust salt) | Similar flavor; may have more cumin. |
How to Make Easy Chicken Burrito Casserole — Step-by-Step
Let’s get cooking! This process is so simple you’ll wonder why you ever fussed with individual burritos. Just follow these steps and you’ll be rewarded with a bubbling, cheesy casserole.
Step 1: Preheat and Combine Dry Ingredients
Preheat your oven to 400°F. In a 9×13-inch baking dish, add the diced onion, diced red bell pepper, uncooked parboiled brown rice, fajita seasoning, and cayenne (if using). Use a spoon to stir everything together so the rice is evenly coated with seasoning and the vegetables are distributed.
💡 mia’s Pro Tip: Don’t skip this dry-mixing step. Coating the rice in seasoning first ensures every grain gets flavored as it cooks, rather than just the top layer.
Step 2: Whisk the Broth Mixture
In a separate bowl or large measuring cup, whisk together the chicken broth, canned mild green chiles, tomato paste, and olive oil until the tomato paste is fully dissolved and the mixture is smooth. This will be your cooking liquid that transforms the rice.
⚠️ Common Mistake to Avoid: Don’t skip whisking the tomato paste. If it’s not fully incorporated, you’ll get pockets of raw tomato paste flavor. Whisk thoroughly until the liquid is a uniform reddish-orange color.
Step 3: Add Liquids to Baking Dish
Pour the broth mixture over the rice and vegetables in the baking dish. Stir gently to combine, making sure the rice isn’t clumping at the bottom.
💡 mia’s Pro Tip: Use a rubber spatula to scrape the sides of the measuring cup so every last bit of that flavorful liquid ends up in the dish.
Step 4: Add Chicken, Beans, and Corn
Add the shredded chicken, rinsed black beans, and frozen corn to the dish. Give everything a good stir until evenly distributed. The mixture will look quite liquid — that’s exactly what we want.
⚠️ Common Mistake to Avoid: Don’t use canned beans without rinsing. The thick starchy liquid from the can can make the casserole gluey. Rinse them well in a colander under cold water.
Step 5: Bake Covered
Cover the baking dish tightly with aluminum foil. Transfer it to the preheated oven and bake for 65-70 minutes, or until all the liquid is absorbed and the rice is tender. The steam trapped under the foil is what cooks the rice perfectly.
💡 mia’s Pro Tip: For a tight seal, crimp the foil around the edges of the dish. This prevents steam from escaping and ensures even cooking. If you notice the casserole looks dry before the rice is done, add 1/4 cup more broth.
Step 6: Add Cheese and Finish Baking
Carefully remove the dish from the oven and take off the foil (watch out for the hot steam!). Sprinkle the shredded Monterey Jack cheese evenly over the top. Return the dish to the oven, uncovered, for another 5-10 minutes until the cheese is melted and lightly golden in spots.
⚠️ Common Mistake to Avoid: Don’t leave the foil on after adding the cheese — you won’t get that delicious browned crust. The uncovered bake allows the cheese to bubble and brown.
Step 7: Rest and Serve
Remove the casserole from the oven and let it cool for 5-10 minutes. This resting time allows the rice to absorb any remaining moisture and makes the casserole easier to serve without falling apart. Garnish with fresh cilantro, green onion, salsa, and sliced avocado as desired, then dig in!
💡 mia’s Pro Tip: For an extra touch of brightness, squeeze a little lime juice over each serving. It cuts through the richness and adds a fresh zing that reminds me of the lime markets in Marrakech.
| Step | Action | Duration | Key Visual Cue |
|---|---|---|---|
| 1 | Preheat & combine dry ingredients | 5 min | Rice evenly coated with seasoning |
| 2 | Whisk broth mixture | 2 min | Smooth, no lumps of tomato paste |
| 3 | Add liquids to dish | 1 min | Liquid level covers rice |
| 4 | Add chicken, beans, corn | 3 min | Ingredients well distributed |
| 5 | Bake covered | 65-70 min | All liquid absorbed, rice tender |
| 6 | Add cheese & bake uncovered | 5-10 min | Cheese melted, golden spots |
| 7 | Rest & serve | 5-10 min | Casserole holds shape when served |
Serving & Presentation
This chicken burrito bake is a meal in itself, but I love to serve it with a few simple sides that add freshness and color. A big bowl of crisp romaine lettuce, some pico de gallo, and a dollop of Greek yogurt (or sour cream, if you prefer) turn it into a complete fiesta. Sometimes I’ll warm up soft corn tortillas on the side for scooping up every last bit of cheesy goodness — a habit I picked up from a little taquería in Brooklyn that reminds me of the street food stalls in Paris.
When I serve this to guests, I like to present it right from the baking dish — it’s rustic and inviting. I scatter fresh cilantro and sliced green onions over the top, add a few wedges of lime, and let everyone help themselves. If I’m feeling extra fancy, I’ll add some radish slices and a drizzle of crema. The combination of hot, cheesy casserole with cool, crunchy toppings is simply irresistible.
| Pairing Type | Suggestions | Why It Works |
|---|---|---|
| Side Dish | Simple green salad, Mexican street corn salad, cilantro lime rice | Adds freshness and crunch to balance the richness. |
| Sauce / Dip | Sour cream, Greek yogurt, avocado crema, salsa verde, hot sauce | Cool, creamy, or spicy toppings customize each bite. |
| Beverage | Agua fresca, Mexican Coke, light beer, margarita | Refreshing drinks cut through the savory cheese. |
| Garnish | Fresh cilantro, green onion, avocado, lime wedges, radishes | Adds color, texture, and a burst of freshness. |
Make-Ahead, Storage & Reheating
One of the best things about this easy chicken casserole is how beautifully it keeps. I often make a big batch on Sunday evenings after a busy week of recipe testing, then portion it out for quick lunches and dinners. Living in NYC means my time is precious, and having a ready-to-go casserole in the fridge is like having a culinary superhero on standby.
| Method | Container | Duration | Reheating Tip |
|---|---|---|---|
| Refrigerator | Airtight container or original dish tightly covered with foil or plastic wrap | Up to 4 days | Reheat covered at 350°F for 15-20 min; add a splash of broth if dry. |
| Freezer | Freezer-safe container or zip-top bag (remove as much air as possible) | Up to 3 months | Thaw overnight in fridge; reheat covered at 350°F for 25-30 min. |
| Make-Ahead | Assemble in dish, cover, and refrigerate (do not bake) | Up to 24 hours in advance | Add 10-15 min to covered bake time since starting from cold. |
When reheating leftovers, I always add a tiny splash of chicken broth or water before covering, to bring back that initial moisture. The microwave works in a pinch, but the oven gives you that fresh-from-the-bake texture with a slightly crisper top. If I’m reheating a frozen portion, I let it thaw slowly in the fridge overnight and then follow the oven method. It’s almost as good as the day I made it — which never fails to impress my dinner guests.
Variations & Easy Swaps
One of the joys of this burrito casserole recipe is how adaptable it is. Over the years, I’ve tested countless variations — some inspired by my Moroccan roots, others by the seasonal produce I find at the Union Square greenmarket. Here are three of my favorites to get you started.
| Variation | Key Change | Best For | Difficulty Impact |
|---|---|---|---|
| Vegetarian Black Bean Quinoa | Replace chicken with black beans + quinoa | Meatless Monday, high protein | Easy |
| Gluten-Free & Dairy-Free | Use dairy-free cheese or nutritional yeast, ensure seasonings are GF | Dietary restrictions | Easy |
| Spicy Chipotle Chicken | Add 1-2 tsp chipotle in adobo + extra cayenne | Heat lovers | Easy |
Vegetarian Version with Black Beans and Quinoa
For a hearty meatless version, swap the shredded chicken for an extra can of black beans (rinsed and drained) and 1 cup of cooked quinoa. The quinoa adds a nutty flavor and a protein boost that matches the texture of the chicken beautifully. I like to add a handful of chopped bell peppers and a squeeze of lime to brighten it up. This variation has become a staple in my kitchen — especially during the summer when I crave something light yet satisfying.
Gluten-Free & Dairy-Free Swap
This recipe is naturally gluten-free if you use certified gluten-free fajita seasoning and broth. To make it dairy-free, simply omit the Monterey Jack or use a dairy-free shred. I often make this for friends with dietary restrictions, and they never feel like they’re missing out. I add an extra tablespoon of olive oil to keep the casserole moist, and sometimes toss in some sliced olives for a briny pop of flavor that reminds me of the Mediterranean coast.
Spicy Chipotle Chicken Burrito Casserole
If you love heat — and I mean real, smoky warmth — stir in 1-2 teaspoons of minced chipotle peppers in adobo sauce along with the broth mixture. The chipotle adds an earthy, almost barbecue-like flavor that’s fantastic with the rice and beans. I also increase the cayenne to 1/4 teaspoon. This version is my go-to when I’m feeling like I need a little fire in my life, and it pairs perfectly with a cold beer from the bodega downstairs.
Share Your Version!
I hope this easy chicken burrito casserole becomes as beloved in your home as it is in mine. There’s something so special about gathering around a steaming dish that’s equal parts comforting and exciting — it’s the kind of meal that creates real, lasting memories. Whether you stick to the classic recipe or put your own spin on it, I’d love to hear how it turned out.
Leave a star rating and a comment below to let me know what you thought. Did you add extra spice? Did you make it vegetarian? Your feedback helps other home cooks find their perfect version. And don’t forget to snap a photo and tag @exorecipes on Instagram or Pinterest — I love seeing your creations! If you have a question about a specific variation, drop it in the comments and I’ll answer personally. From my NYC kitchen to yours — I hope this recipe brings as much warmth to your table as it does to mine. — mia 🧡
Love This Recipe? Save It to Pinterest!
If you enjoyed this Easy Chicken Burrito Casserole recipe, don’t let it get lost in your browser tabs! 😄 Pin it now so you can find it again anytime — and explore hundreds more tried-and-tested recipes waiting for you on my Pinterest boards.
👉 Follow mia on Pinterest @chefrecipes2
📌 Pin this recipe · 🔁 Re-pin your favorites · 💬 Tag me when you make it — I love seeing your creations!
⭐️ Did you make this Easy Chicken Burrito Casserole? ⭐️
I’d love to hear how it went! Leave a star rating and comment below, or tag me @exorecipes on social media — your feedback makes this community so special. Until next time, happy cooking! — mia 🧡
Can I use leftover chicken or rotisserie chicken for this easy chicken burrito casserole?
Absolutely — this is actually one of the best ways to use leftover or rotisserie chicken! I do it all the time in my own kitchen. Simply shred the meat (discard skin and bones) and measure out 5 cups. Rotisserie chicken adds a lovely smoky depth from the roasting, and it’s a huge time-saver. If you’re starting with raw chicken, you can poach or bake it beforehand, but leftover chicken makes this casserole come together in literally 15 minutes of active prep. Just make sure the chicken is well incorporated into the rice and liquid before baking so it doesn’t dry out.
How do I prevent my chicken burrito casserole from turning out too soggy?
Sogginess is usually the result of too much liquid or not enough baking time. In this recipe, the rice-to-broth ratio is carefully balanced — 1 cup of rice to 3 cups of broth. I always recommend using parboiled brown rice because it absorbs liquid more predictably than regular white rice. Also, be sure to cover the dish tightly with foil during the first baking stage; this traps steam and allows the rice to cook evenly without becoming waterlogged. If after 70 minutes the casserole still looks wet, remove the foil and bake an additional 5-10 minutes uncovered to let excess moisture evaporate. Letting it rest for 5-10 minutes after baking also helps the rice absorb any remaining liquid.
What can I substitute for sour cream or cream of chicken soup in this casserole?
This recipe doesn’t use sour cream or cream of chicken soup — it relies on a simple broth-tomato paste mixture for flavor and moisture. But if you’re looking for a creamy element, you can stir in 1/2 cup of plain Greek yogurt or sour cream after baking (just before serving) for a tangy finish. For a dairy-free creamy twist, try a spoonful of cashew cream or even mashed avocado. If you wanted to replace the broth mixture entirely with cream of chicken soup, you could — thin it with 1/2 cup of milk or broth — but I find the tomato-based version much lighter and more vibrant, letting the fajita seasoning and chiles shine.
How long should I bake an easy chicken burrito casserole and at what temperature?
Bake this casserole at 400°F (200°C) for a total of about 75 minutes. The first stage is 65-70 minutes covered with foil — this is crucial for cooking the rice through without drying out the top. Then you uncover, sprinkle the cheese on, and bake for another 5-10 minutes until the cheese is melted and golden. The total time can vary slightly depending on your oven and the type of rice you use. If you’re using long-grain white rice instead of parboiled brown, reduce the covered baking time by about 10 minutes and check for doneness at the 55-minute mark.
Can I freeze chicken burrito casserole?
Yes, this casserole freezes beautifully! After baking, let it cool completely, then portion it into freezer-safe containers or wrap the entire dish tightly in plastic wrap and then foil. It will keep for up to 3 months. To reheat, thaw overnight in the refrigerator and then reheat in a 350°F oven, covered, for 25-30 minutes. If you’re reheating from frozen, add about 10-15 minutes and a splash of chicken broth to keep it moist. I often freeze individual portions for quick lunches during my busy recipe testing weeks — it’s a lifesaver.
What type of rice works best for this casserole?
For the best texture, I highly recommend parboiled long-grain brown rice (also called converted rice). It holds its shape well and absorbs liquid evenly without turning mushy. You can use regular long-grain white rice as a substitute — just reduce the covered baking time by about 10 minutes and check for doneness at the 55-minute mark. Avoid short-grain white rice or sushi rice, as they can become gluey. Instant rice is not recommended because it will overcook and turn to mush. And if you’d like to use regular brown rice, you’ll need to increase the covered baking time to about 80-85 minutes and add an extra 1/4 cup of broth.
Can I make this casserole vegetarian?
Absolutely! To make a vegetarian version, simply omit the shredded chicken and double up on the black beans (use a second can, rinsed and drained) or add cooked lentils or crumbled tofu. You can also substitute vegetable broth for the chicken broth. I like to add extra vegetables like diced zucchini or corn to replace the volume of the chicken. The texture will be a bit different, but the flavor is still fantastic. For extra protein, toss in a cup of cooked quinoa — it blends beautifully with the rice.
Is this chicken burrito casserole gluten-free?
Yes, this recipe is naturally gluten-free as written! The key ingredients — rice, corn, beans, chicken, vegetables, and cheese — are all gluten-free. However, you must check your fajita seasoning and chicken broth labels to ensure they don’t contain any added wheat or gluten. Many store-bought seasoning blends and broths are gluten-free, but it’s always wise to verify. I often use my homemade fajita seasoning to be absolutely sure. Also, avoid any pre-shredded cheeses that might be dusted with wheat flour — grate your own from a block for a safe, meltier result.
Easy Chicken Burrito Casserole

If your family loves Mexican food, whip together this chicken burrito casserole recipe for an easy, low-prep dinner! It tastes like your favourite burritos yet can be made in one big casserole dish with simple ingredients. Plus, it’s loaded with protein for a satisfying and healthy meal! {Gluten-Free}
Ingredients
- 1/2 cup finely diced onion
- 1 red bell pepper (diced)
- 1 cup uncooked parboiled long-grain brown rice ((can also use long grain white rice))
- 3 tablespoons fajita seasoning ((homemade or store-bought))
- 1/8 teaspoon cayenne pepper ((optional))
- 1 cup corn kernels (frozen)
- 1 14 ounce can low sodium black beans (drained and rinsed)
- 5 cups shredded chicken
- 3 cups reduced sodium chicken broth
- 1 4 ounce can mild green chilies
- 1 tablespoon olive oil
- 2 tablespoons tomato paste
- 1 1/4 cups shredded Monterey Jack cheese
Instructions
- Preheat oven to 400°F. Add onion, bell pepper, uncooked rice, fajita seasoning and cayenne (if using) to a 9×13 inch baking dish and stir to combine.
- In a separate bowl or measuring cup, whisk together the chicken broth, green chiles, tomato paste and olive oil until well combined.
- Add the broth mixture to the baking dish and stir to combine with the rice mixture.
- Add shredded chicken, black beans and corn to the baking dish. Give it an additional stir until well combined.
- Cover the baking dish with aluminium foil and then transfer to the oven to bake for 65-70 minutes or until all of the liquid is absorbed.
- Once complete, remove the baking dish from the oven, remove the aluminium foil, and sprinkle evenly with grated cheese.
- Return the baking dish to the oven for a final 5-10 minutes until the cheese has melted and is slightly golden.
- Remove from the oven, allow to cool for 5-10 minutes, and serve with a sprinkle of fresh cilantro, green onion, salsa and avocado, if desired.
Nutrition
- Calories: 343 kcal
- Sugar: 3 g
- Fat: 14 g
- Carbohydrates: 24 g
- Protein: 29 g
Tried This Recipe? Leave a Comment!
Did you make this recipe? I’d love to hear how it turned out! Please leave a comment and a rating below. Your feedback helps other home cooks and supports cheerychop.com!
For more delicious inspiration, follow me on Pinterest!