Table of Contents
Fluffernutter Cookies: The Ultimate Peanut Butter Marshmallow Cookies
Growing up in Morocco, my mother’s kitchen was filled with the aromas of warm spices and roasted nuts—peanuts were a rare treat, often reserved for special occasions. Now, living in New York City, I find those same comforting flavors in a classic American sandwich: the Fluffernutter. I knew I had to turn that nostalgic combination into a cookie. This Fluffernutter Cookies Recipe is my love letter to that iconic pairing, with a twist from my Parisian pastry training. The secret? Freezing the marshmallows before baking—a technique I learned in a pâtisserie kitchen to keep them gooey and intact.
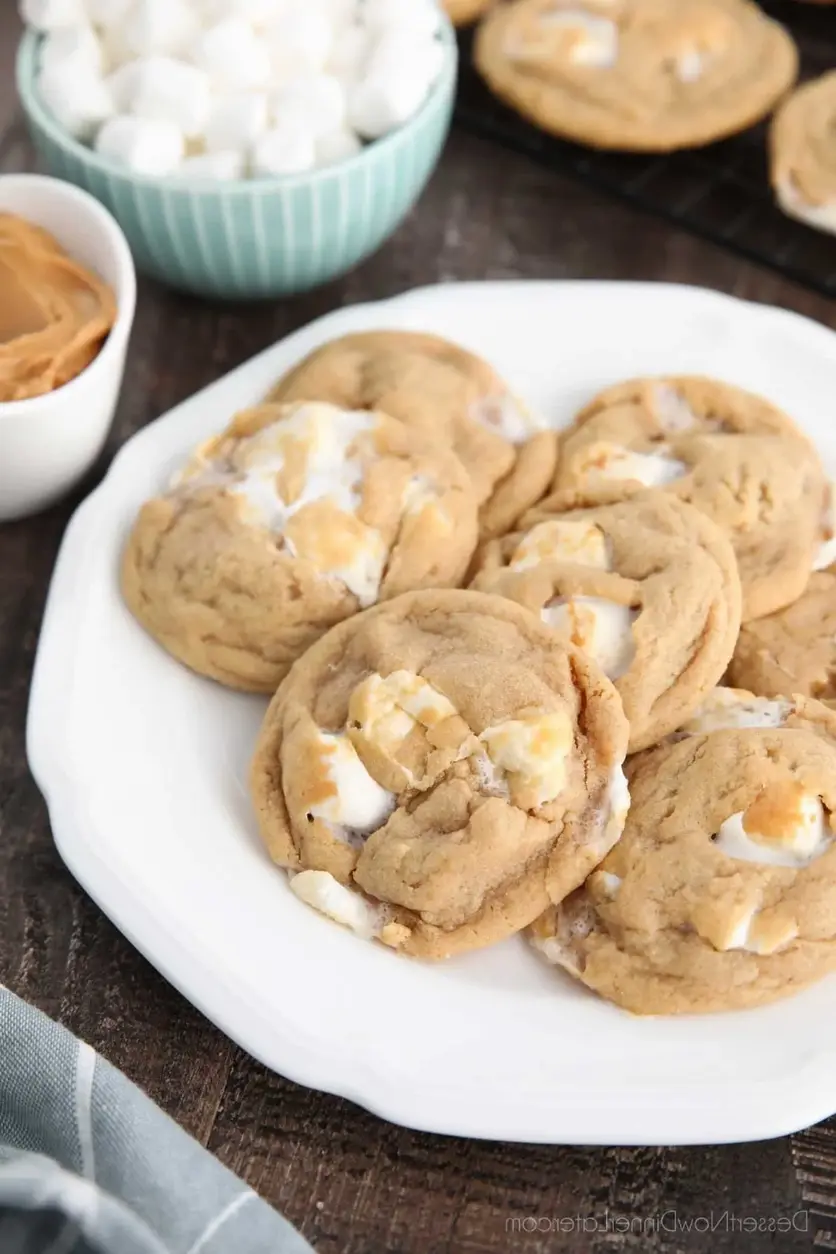
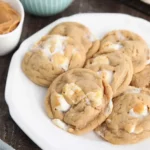
Imagine biting into a soft, chewy peanut butter cookie, only to find pockets of molten, gooey marshmallow hidden inside. The edges are lightly golden and crisp, while the center stays tender and almost fudge-like. A hint of vanilla rounds out the richness, and a sprinkle of flaky sea salt (if you dare) cuts through the sweetness. These Easy Fluffernutter Cookies are the perfect balance of salty, sweet, and utterly decadent.
I’ve tested this recipe dozens of times to get it just right. My version ensures the marshmallows don’t melt into a puddle—a common frustration. The key is to freeze the mini marshmallows for at least an hour before folding them into the dough. Also, chilling the shaped dough balls ensures they hold their shape. Trust me, this Fluffernutter Cookie Recipe is foolproof. One bite, and you’ll see why these are the best Marshmallow Peanut Butter Cookies you’ll ever make.
Why This Fluffernutter Cookies Recipe Is the Best
The Flavor Secret: I use a combination of creamy peanut butter and a touch of light brown sugar. The brown sugar adds a subtle molasses depth that complements the peanut butter beautifully. This isn’t just a cookie; it’s a homage to my mother’s peanut-studded pastries, elevated by a classic French technique of balancing sweet and savory notes.
Perfected Texture: The freezing trick is non-negotiable. When marshmallows are frozen, they release less moisture during baking. This means they stay in distinct, chewy pockets rather than dissolving into the dough. My Parisian training taught me that controlling temperature is the key to texture. Here, it’s the difference between a messy cookie and a masterpiece.
Foolproof & Fast: Even a beginner baker can nail these. The dough comes together in one bowl, there’s no chilling time for the dough itself (just the marshmallows), and the baking time is short. I’ve designed this as a quick project for weekday baking. You’ll have a batch of the best Fluffernutter Cookies in under 30 minutes.
Easy Fluffernutter Cookies Ingredients
I love sourcing my ingredients from the Union Square Greenmarket in NYC, but everything here is from a standard grocery store. The quality of peanut butter and butter really matters. I use Jif or Skippy natural-style for that perfect creamy texture. Let’s dive into the list.
Ingredients List
- 1 ½ cups all-purpose flour (stir, spoon & level)
- 1 tsp baking soda
- ½ tsp salt
- ½ cup unsalted butter (room temperature)
- ½ cup granulated sugar
- ½ cup light brown sugar (gently packed)
- ½ cup creamy peanut butter (not natural-style with oil separation)
- 1 large egg
- 1 tsp vanilla extract
- 1 cup mini marshmallows (frozen*)
Ingredient Spotlight
Peanut Butter: This is the star. Use a standard creamy peanut butter like Jif or Skippy. Natural-style peanut butters with separated oil can make the cookies too greasy and less tender. For a deeper flavor, you can substitute with crunchy peanut butter, but the texture will be slightly different.
Marshmallows: Mini marshmallows are essential. Freezing them is the trick I learned working in a Parisian pâtisserie that specialized in confections. It prevents them from melting entirely into the dough. Do not skip this step! If you use regular-sized marshmallows, cut them into smaller pieces and freeze them.
Butter: Unsalted butter at room temperature is crucial. If it’s too cold, it won’t cream properly with the sugar. If it’s too warm, the cookies will spread. I let mine sit out for about 30 minutes. Salted butter can be used in a pinch, but reduce the added salt to ¼ teaspoon.
| Original Ingredient | Best Substitution | Flavor / Texture Impact |
|---|---|---|
| Creamy Peanut Butter | Crunchy Peanut Butter | Adds nutty texture, slightly less smooth |
| Unsalted Butter | Salted Butter (reduce added salt) | Slightly saltier, less control over sodium |
| All-Purpose Flour | Gluten-Free 1:1 Blend | Slightly grainier, but still chewy |
How to Make Fluffernutter Cookies — Step-by-Step
Let’s get baking! I promise these are simple. Just follow these steps, and you’ll have a batch of warm, gooey cookies in no time.
Step 1: Freeze the Marshmallows
Spread the mini marshmallows on a small baking sheet and freeze them for at least 1-2 hours, or overnight if you can. This is the most critical step. Keep them in the freezer until right before you fold them into the dough.
💡 mia’s Pro Tip: If you forget to freeze them, don’t panic! Pop them in the freezer for 30 minutes while you prep the other ingredients. Every bit of cold helps.
Step 2: Preheat and Prep
Preheat your oven to 350°F (175°C). Line two large baking sheets with parchment paper or silicone baking mats. This prevents sticking and ensures even browning.
⚠️ Common Mistake to Avoid: Using dark, non-stick baking sheets can cause the bottoms of your cookies to burn. Use light-colored, rimmed baking sheets for best results.
Step 3: Mix Dry Ingredients
In a medium bowl, whisk together the flour, baking soda, and salt. This ensures the leavener is evenly distributed. Set this bowl aside.
Step 4: Cream Butter and Sugars
In a large bowl, use an electric mixer (hand or stand mixer with paddle attachment) to beat the softened butter, granulated sugar, and light brown sugar together on medium speed until light, fluffy, and pale in color. This takes about 2-3 minutes.
💡 mia’s Pro Tip: Don’t rush the creaming process. You want to incorporate air into the butter and sugar mixture. It should look like a sandy, pale paste. This is the foundation of a tender cookie.
Step 5: Add Wet Ingredients
Add the creamy peanut butter, the large egg, and vanilla extract to the butter-sugar mixture. Beat on medium speed until everything is well combined. Scrape down the sides and bottom of the bowl with a rubber spatula to make sure it’s all incorporated.
Step 6: Combine Wet and Dry
With the mixer on low speed, gradually add the dry ingredients to the wet ingredients. Mix until just combined—you should see a few streaks of flour remaining. Do not overmix, as this can make the cookies tough.
Step 7: Fold in Frozen Marshmallows
Remove the marshmallows from the freezer. Use a rubber spatula to gently fold a heaping cup of frozen marshmallows into the cookie dough. Work quickly so the marshmallows stay cold.
⚠️ Common Mistake to Avoid: If the marshmallows start to soften and melt into the dough, the cookies will spread too much. Keep them frozen until the last possible second.
Step 8: Shape and Scoop
Use a #30 cookie scoop (about 2 tablespoons) to quickly drop rounded dough balls onto the prepared baking sheets, spacing them about 3 inches apart. Place any remaining dough in the fridge while the first batch bakes to keep the marshmallows cold.
💡 mia’s Pro Tip: If you don’t have a cookie scoop, use two spoons to shape the dough quickly. The key is speed—the colder the marshmallows, the better the cookie.
Step 9: Bake and Cool
Bake the cookies at 350°F for 11-12 minutes, or until the edges are lightly golden and the centers look just set. They will look slightly underdone in the middle. Let them cool on the baking sheet for 10 minutes. After about 2-3 minutes of cooling, use a greased spatula to gently round any misshapen edges.
⚠️ Common Mistake to Avoid: Do not try to move the cookies to a wire rack while they are hot. They are very fragile and the marshmallows are gooey. Let them fully cool on the tray. Transferring them too soon can cause them to fall apart.
| Step | Action | Duration | Key Visual Cue |
|---|---|---|---|
| 1 | Freeze marshmallows | 1-2 hours | Firm, not sticky to the touch |
| 2-4 | Mix dry and wet ingredients | 5 minutes | Smooth, cohesive dough |
| 5-7 | Fold in frozen marshmallows | 30 seconds | White marshmallows visible |
| 8 | Bake | 11-12 minutes | Edges golden, centers set |
Serving & Presentation
These Fluffernutter Cookies are best enjoyed warm, when the marshmallows are at their gooey peak. I love serving them on a rustic wooden board, straight from the baking sheet. A light dusting of powdered sugar or a drizzle of melted chocolate makes them feel extra special for a party.
For a truly indulgent treat, serve them alongside a glass of cold milk (my NYC pick: Ronnybrook Farm Dairy). They also pair beautifully with a scoop of vanilla ice cream for a cookie sundae. In our family, we sometimes crumble them over a bowl of warm chocolate pudding for a playful take on a Moroccan-style milk pudding.
| Pairing Type | Suggestions | Why It Works |
|---|---|---|
| Side Dish | Fresh fruit salad, apple slices | Bright acidity balances sweetness |
| Sauce / Dip | Chocolate ganache, caramel sauce | Richness enhances peanut butter flavor |
| Beverage | Cold milk, black coffee, chai latte | Creamy or bitter notes cut through sugar |
| Garnish | Flaky sea salt, crushed peanuts | Adds texture and savory contrast |
Make-Ahead, Storage & Reheating
Living in a small NYC kitchen, I’m all about efficiency. These cookies are perfect for making ahead. You can prep the dough and freeze it for up to 3 months. Just scoop the dough balls, arrange them on a tray, and freeze them solid. Then pop them into a freezer bag.
| Method | Container | Duration | Reheating Tip |
|---|---|---|---|
| Refrigerator | Airtight container | 5 days | Microwave 10 seconds for gooeyness |
| Freezer (baked) | Freezer-safe bag | 3 months | Bake at 300°F for 5 minutes |
| Make-Ahead (dough) | Frozen dough balls | 3 months | Bake from frozen, add 2-3 minutes |
To reheat a baked cookie, pop it in the microwave for about 10 seconds. This brings back that fresh-from-the-oven gooeyness. If you’re baking from frozen dough, don’t thaw the dough first—just bake with marshmallows frozen, adding a few extra minutes

Print
Fluffernutter Cookies
Fluffernutter Cookies are the ultimate peanut butter marshmallow cookies. The best soft and chewy peanut butter cookies, with gooey marshmallows throughout.
Ingredients
- 1 ½ cups all-purpose flour ((stir, spoon & level))
- 1 tsp baking soda
- ½ tsp salt
- ½ cup unsalted butter (room temperature)
- ½ cup granulated sugar
- ½ cup light brown sugar (gently packed)
- ½ cup creamy peanut butter
- 1 large egg
- 1 tsp vanilla extract
- 1 cup mini marshmallows (frozen*)
Instructions
- *FREEZE marshmallows for at least 1-2 hours before using. Keep marshmallows in freezer until ready to bake.
- Preheat oven to 350 degrees Fahrenheit. Line cookie sheets with a silicone baking mat or parchment paper. Set aside.
- In a medium bowl, stir together the flour, baking soda and salt. Set aside.
- Cream the butter and both sugars with an electric mixer until light and creamy.
- Add the peanut butter, egg, and vanilla. Mix well and scrape bowl. Add the dry ingredients and mix until almost incorporated.
- Remove marshmallows from freezer and fold a heaping cup of marshmallows into the cookie dough.
- Use a #30 scoop (about 2 Tbsp) to quickly shape the cookie dough into balls. Place a few inches apart on a prepared baking sheet. Place remaining cookie dough in the fridge to keep marshmallows cold until ready to bake.
- Bake cookies at 350ËF for 11-12 minutes or until just set and edges are starting to brown. Allow cookies to cool completely on tray, about 10 minutes. After 2-3 minutes of cooling, use a greased spatula to round any misshapen cookies, if desired. Transfer cooled cookies directly to serving platter or airtight container. May stick to a wire cooling rack.
Nutrition
- Calories: 161 kcal
- Sugar: 11 g
- Fat: 8 g
- Carbohydrates: 20 g
- Protein: 3 g
Tried This Recipe? Leave a Comment!
Did you make this recipe? I’d love to hear how it turned out! Please leave a comment and a rating below. Your feedback helps other home cooks and supports cheerychop.com!
For more delicious inspiration, follow me on Pinterest!