Table of Contents
Peanut Butter Balls with Rice Krispies – No-Bake Chocolate Magic
When the holidays roll around in New York City, my apartment kitchen transforms into a sweet, chocolatey haven. Amidst the bustling city streets and the dazzling lights, there’s a comfort that comes from familiar, beloved treats. For years, my mother’s kitchen in Morocco would fill with the aroma of spices, but here in NYC, it’s the scent of this classic combination that defines festive baking. These Peanut Butter Balls with Rice Krispies, a beloved no-bake peanut butter balls recipe, are my go-to. They’re incredibly simple, requiring just a few pantry staples and minimal effort, weaving together that irresistible salty-sweet balance that makes every bite a pure delight. It’s a recipe that even my most novice friends can master, bringing a touch of homemade joy without the stress.
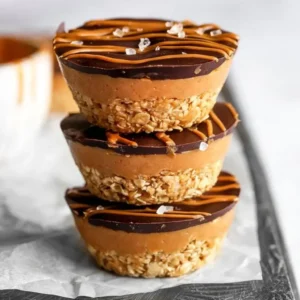
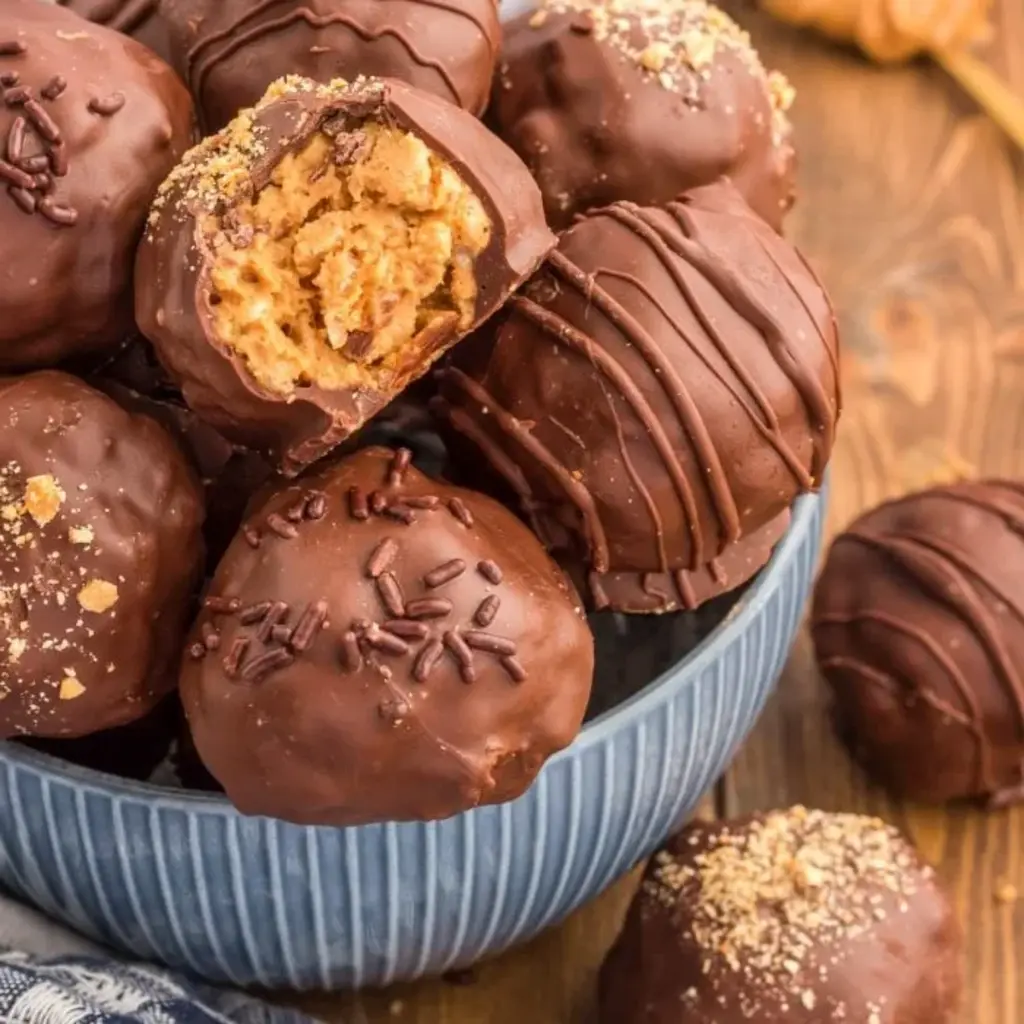
Imagine this: a soft, yielding center, infused with rich, creamy peanut butter and a hint of pure vanilla extract, all hugged by a crisp shell of melted chocolate. Then, woven through that peanut butter core is the delightful crunch and airy crispness of Rice Krispies cereal, providing a surprising texture that keeps your taste buds engaged. It’s a symphony of sensations – the smooth chocolate, the creamy peanut butter, and that satisfying, almost nostalgic, cereal crunch. It reminds me of the simple yet profound flavors we cherished back home, using basic ingredients to create something truly magical. This isn’t just a dessert; it’s a texture party in your mouth.
What I love most about these crispy peanut butter treats is their adaptability and how quickly they come together, making them perfect for last-minute gatherings or even a mid-week pick-me-up. I’ve perfected the ratios over the years, drawing on my French pastry training to ensure the perfect balance of chewiness and crispness. I’ll share a little secret in the instructions that guarantees evenly formed, beautiful balls every time. Plus, I’ll highlight a common mistake that can make your chocolate peanut butter balls turn out crumbly. So, let’s dive into creating these undeniably delightful peanut butter rice krispie balls that are sure to become a favorite in your recipe collection!
Why This Peanut Butter Balls with Rice Krispies Recipe Is the Best
The unique magic of these peanut butter balls with Rice Krispies lies in the perfect marriage of textures and flavors, a concept I learned to appreciate deeply during my culinary studies in Paris. While many recipes stick to a dense peanut butter fudge, my approach elevates it by incorporating the airy crunch of Rice Krispies. This addition not only lightens the texture but also provides a delightful contrast that complements the richness of the peanut butter and chocolate. It’s a simple innovation, but one that transforms a good treat into an extraordinary one, offering a flavor profile that’s both comforting and exciting, a true testament to how humble ingredients can be elevated with a touch of technique and creativity.
From a professional cook’s perspective, achieving the perfect texture is paramount. My method ensures the peanut butter mixture is just cohesive enough to roll into balls without being overly sticky or dry. The key is the gentle folding of the Rice Krispies, ensuring they maintain their crispness until baked and then providing that signature textural element. This technique ensures your peanut butter rice krispie balls have a delightful chew that’s not dense or heavy, but pleasantly light and satisfying. It’s about finding that perfect balance, much like mastering a delicate French patisserie, where each component plays its role flawlessly.
The beauty of these no-bake peanut butter balls is their sheer simplicity and speed. They’re designed for busy home cooks, making them incredibly accessible and perfect for any occasion, from a casual weekend bake to a large holiday buffet. You don’t need any special equipment or advanced culinary skills; just a bowl, a spoon, and a desire for something delicious. This recipe is a foolproof way to impress friends and family, offering a delightful homemade treat that tastes like it came from a gourmet bakery, all without turning on the oven. It’s a testament to how simple, quality ingredients, when combined thoughtfully, can create pure joy.
Peanut Butter Balls with Rice Krispies Ingredients
When I’m whipping up a batch of these peanut butter balls with Rice Krispies in my New York City kitchen, I always head to my local farmer’s market or a specialty grocery store for the best quality ingredients. My mother used to say that the soul of any dish starts with its ingredients, a lesson I carry with me from our home in Morocco. For these treats, the quality of your peanut butter and chocolate really shines through. I find that the simpler, the better – no need for overly processed versions when you’re aiming for that pure, delicious flavor.
Ingredients List
- 2 cups peanut butter (creamy or crunchy, your choice!)
- ½ cup salted butter, softened
- 2 teaspoons vanilla extract
- 2 cups powdered sugar
- 3½ cups Rice Krispies cereal
- 20 ounces chocolate melting wafers (milk, dark, or semi-sweet)
Ingredient Spotlight
Peanut Butter: This is the heart of our peanut butter rice krispie balls. I recommend using a good quality, creamy peanut butter for the smoothest texture, but crunchy adds a fun textural element. Look for brands with minimal added sugar and oil. If you can find natural peanut butter, give it a good stir; it’s often richer in flavor. A good substitute could be almond butter or cashew butter for a different nutty profile, though the flavor will change significantly.
Rice Krispies Cereal: The star that gives these crispy peanut butter treats their signature crunch and lightness! Ensure your cereal is fresh and crisp for the best texture. Avoid stale cereal, as it can make the balls somewhat chewy or soft. In a pinch, I’ve seen recipes use other puffed cereals, but they might alter the classic flavor and texture. Corn or rice cereal puffs can work, but their shape and density are different.
Chocolate Melting Wafers: These are the easiest and most reliable way to get a smooth, glossy coating on your chocolate peanut butter balls. They melt beautifully and set up firm without the need for tempering. You can find them in various forms – milk chocolate for sweetness, dark chocolate for richness, or semi-sweet for a balance of both. If you can’t find wafers, good quality chocolate chips (like Guittard or Ghirardelli) can work, but you might need to add a teaspoon of coconut oil or vegetable shortening to help achieve a smoother consistency when melting.
| Original Ingredient | Best Substitution | Flavor / Texture Impact |
|---|---|---|
| Peanut Butter | Almond Butter or Cashew Butter | Changes the nutty flavor profile; may affect binding slightly. |
| Rice Krispies Cereal | Puffed Corn or Puffed Rice Cereal | May alter the familiar flavor and texture slightly; test for crispness. |
| Chocolate Melting Wafers | Good Quality Chocolate Chips (plus 1 tsp oil/shortening) | May result in a softer set; adding oil helps achieve fluidity. |
How to Make Peanut Butter Balls with Rice Krispies – Step-by-Step
Let’s dive into creating these delightful little spheres of joy. Follow these simple steps, and you’ll have a batch of perfect no-bake peanut butter balls in no time!
Step 1: Create the Peanut Butter Base
In a large mixing bowl, combine the peanut butter, softened salted butter, and vanilla extract. Use an electric mixer or a sturdy whisk to beat these ingredients together until they are completely smooth and well combined. This forms the rich, creamy foundation for our treats. It’s important that the butter is truly softened, almost to a paste, to ensure it blends seamlessly with the peanut butter without any lumps.
💡 mia’s Pro Tip: Make sure your butter is at room temperature but not melted. It should be pliable enough to indent easily with your finger. This ensures it emulsifies beautifully with the peanut butter for a super smooth base.
Step 2: Incorporate the Powdered Sugar
Add the powdered sugar to the peanut butter mixture, gradually incorporating it. I like to add it about half a cup at a time, mixing on low speed or by hand between additions. This prevents the powdered sugar from flying all over your kitchen, which can be quite messy! Continue mixing until the sugar is fully incorporated and the mixture starts to thicken, becoming more like a dough.
⚠️ Common Mistake to Avoid: Adding all the powdered sugar at once can make the mixture too stiff and difficult to mix, or it can create a cloud of sugar dust. Gradual addition is key to a smoothly combined, workable dough.
Step 3: Fold in the Rice Krispies
Gently fold the Rice Krispies cereal into the peanut butter and powdered sugar mixture. Use a spatula or a large spoon to do this carefully, trying not to crush the cereal too much – we want to preserve that delightful crunch! Once everything is evenly distributed, the mixture should feel firm and pliable enough to shape.
Step 4: Portion and Roll the Balls
Line a baking sheet with parchment paper. Using a medium cookie scoop (about 1.5 tablespoons), portion the mixture. Roll each portion between the palms of your lightly greased or dampened hands to form smooth, compact balls. Place these balls onto the prepared baking sheet. This ensures they are uniformly sized and have a pleasingly rounded shape, ready for their chocolate coating.
💡 mia’s Pro Tip: For perfectly smooth balls, a light coating of non-stick spray or a little water on your hands can prevent sticking and help create a seamless finish. You can also chill the mixture for 10-15 minutes before rolling if it feels too soft.
Step 5: Melt the Chocolate
While your balls are chilling or after they’ve been rolled, melt the chocolate. Place the chocolate melting wafers in a deep, wide-mouth cup or microwave-safe bowl. Microwave in 30-second intervals, stirring thoroughly between each one, until the chocolate is completely melted and smooth. Be patient; chocolate can burn easily if microwaved too long or on too high a heat.
Step 6: Dip the Peanut Butter Balls
Using a fork or a dipping tool, carefully dip each peanut butter Rice Krispie ball into the melted chocolate. Lift it out, allowing any excess chocolate to drip back into the bowl. Place the coated ball back onto the parchment-lined baking sheet, ensuring it doesn’t touch any other balls while the chocolate sets.
Step 7: Finish and Let Them Set
Continue this process until all balls are dipped. You may need to reheat the chocolate if it starts to cool and thicken; repeat the 30-second interval microwaving. Once all balls are coated, let them sit at room temperature until the chocolate has hardened completely—this usually takes about 30-60 minutes. For a quicker set, you can pop the baking sheet into the refrigerator for about 15 minutes.
💡 mia’s Pro Tip: If the chocolate gets too thick while dipping, it’s much better to gently reheat it in the microwave for 15-20 seconds rather than adding more oil, which can alter the flavor and set. This ensures a beautiful, smooth coating every time.
| Step | Action | Duration | Key Visual Cue |
|---|---|---|---|
| 1 | Combine peanut butter, butter, vanilla | ~2 mins | Smooth, paste-like consistency. |
| 2 | Gradually add powdered sugar | ~3-4 mins | Thick, dough-like texture. |
| 3 | Fold in Rice Krispies | ~2 mins | Evenly distributed cereal, pliable mixture. |
| 4 | Portion and roll balls | ~10 mins | Uniformly shaped, compact balls. |
| 5 | Melt chocolate | ~2-3 mins (in intervals) | Smooth, glossy, fluid chocolate. |
| 6 | Dip balls in chocolate | ~3-5 mins | Even coating, no dripping excess. |
| 7 | Let set | ~15 mins (fridge) or 30-60 mins (room temp) | Chocolate is firm to the touch. |
Serving & Presentation
These peanut butter balls with Rice Krispies are wonderfully versatile when it comes to serving. For a festive occasion, I love arranging them on a tiered stand alongside cookies and macarons, reminiscent of the beautiful dessert platters my mother would prepare for special guests in Morocco. Their classic appeal makes them a crowd-pleaser at any party, from a casual NYC gathering to a more formal event. The rich chocolate coating and the hint of salty peanut butter create an irresistible flavor combination that always gets rave reviews.
For an elegant touch, consider a delicate drizzle of contrasting chocolate (white chocolate works beautifully!) over the top after the main coating has set. This adds visual interest and an extra layer of sweetness. They also look stunning nestled on a small plate with a single, fresh raspberry or a tiny mint sprig. These little touches, inspired by Parisian patisserie presentation, elevate the humble treat into something truly special. Remember, presentation is half the experience, even for a simple, beloved cookie!
| Pairing Type | Suggestions | Why It Works |
|---|---|---|
| Side Dish | Fresh Fruit Platter (strawberries, bananas), Mini Pretzels | Complements sweetness; adds contrasting crunch/saltiness. |
| Sauce / Dip | Raspberry Coulis, Freshly Whipped Cream | Adds a tart or creamy element to cut the richness. |
| Beverage | Milk, Coffee, Herbal Tea (Peppermint or Chamomile) | Classic pairings that complement chocolate and peanut butter flavors. |
| Garnish | Crushed Peanuts, Chocolate Drizzle (white or dark), Sprinkles | Enhances appearance and adds textural or visual contrast. |
Make-Ahead, Storage & Reheating
As a busy New Yorker, I almost always have these peanut butter balls with Rice Krispies made ahead of time. They are the perfect make-ahead treat for potlucks, cookie exchanges, or simply for those moments when a chocolate craving hits unpredictably. Knowing they will keep well means I can prepare them days in advance, taking one thing off my mental load. Storing them properly is key to maintaining their texture and deliciousness, ensuring they are just as good on day five as they are on day one.
| Method | Container | Duration | Reheating Tip |
|---|---|---|---|
| Refrigerator | Airtight container | Up to 5 days. | No reheating needed; serve chilled or at room temperature. |
| Freezer | Freezer-safe bag or container | Up to 2 months. | Thaw in refrigerator overnight. For a firmer coating, briefly chill again after thawing. |
| Make-Ahead | Arrange on parchment-lined tray, cover loosely with plastic wrap | Up to 2 days at room temperature (in cool environment) before dipping. Once dipped, store as above. | Ensure chocolate is fully set before packing. |
If you’ve stored your peanut butter balls in the refrigerator, I find they taste best when allowed to come to room temperature for about 20-30 minutes before serving. This allows the peanut butter center to soften to its ideal consistency, creating that perfect melt-in-your-mouth experience. If they’ve been in the freezer, thawing them slowly in the fridge overnight is the best approach to prevent condensation from affecting the chocolate coating. Gently reheating the chocolate coating is usually not necessary, as it’s meant to be a crisp shell.
Variations & Easy Swaps
| Variation | Key Change | Best For | Difficulty Impact |
|---|---|---|---|
| Chocolate Lover’s Dream | Use dark chocolate wafers; add cocoa powder to the peanut butter mix. | Intense chocolate and peanut butter lovers. | Slightly more involved mixing. |
| Gluten & Dairy-Free Delight | Use dairy-free chocolate wafers; ensure peanut butter is dairy-free. | Those with dietary restrictions. | Requires careful ingredient selection. |
| Seasonal Spiced Treats | Add cinnamon, ginger, or a pinch of cardamom to the peanut butter mix. | Fall and winter holidays. | Minimal complexity. |
Chocolate Lover’s Dream
For those who believe more chocolate is always better, this variation is for you! Swap the standard milk or semi-sweet chocolate wafers for dark chocolate for a richer, more intense flavor. Additionally, I love incorporating about 2-3 tablespoons of unsweetened cocoa powder directly into the peanut butter mixture. This infuses the heart of the ball with deep chocolate notes, creating a truly decadent chocolate peanut butter ball experience that is incredibly satisfying and sophisticated.
Gluten & Dairy-Free Delight
Adapting these popular peanut butter balls with Rice Krispies to be gluten and dairy-free is surprisingly straightforward. Ensure your peanut butter is naturally gluten and dairy-free (most are). Use dairy-free chocolate melting wafers, which are widely available now in brands like Enjoy Life or Chocodate. The Rice Krispies cereal itself is typically gluten-free, but always check the packaging to be absolutely sure. This variation is a faithful replica of the original, offering a delicious treat for those with common dietary needs without compromising on taste or texture.
Seasonal Spiced Treats
Drawing inspiration from my Moroccan heritage, where spices are integral to desserts, I love adding a touch of warmth to these treats during the cooler months. Incorporate half a teaspoon of ground cinnamon and a quarter teaspoon of ground ginger into the peanut butter mixture. For a more exotic touch, a tiny pinch of cardamom or even a whisper of nutmeg can add incredible depth. This subtle spice blend complements the peanut butter and chocolate beautifully, making these just perfect for fall cookie platters or holiday gatherings.
How do you keep peanut butter balls with Rice Krispies from falling apart?
The key to keeping these peanut butter balls with Rice Krispies from falling apart is ensuring the peanut butter mixture is well-combined and has the right consistency. Make sure the butter is softened but not melted, and gradually add the powdered sugar. Once the Rice Krispies are folded in, the mixture should be cohesive enough to roll into balls without crumbling or being overly sticky. If it’s too dry, a teaspoon of milk or melted butter can help; if too wet, a bit more powdered sugar or cereal. Rolling them firmly between your palms also helps bind them together before they are dipped.
What can I use instead of Rice Krispies in peanut butter balls?
If you don’t have Rice Krispies cereal, you can experiment with other crisp ingredients for your peanut butter balls. Puffed rice cereal, puffed corn cereal, or even crispy rice treats broken into small pieces can offer a similar crunchy texture. Some people also enjoy adding finely chopped nuts like peanuts or pecans for a different kind of crunch. Keep in mind that different cereals or additions might alter the flavor and texture slightly, so it’s always a good idea to test a small batch first to ensure you like the result.
Do you need to refrigerate peanut butter balls with Rice Krispies before dipping in chocolate?
While this recipe doesn’t strictly require refrigeration before dipping, I often find that chilling the rolled balls for about 15-20 minutes in the refrigerator makes them firmer and easier to handle when dipping them into the warm melted chocolate. This firming step helps prevent the balls from absorbing too much heat from the chocolate, which can cause them to soften or even break apart. It’s not essential, but it does contribute to a cleaner dip and a more solid shell. Be careful not to chill them for too long, or the chocolate may set too quickly.
Can I freeze peanut butter balls with Rice Krispies for later?
Yes, absolutely! These peanut butter balls with Rice Krispies freeze exceptionally well, which is fantastic for making them well in advance for holidays or parties. Once the chocolate coating has hardened completely, arrange the balls in a single layer on a baking sheet and freeze them until solid for about an hour. Then, transfer them to a freezer-safe airtight container or a heavy-duty freezer bag. They can be stored for up to two months. Thaw them in the refrigerator overnight for the best texture and to prevent condensation from affecting the chocolate.
What kind of peanut butter is best for these no-bake balls?
For these no-bake peanut butter balls, the best kind of peanut butter to use is one that is creamy and has a good, balanced flavor. I prefer using a standard creamy peanut butter like Jif or Skippy, as they have a sticky, pliable texture that binds well with the other ingredients and holds its shape beautifully. Natural peanut butters, while delicious, can be too oily and may cause the mixture to be crumbly or the balls to not hold together as well. If you do use natural peanut butter, make sure to stir it very thoroughly and consider adding a tablespoon more of powdered sugar if needed.
Why did my chocolate coating crack on the peanut butter balls?
Chocolate coating can crack on peanut butter balls for a few common reasons. The most frequent culprit is a significant temperature difference between the peanut butter balls and the melted chocolate. If the balls are too cold (e.g., straight from the freezer without thawing) and the chocolate is warm, the rapid temperature change can cause the chocolate to contract too quickly and crack. Another reason is if the chocolate isn’t fully melted and is applied too thickly, or if it’s overheated and burns. Ensure your balls are at room temperature and the chocolate is smooth and fluid before dipping.
Can I make these vegan?
Yes, you can definitely make these peanut butter balls with Rice Krispies vegan! The peanut butter and Rice Krispies cereal are typically vegan, but it’s always good to double-check the labels. The main change you’ll need to make is using vegan chocolate melting wafers or chips. Many brands now offer delicious vegan chocolate options that work perfectly for coating. Ensure your butter substitute is also vegan (like a plant-based butter spread), and you’ve got yourself a wonderful vegan treat that everyone can enjoy.
What’s the best way to store these crispy peanut butter treats?
The best way to store these crispy peanut butter treats is in an airtight container. They can be kept at room temperature for a few days if your kitchen isn’t too warm, but for optimal freshness and to keep the chocolate coating firm, I prefer storing them in the refrigerator. Place them in a single layer or with parchment paper between layers to prevent sticking. They will stay delicious for about 5 days this way. If you plan to store them longer, freezing is the best option, as mentioned before.
Share Your Version!
I just love seeing how you bring these recipes to life in your own kitchens! If you’ve made these delightful Peanut Butter Balls with Rice Krispies, please consider leaving a star rating and a comment below – your feedback helps other cooks immensely. And if you’ve snapped a photo, share it on Instagram or Pinterest and tag me @chefrecipes2! I’m always so curious to see your variations. Did you try adding any special spices like I mentioned? I’d love to hear your thoughts!
From my NYC kitchen to yours — I hope this recipe brings as much warmth to your table as it does to mine. — mia 🧡
Love This Recipe? Save It to Pinterest!
If you enjoyed this Peanut Butter Balls with Rice Krispies recipe, don’t let it get lost in your browser tabs! 😄 Pin it now so you can find it again anytime — and explore hundreds more tried-and-tested recipes waiting for you on my Pinterest boards.
👉 Follow mia on Pinterest @chefrecipes2
📌 Pin this recipe · 🔁 Re-pin your favorites · 💬 Tag me when you make it — I love seeing your creations!

Peanut Butter Balls with Rice Krispies

These Rice Krispie Peanut Butter Balls are a sweet and salty no-bake treat that’s made with only 6 ingredients in just 45 minutes! Great for potlucks and cookie trays!
Ingredients
- 2 cups peanut butter (creamy or crunchy)
- ½ cup salted butter (softened)
- 2 teaspoons vanilla extract
- 2 cups powdered sugar
- 3½ cups rice krispies cereal
- 20 ounces chocolate melting wafers
Instructions
- In a large bowl, beat together 2 cups peanut butter, ½ cup salted butter, and 2 teaspoons vanilla extract until fully combined.
- Add 2 cups powdered sugar (½ cup at a time), mixing a little between each addition so it doesn't make a mess.
- Fold in the 3½ cups rice krispies cereal and portion the mixture out onto a parchment-lined baking sheet with a medium cookie scoop.
- Roll the balls between your palms to smooth them out.
- Melt 20 ounces chocolate melting wafers in a deep wide-mouth cup or bowl at 30-second intervals, stirring between each one, until fully melted.
- Dip the balls in the melted chocolate one at a time, letting any excess chocolate drip off, then placing back on the parchment.
- Reheat the chocolate if it begins getting too cool and thick, then finish dipping the balls.
- Let the balls sit at room temperature until the harden or pop them in the fridge for 15 minutes.
Nutrition
- Calories: 324 kcal
- Sugar: 24 g
- Fat: 22 g
- Carbohydrates: 31 g
- Protein: 6 g
Tried This Recipe? Leave a Comment!
Did you make this recipe? I’d love to hear how it turned out! Please leave a comment and a rating below. Your feedback helps other home cooks and supports cheerychop.com!
For more delicious inspiration, follow me on Pinterest!