“`html
Table of Contents
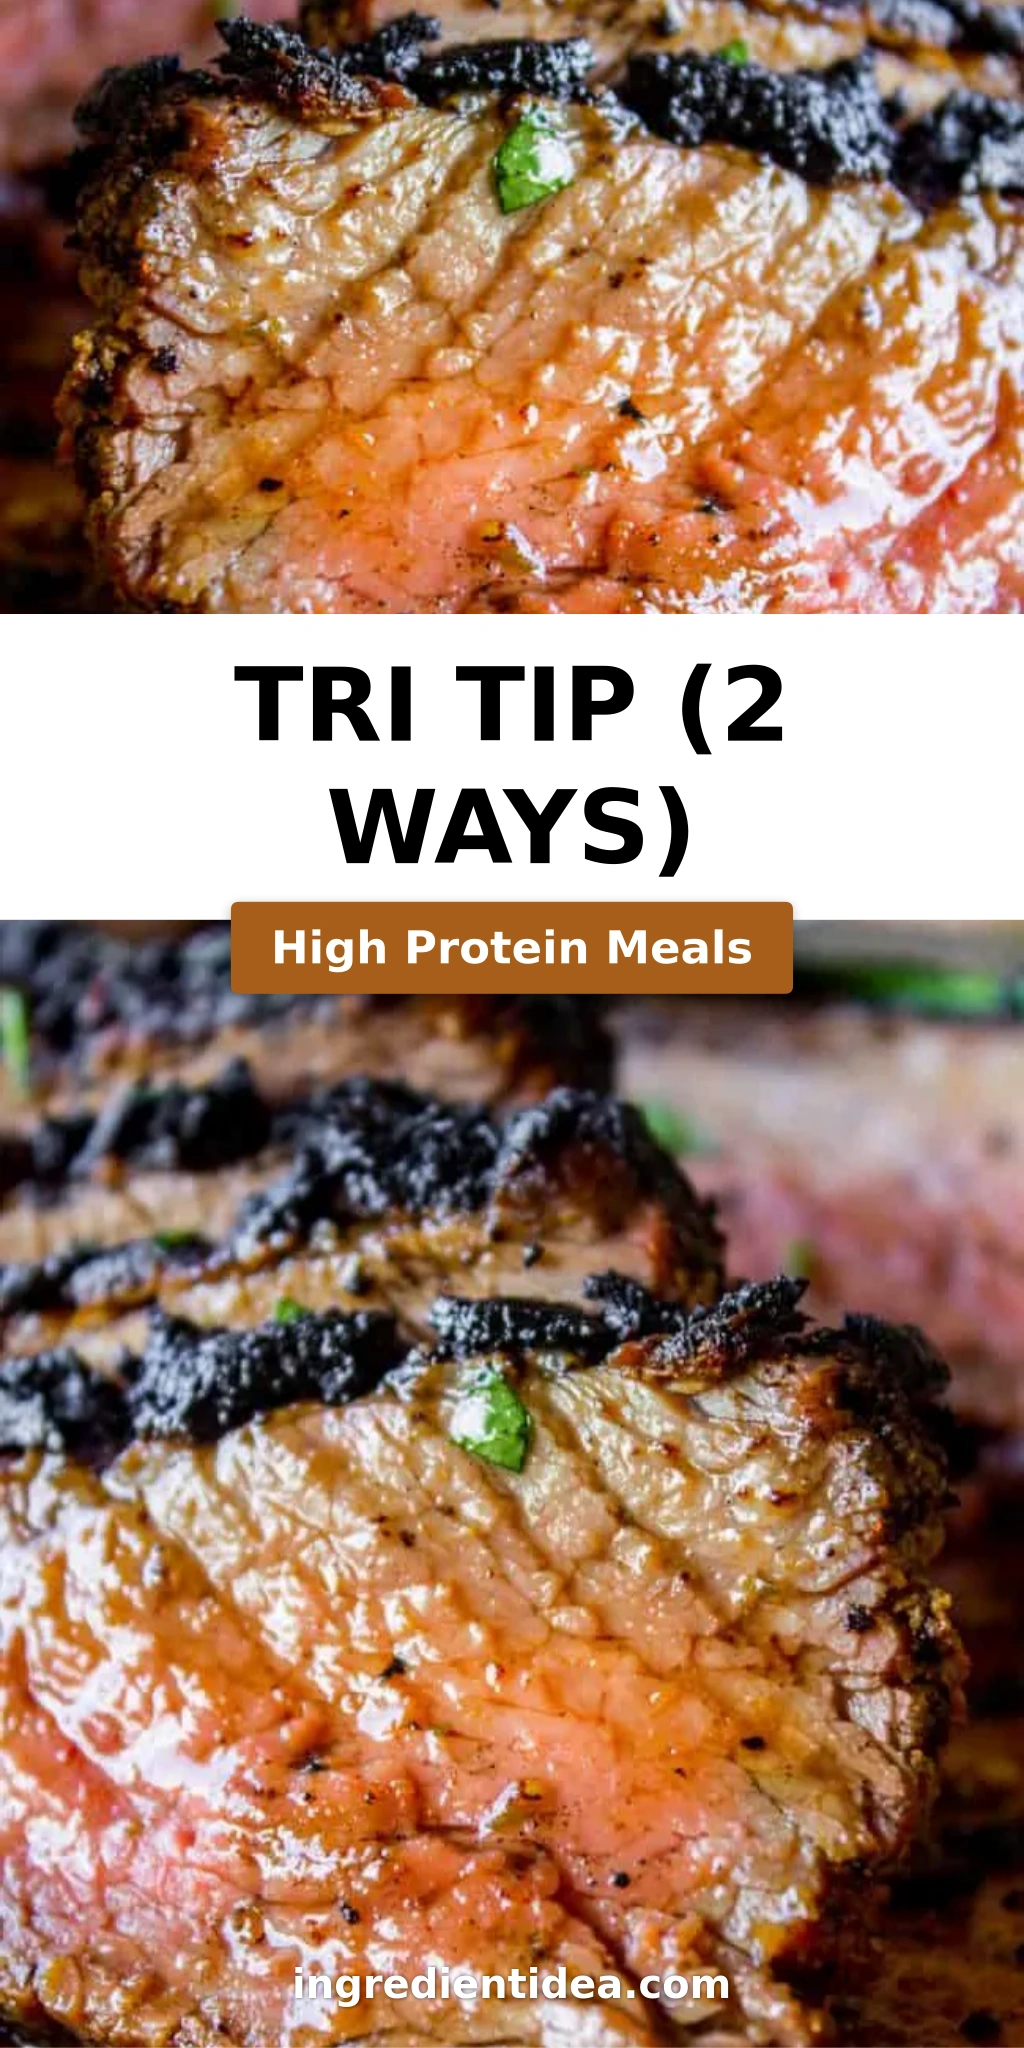
Tri Tip (2 Ways): Grilled and Oven-Baked – The Best Tri Tip Recipes
If you have never had tri tip, you haven’t lived! I will show you how to cook tri tip on the grill or in the oven – it’s SO easy and the flavor is unbeatable. Growing up in Morocco, my mother always slow-cooked beef with warm spices, but it wasn’t until I moved to New York City that I discovered the humble tri tip roast. This cut, also called a California cut or triangle roast, is a hidden gem of the beef world. I’ve perfected two methods for cooking it: a smoky grilled version that brings back memories of backyard feasts in Marrakech, and an oven-baked method that delivers a gorgeous crust and tender interior every time. We always had tri tip for Christmas dinner growing up – it’s an impressive main dish that doesn’t require hours of fussing.
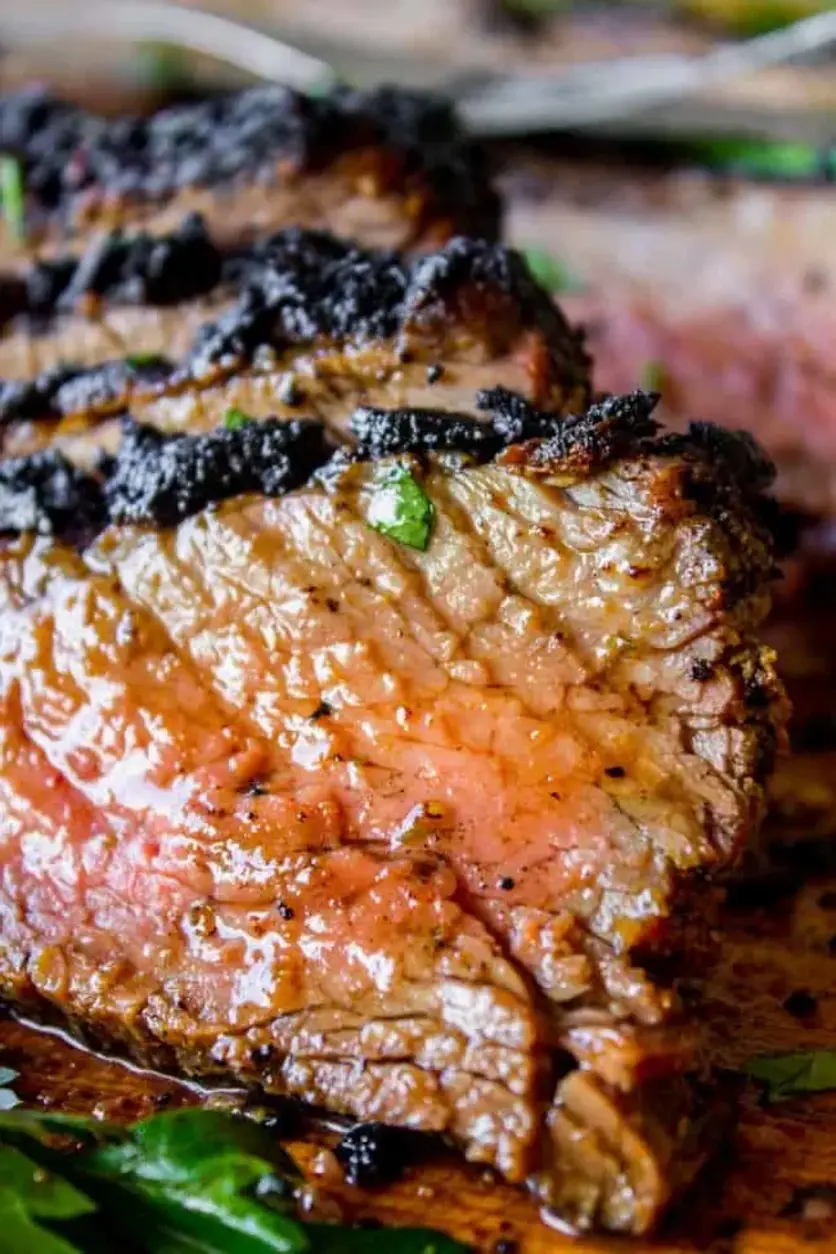
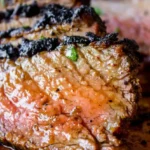
The first time I made tri tip in my tiny NYC apartment, the aroma of garlic, parsley, and Lawry’s seasoning filled every room – it was like a warm hug after a long winter day. The exterior develops a deep, mahogany-brown crust from the sear, while the inside stays blush-pink and impossibly tender. Each slice reveals a beautiful red center with a dark, spiced edge. The fat cap, left on for oven roasting, renders down and bastes the meat as it cooks, creating a buttery richness that you just can’t get from a leaner roast. When you slice it against the grain, the muscle fibers separate into perfect, bite-sized pieces that practically melt on your tongue.
What sets my version apart is the balance of the spice rub – it’s salty, savory, and has just a whisper of sugar to help with caramelization. I learned the importance of a good sear during my pastry training in Paris, where we applied the same technique to beef for a client’s private dinner. The key is to use Diamond Crystal kosher salt (never table salt – it makes a difference!) and to let the roast marinate for at least eight hours. If you don’t have that kind of time, even 15 minutes will still give you a fantastic result. I’ll show you exactly how to nail the timing, whether you’re grilling or baking, and I’ll share my favorite pan sauce trick that uses the drippings.
Why This Tri Tip Recipe Is the Best
The flavor secret here is the combination of garlic salt, Lawry’s seasoning, a touch of sugar, and fresh parsley. This isn’t just any spice rub – it’s the same one my mother used for her Friday night roasts, but I’ve added a pinch of sugar to help the meat develop that gorgeous crust. The olive oil in the marinade carries the spices deep into the meat, so every bite is seasoned from the inside out. I always buy my tri tip from a local butcher in NYC who carries prime cuts with beautiful marbling – that fat equals flavor, and it’s worth seeking out.
Perfected texture comes from the two-zone cooking method. Whether you’re grilling over indirect heat or oven-roasting at 400°F, the sear locks in the juices, and the slow, gentle finish ensures the meat stays tender. I learned this technique from a chef in Paris who always said, “The meat tells you when it’s done – you just have to listen.” Using a meat thermometer is non-negotiable here: 135°F for rare, 145°F for medium-rare. Never go past 145°F or the meat will become tough because this cut doesn’t have enough fat for well-done.
Foolproof and fast – even if you’re a beginner, this recipe will make you look like a pro. The ingredients are all available at a standard US grocery store, and the steps are simple: rub, rest, sear, then finish over indirect heat or in the oven. I’ve taught this recipe to dozens of friends in my NYC cooking classes, and every single one has nailed it on the first try. Plus, you get two methods in one post – so whether it’s snowing outside or you’re firing up the grill for summer, you’re covered.
Tri Tip Recipes Ingredients
I pick up my tri tip from the butcher at the Union Square Greenmarket in NYC – they always have well-marbled prime cuts that are perfect for roasting. In Morocco, my mother would use a similar cut called “gigot” for special occasions, but tri tip has become my go-to here in the States. The ingredients are simple, and you probably already have most of them in your pantry.
Ingredients List
- 2 & 1/2 pound tri tip roast
- 1 & 1/2 teaspoons garlic salt
- 1 tablespoon Lawry’s seasoning salt
- 1 & 1/2 teaspoons kosher salt (Diamond Crystal preferred)
- 1 teaspoon black pepper
- 1/2 teaspoon sugar
- 2 teaspoons garlic powder
- 1 tablespoon dried or fresh parsley
- 1/4 cup olive oil
Ingredient Spotlight
The tri tip roast is the star here. Look for a “prime” cut from a local butcher – it will have more marbling and fat, which means more flavor and a longer cook time. At a high-end grocery store, you’ll get mid-range cuts, but discount stores often have lean meat that will shrink significantly. Ask for a “California cut” or “triangle roast” if the butcher isn’t familiar with tri tip. Kosher salt is crucial – I use Diamond Crystal because its light, flaky texture distributes evenly and doesn’t over-salt. Lawry’s seasoning salt adds that savory, herbaceous depth that makes this rub sing, and the sugar (just 1/2 teaspoon) helps the crust caramelize beautifully.
| Original Ingredient | Best Substitution | Flavor / Texture Impact |
|---|---|---|
| Tri tip roast | Top sirloin roast | Similar texture but leaner; reduce cook time slightly |
| Lawry’s seasoning salt | 1 tbsp seasoned salt + 1/2 tsp dried herbs | Slightly less complex but still delicious |
| Diamond Crystal kosher salt | Morton kosher salt (use 1 tsp instead of 1.5) | Morton is denser; adjust amount to avoid over-salting |
| Olive oil | Avocado oil | Higher smoke point, neutral flavor – great for searing |
How to Make Tri Tip (2 Ways) — Step-by-Step
Let me walk you through both methods – grilled and oven-baked. Each one is simple, and I’ve included my best pro tips and common mistakes to avoid, so you get perfect results every time.
Step 1: Choose Your Meat
If you can, get your tri tip from a local butcher. They will have what is called “prime” cuts, which has more fat and marbling than you can find at the grocery store. It will take longer to cook because of all the fat – and fat equals flavor! If you buy at a grocery store, choose a high-end one for mid-range cuts. Discount stores will have lean meat that shrinks a lot and cooks faster.
💡 mia’s Pro Tip: Ask the butcher or clerk for a “California cut” or “triangle roast.” If they still don’t know, ask for the bottom sirloin butt (subprimal cut).
Step 2: Make the Spice Rub
In a small bowl, combine all the spices: garlic salt, Lawry’s seasoning salt, kosher salt (only kosher salt – never table salt, and preferably Diamond Crystal!), black pepper, sugar, garlic powder, and dried or fresh parsley. If using fresh parsley, use 2-3 tablespoons.
⚠️ Common Mistake to Avoid: Using table salt instead of kosher salt will make the roast way too salty. Kosher salt crystals are larger and distribute more evenly.
Step 3: Trim and Marinate
If you are grilling, trim the fat cap from the roast. If you are oven roasting, leave it on. Rub the spice mixture all over the roast with your hands. Place in a large ziplock bag and add 1/4 cup olive oil. Seal the bag and massage the oil into the meat. Refrigerate for about 8 hours, turning a couple times. If you only have an hour or even 15 minutes, you’ll still get a great roast – but the longer you marinate, the more flavor you’ll get. You can leave it for up to 3 days.
💡 mia’s Pro Tip: Massage the bag for a full 2 minutes to make sure every surface is coated. This helps the spices penetrate deeper.
Step 4: Bring to Room Temperature
Remove the meat from the fridge 30 minutes before you plan to cook it. It should start cooking at room temperature for even cooking throughout.
Step 5A: Grilling Method
Preheat your grill to high heat – give it a good 15-20 minutes to heat up. Place the roast on a plate and discard the marinade (or save it for a pan sauce). Grease the grill or brush oil directly on the meat. Sear the roast over high heat for 2-3 minutes per side until nicely browned, keeping the lid shut as much as possible. Then turn off the heat on the side where the meat is (indirect heat), and lower the other side to low. Grill without opening the lid for 20-25 minutes, or about 10-15 minutes per pound, depending on your desired doneness. Rare is 135°F, medium-rare is 145°F. Use a meat thermometer inserted in the center.
⚠️ Common Mistake to Avoid: Don’t flip the meat more than once – it disrupts the crust formation. Let it sear undisturbed for the full time.
Step 5B: Oven-Baking Method
Preheat your oven to 400°F. Line a rimmed baking sheet with foil and place an oven-safe cooling rack on top. Heat a large skillet over medium-high heat with 2 tablespoons olive oil. When the oil shimmers, place the roast fat side down and sear for 3-4 minutes until a brown crust develops. Flip and sear the other side. Place the roast on the cooling rack and bake at 400°F for 20-30 minutes, or 10-15 minutes per pound. Rare is 130-135°F, medium-rare is 135-145°F. Don’t cook past 145°F – the meat doesn’t have enough fat for medium-well or well.
💡 mia’s Pro Tip: Save the marinade and oil from searing to make a quick pan sauce – just add 2 cups beef broth, a flour slurry, and butter for an incredible gravy.
Step 6: Rest and Slice
Remove the roast from the grill or oven and place on a rimmed serving platter. Cover well with foil and let rest for 10-15 minutes. This step is crucial for the juices to redistribute. Slice against the grain and serve. The grain runs diagonally across the roast, so angle your knife to cut perpendicular to it for the most tender slices.
⚠️ Common Mistake to Avoid: Slicing with the grain instead of against it makes the meat chewy. Look closely at the muscle fibers and always cut across them.
| Step | Action | Duration | Key Visual Cue |
|---|---|---|---|
| 1 | Choose prime tri tip | 5 mins | Well-marbled, bright red color |
| 2 | Make spice rub | 5 mins | Aromatic, well-blended |
| 3 | Trim and marinate | 8 hrs (ideal) | Meat fully coated, oil absorbed |
| 4 | Bring to room temp | 30 mins | No longer cold to the touch |
| 5 | Sear | 2-4 mins per side | Deep brown crust |
| 6 | Cook (grill or oven) | 20-30 mins | Internal temp 135-145°F |
| 7 | Rest and slice | 10-15 mins | Juices reabsorb, meat relaxes |
Serving & Presentation
This tri tip is a showstopper on any table. I love to slice it against the grain and fan the pieces out on a large wooden board or rimmed platter, letting the pink centers peek through. Sprinkle a little flaky sea salt and fresh parsley over the top for color, and serve it alongside Santa Maria Pinquito Beans – that’s the traditional side dish from California and it’s absolutely perfect with this roast. In my NYC kitchen, I’ll often pair it with a simple arugula salad dressed with lemon and olive oil to cut through the richness.
For a Moroccan twist from my childhood, I sometimes drizzle a little chermoula-inspired sauce over the slices – a blend of cilantro, parsley, garlic, cumin, and lemon juice. It’s not traditional with tri tip, but the bright, herby flavors are a beautiful match. If you’re feeding a crowd, set out warm tortillas, pickled onions, and a creamy horseradish sauce so everyone can build their own little sliders.
| Pairing Type | Suggestions | Why It Works |
|---|---|---|
| Side Dish | Santa Maria Pinquito Beans, roasted potatoes, grilled asparagus | Hearty sides complement the rich beef without overpowering it |
| Sauce / Dip | Horseradish cream, chimichurri, pan gravy | Adds brightness, heat, or richness as desired |
| Beverage | Red Zinfandel, Malbec, dark lager | Bold wines stand up to the beef; lager cleanses the palate |
| Garnish | Flaky salt, fresh parsley, pickled red onions | Adds color, texture, and a pop of acidity |
Make-Ahead, Storage & Reheating
In my busy NYC life, I often make the full spice rub and marinate the tri tip a day ahead – then all I have to do on the day is sear and roast. The leftovers, if you have any, are fantastic for sandwiches the next day. I always keep a container of the pan gravy in the fridge for quick lunches.
| Method | Container | Duration | Reheating Tip |
|---|---|---|---|
| Refrigerator | Airtight container or wrapped in foil | 3-4 days | Slice and reheat gently in a skillet with a splash of broth or gravy |
| Freezer | Vacuum-sealed or heavy-duty freezer bag | 2-3 months | Thaw in fridge overnight, then reheat in a 300°F oven with foil |
| Make-Ahead | Spice rub in a jar, meat in marinade bag | 1-2 days in advance | Rub and marinate up to 3 days; sear and roast on the day |
When reheating, the key is to add moisture back into the meat. I always keep some of the pan gravy or beef broth on hand – reheating in a covered skillet over low heat with a few tablespoons of liquid keeps the slices tender and juicy. Avoid the microwave if you can, as it tends to toughen the meat. If you’re in a rush, a 30-second blast at 50% power is okay, but lower and slower is always better.
Variations & Easy Swaps
| Variation | Key Change | Best For | Difficulty Impact |
|---|---|---|---|
| Moroccan Spice Rub | Add 1 tsp cumin, 1/2 tsp cinnamon, 1/2 tsp paprika | A North African twist with warm, earthy flavors | Easy (same method) |
| Coffee-Chile Crust | Add 1 tbsp finely ground coffee, 1 tsp ancho chile powder | Smoky, slightly bitter depth that pairs with grilling | Easy (same method) |
| Herb and Lemon | Reduce Lawry’s to 2 tsp, add 2 tbsp lemon zest, 1 tbsp fresh thyme | Bright, fresh flavor – ideal for spring and summer | Easy (same method) |
Moroccan Spice Rub Variation
This is my personal favorite – it takes me straight back to my mother’s kitchen in Marrakech. Add 1 teaspoon of cumin, 1/2 teaspoon of cinnamon, and 1/2 teaspoon of sweet paprika to the rub. The cumin and cinnamon create a warm, aromatic crust that is absolutely incredible with the pan gravy. Follow the same method for grilling or oven roasting – the spices will bloom and become even more fragrant during the sear.
Gluten-Free / Dairy-Free Variation
This recipe is naturally gluten-free and dairy-free as written – just make sure your Lawry’s seasoning salt doesn’t contain any additives with gluten. For the pan gravy, use a gluten-free flour blend (I like Bob’s Red Mill 1-to-1) in the same amount as the regular flour, and substitute the butter with a dairy-free alternative like Miyoko’s or Earth Balance. The texture will be just as silky and rich.
Smoky Chipotle Twist
For a smoky, spicy kick that I love for summer grilling, add 1 to 2 teaspoons of chipotle powder to the rub and replace the sugar with a tablespoon of honey or maple syrup in the marinade. The sweetness balances the heat beautifully. You’ll find gorgeous chipotle powder at any NYC spice shop or in the Mexican section of your grocery store. This variation is fantastic with a side of Mexican street corn.
What is the best way to cook tri tip to keep it tender?
The best way to keep tri tip tender is to cook it using a two-zone method: first sear it over high heat to develop a flavorful crust, then finish it over indirect heat (grill) or in a 400°F oven until it reaches an internal temperature of 135-145°F for rare to medium-rare. Always let the meat rest for 10-15 minutes after cooking so the juices redistribute, and slice against the grain for the most tender bites. Using a meat thermometer is essential – don’t rely on time alone.
What are the two main methods for cooking tri tip?
The two main methods for cooking tri tip are grilling and oven roasting. For grilling, you sear the meat over high heat, then move it to the cooler side of the grill to cook through indirectly. For oven roasting, you sear it in a hot skillet first, then transfer it to a 400°F oven on a rack set over a baking sheet. Both methods produce a beautifully crusted exterior and tender interior – the choice depends on your setup and the weather. I include both in this post so you can choose whichever works best for you.
What is the difference between grilling and roasting tri tip?
Grilling tri tip gives you a smoky, charred flavor from the direct heat of the flames, and it’s ideal for outdoor cooking in warmer months. Roasting in the oven provides more even, controlled heat and is perfect for winter or when you don’t have access to a grill. With grilling, you’ll want to trim the fat cap to avoid flare-ups, while for oven roasting you leave it on so it bastes the meat as it renders. Both methods require a good sear first, then gentle finishing heat to reach the right internal temperature.
How long should you let tri tip rest after cooking?
You should let tri tip rest for 10-15 minutes after cooking. This resting period is crucial because it allows the juices, which have been pushed to the center during cooking, to redistribute evenly throughout the meat. If you slice it too soon, all those delicious juices will run out onto the cutting board, leaving the meat dry. Cover the roast loosely with foil during resting to keep it warm without trapping too much steam that could soften the crust.
Should I trim the fat cap on tri tip before cooking?
It depends on your cooking method. If you are grilling, trim the fat cap to about 1/4 inch thick to prevent flare-ups from dripping fat. If you are oven roasting, leave the fat cap on – it will render and baste the meat as it cooks, adding moisture and flavor. The fat cap also helps protect the meat from drying out in the oven’s dry heat. Either way, the marbling within the meat is what really matters for tenderness and flavor.
Can I marinate tri tip for too long?
Yes, you can marinate tri tip for too long if you use an acidic marinade (like one with vinegar or citrus), which can break down the meat fibers and make it mushy. However, this particular marinade is oil-based with dry spices and no acid, so it’s very forgiving. I recommend marinating for 8 hours to 3 days maximum. After 3 days, the texture can start to degrade slightly. If you’re short on time, even 15 minutes of marinating will still give you a flavorful roast.
What temperature should tri tip be for medium rare?
For medium-rare tri tip, the internal temperature should reach 135-145°F when measured with a meat thermometer inserted into the thickest part of the roast. I personally prefer it at 135-140°F for a perfect medium-rare – the center is warm, pink, and very tender. Once it hits 145°F, it’s closer to medium. Never cook it past 145°F because this cut doesn’t have enough fat to stay tender at higher temperatures. Always let it rest for 10-15 minutes after cooking, during which the temperature will rise another 5°F.
Do you flip tri tip when cooking in the oven?
No, you don’t need to flip tri tip when cooking in the oven. After searing it in a hot skillet (about 3-4 minutes per side), you transfer it to a rack on a baking sheet and roast it at 400°F without flipping. The hot oven air circulates around the meat, cooking it evenly on all sides. The seared crust stays intact, and the fat cap renders beautifully. Just make sure to let it rest after roasting to lock in the juices before slicing.
What side dishes go best with tri tip?
The classic side dish for tri tip is Santa Maria Pinquito Beans – small pink beans cooked with bacon, garlic, and spices. Other excellent sides include roasted potatoes, grilled asparagus, a simple arugula salad, or creamy polenta. For a Moroccan-inspired meal, I love serving it with couscous and roasted carrots. The rich, savory beef pairs beautifully with bright, acidic sides (like a vinegary slaw) or starchy, buttery ones (like mashed potatoes). A good pan gravy ties everything together.
Can you cook tri tip from frozen?
I don’t recommend cooking tri tip from frozen because the outside will overcook before the inside is done. For best results, thaw it in the refrigerator for 24-48 hours before cooking. If you’re in a hurry, you can use the cold water method: place the sealed roast in a bowl of cold water, changing the water every 30 minutes, and it should thaw in 2-3 hours. Once thawed, pat it dry, apply the spice rub, and let it marinate for at least 30 minutes before cooking for the best flavor.
Share Your Version!
I absolutely love hearing how this recipe turns out in your kitchen! Did you go with the grilled version for that smoky flavor, or did you roast it in the oven? Did you try any of the variations – maybe the Moroccan spice rub or the chipotle twist? Drop a comment below and let me know how it went. If you made any substitutions that worked beautifully, share those too – we all learn from each other.
Snap a photo of your tri tip masterpiece and tag me on Instagram or Pinterest @exorecipes – I love seeing your creations! And if you’re feeling extra helpful, leave a star rating on the recipe. Your feedback helps other home cooks find this recipe and know it’s a winner. What’s your favorite way to serve tri tip – with beans, potatoes, or something completely different? I can’t wait to hear from you!
From my NYC kitchen to yours – I hope this recipe brings as much warmth to your table as it does to mine. — mia 🧡
Love This Recipe? Save It to Pinterest!
If you enjoyed this Tri Tip (2 Ways) recipe, don’t let it get lost in your browser tabs! 😄 Pin it now so you can find it again anytime — and explore hundreds more tried-and-tested recipes waiting for you on my Pinterest boards.
👉 Follow mia on Pinterest @exorecipe
📌 Pin this recipe · 🔁 Re-pin your favorites · 💬 Tag me when you make it — I love seeing your creations!
💬 Which method will you try first – grilled or oven-baked? Let me know in the comments!
Tag @exorecipes on Instagram or Pinterest and I’ll feature your remake in my stories! 🧡
“`
Print
Tri Tip (2 Ways)
If you have never had tri tip, you haven’t lived! I will show you how to cook tri tip on the grill or in the oven, it’s SO easy and the flavor is unbeatable! We always had tri tip for Christmas dinner growing up, it’s an impressive main dish!
Ingredients
- 2 & 1/2 pound tri tip roast
- 1 & 1/2 teaspoons garlic salt
- 1 tablespoon Lawry's seasoning salt
- 1 & 1/2 teaspoons kosher salt (Diamond Crystal)
- 1 teaspoon black pepper
- 1/2 teaspoon sugar
- 2 teaspoons garlic powder
- 1 tablespoon dried or fresh parsley
- 1/4 cup olive oil
Instructions
- If you can, get your tri tip from a local butcher. They will have what is called "prime" cuts, which has more fat and marbling than you can find at the grocery store. It will take longer to cook because of all the fat. (Fat=flavor)
- If you buy your tri tip at the grocery store, make sure that you go to a high-end grocery store. High-end grocery stores are going to have mid-range cuts of meat. A discount store is going to have discount meat, and it will not be marbled well. Your roast will shrink a lot more and it will take a shorter time to cook.
- Ask the butcher or grocery clerk for a well marbled tri tip roast, or "California cut" or a "triangle roast." If they still don't know what you mean, ask for the bottom sirloin butt (subprimal cut).
- In a small bowl, combine all the spices: galic salt, seasoning salt, kosher salt (only kosher salt, never table salt, and preferably Diamond Crystal!), pepper, sugar, garlic powder, and parsley. 1 tablespoons of dried parsley is fine, you can use 2-3 tablespoons if you are using fresh parsley.
- If you are grilling, trim the fat cap from the roast. If you are oven roasting, leave it on.
- Rub the spice mixture all over the roast with your hands. Place in a large ziplock bag and add 1/4 cup olive oil. Seal the bag and massage the oil into the meat. Place in the fridge and marinate, turning a couple times, for about 8 hours. (This is ideal. If you only have an hour or even 15 minutes, guess what, you're still going to get a great roast. But the longer you marinate, the more flavor there will be. You can leave it in the fridge for up to 3 days.)
- Remove the meat from the fridge 30 minutes before you plan to cook it. It should start cooking at room temperature.
- Preheat your grill to high heat. Make sure you give it a good 15-20 minutes to heat up.
- Place the roast on a plate and discard the marinade (or save it to add to a pan sauce if you plan to make one).
- Grease the grill (or brush oil directly on the meat).
- Sear the roast over high heat for about 2-3 minutes, until it is nicely browned. Flip over (grease again if necessary) and sear the other side for 2-3 minutes. Keep the lid shut as much as you can.
- Turn off the heat on the side of the grill that your meat is on. We are cooking it over INDIRECT heat. Lower the other side of the grill to low heat. If you are cooking over charcoals, arrange the meat and charcoals so that the meat is off to the side, not cooking directly above the charcoal.
- Grill without opening the lid for about 20-25 minutes, or about 10-15 minutes per pound, depending on how rare you want it. Rare is 135 degrees F. Medium rare is 145 degrees F. Use a meat thermometer inserted in the center of the roast to check the temperature.
- Remove the roast from the grill, and place on a rimmed serving platter. Cover well with foil and let rest for 10-15 minutes.
- Slice against the grain and serve (see photos). Try this tri tip with it's traditional side dish, Santa Maria Pinquito Beans!
- Remove the meat from the fridge 30 minutes before you plan to cook it. It should start cooking at room temperature.
- Preheat your oven to 400 degrees F.
- Line a rimmed baking sheet with foil and place an oven-safe cooling rack on top, and set aside.
- Heat a large skillet over medium high heat. Add 2 tablespoons olive oil. When the oil shimmers, place the roast in the pan, fat side down. Sear the roast for about 3-4 minutes, until a brown crust has developed. Flip and sear the other side.
- Place the roast on the cooling rack. Save the marinade and oil from searing for a pan sauce, if you choose to make one.
- Put the roast in the oven and bake at 400 degrees for about 20-30 minutes, or about 10-15 minutes per pound, depending on how rare you want it. Rare is 130-135 degrees F. Medium rare is 135-145 degrees F. Don't cook it past 145; the meat doesn't have enough fat for medium well or well. Use a meat thermometer inserted in the center of the roast to check the temperature.
- Remove the roast from the oven, and cover well with foil. Let rest for 10-15 minutes.
- Slice against the grain and serve (see photos). Try this tri tip with it's traditional side dish, Santa Maria Pinquito Beans!
- Save all meat drippings* and excess marinade. Add to a small saucepan with 2 cups beef broth.* Bring to a boil. In a small bowl, combine 1/3 cup cold water and 3 tablespoons flour. Whisk until smooth, and then slowly pour into the boiling broth. Continue simmering for 5-10 minutes until thickened. Add 2 tablespoons butter, season with salt and pepper, and serve with meat.
Nutrition
- Calories: 458 kcal
- Sugar: 1 g
- Fat: 28 g
- Carbohydrates: 2 g
- Protein: 47 g
Tried This Recipe? Leave a Comment!
Did you make this recipe? I’d love to hear how it turned out! Please leave a comment and a rating below. Your feedback helps other home cooks and supports cheerychop.com!
For more delicious inspiration, follow me on Pinterest!