Table of Contents
Homemade Ice Cream Sandwiches Recipe – The Ultimate Fudge Brownie Treat
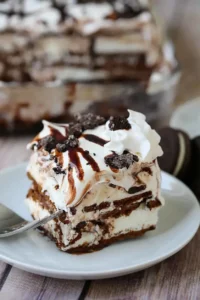
Summer in New York City means sticky subway platforms, melting gelato cones, and the sweet relief of a cold treat. Last week, I was at the Union Square Greenmarket, bags heavy with stone fruits and fresh herbs, when a kid walked past with a perfect, dripping chocolate ice cream sandwich. It transported me straight back to my mother’s kitchen in Marrakech, where she’d press warm fig jam between two layers of chilled vanilla cream — her version of a sandwich dessert. That moment, I knew I had to create the ultimate homemade ice cream sandwiches recipe that captures both the nostalgia of my childhood and the indulgence of a classic American treat. This isn’t just any easy ice cream sandwiches recipe; it’s one built on rich, fudge-like brownies that stay perfectly chewy even when frozen, so you never get that sad, soggy bite. If you’ve ever wondered how to make ice cream sandwiches that taste like they’re from a gourmet shop, you’re in the right place. This is the chocolate ice cream sandwiches of your dreams.
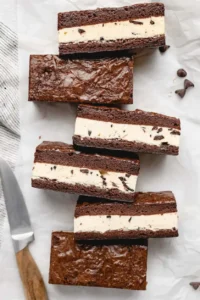
Imagine this: two layers of intensely chocolate brownie, with a crackly, glossy top and a tender, fudgy center, sandwiching a generous layer of your favorite ice cream. The first bite is a gentle give of the slightly softened brownie, followed by the cold, creamy richness of the ice cream, and then that final, satisfying chewiness. I add a touch of flaky sea salt to the brownie batter — a classic French technique I learned at Le Cordon Bleu in Paris — to cut through the sweetness and elevate the chocolate flavor. The contrast in textures between the firm, buttery brownie and the melting ice cream is pure bliss. It’s the kind of dessert that makes you close your eyes and savor every last bite, and it’s surprisingly simple to pull off at home.
After culinary school in Paris and years cooking in New York, I’ve tested every iteration of this dessert. The key difference in my recipe? I bake the brownies in two separate 8×8 pans, creating perfectly even layers that stack beautifully without any doming or crumbling. Many recipes use a single pan and try to cut it horizontally, which often leads to a mess. This method is foolproof. I’ll also share my best tip for keeping the ice cream layer from getting icy, a common mistake that ruins the texture. Trust me, once you master this ice cream dessert recipe, you’ll never go back to store-bought. Let’s make some magic.
Why This Homemade Ice Cream Sandwiches Recipe Is the Best
The Flavor Secret: The brownie base is what makes or breaks this ice cream dessert recipe. I use a combination of melted butter and vegetable oil, inspired by my French training where fat is king. This gives the brownie an incredibly moist, fudgy crumb that doesn’t get rock-hard in the freezer. The cocoa powder is non-negotiable — I use a Dutch-processed variety for a deeper, less acidic chocolate flavor that pairs perfectly with any ice cream.
Perfected Texture: Here’s the chef’s trick: I beat the eggs, granulated sugar, and brown sugar together on medium speed for a full 3 minutes until the mixture is thick and pale. This incorporates air and helps create that iconic shiny, crackled top that every brownie lover adores. The two-pan method guarantees that both layers of your chocolate ice cream sandwiches are identical in thickness, so every bite is balanced.
Foolproof & Fast: This easy ice cream sandwiches recipe is designed for home cooks of any skill level. The most intimidating part is usually the assembly, but I’ve broken it down into simple steps with visual cues. I also include a key tip for preventing your ice cream from melting too quickly during assembly, which is the number one issue people face. You won’t need any special equipment — just two square pans, a hand mixer, and a little patience for the freezer to work its magic.
Homemade Ice Cream Sandwiches Recipe Ingredients
Growing up, my mother’s pantry was a treasure trove of spices and simple staples. In my NYC kitchen, I keep things similarly organized. For this recipe, I source my butter from a local dairy at the Chelsea Market — the extra fat content makes a real difference. The eggs are always cage-free and at room temperature, a non-negotiable detail passed down from my pastry chef days in Paris. Let’s gather what you need.
Ingredients List
- 1 1/2 cups unsalted butter (melted)
- 2 1/4 cups granulated sugar
- 1 1/2 cups light brown sugar (packed)
- 6 large eggs (room temperature)
- 3 tbsp vegetable oil
- 2 tbsp pure vanilla extract
- 2 1/4 cups all purpose flour
- 1 1/2 cups cocoa powder (Dutch-processed preferred)
- 1 1/2 tsps salt
- 1.5 qts of your favorite ice cream flavor (e.g., vanilla, chocolate, or strawberry – you can use less if you prefer a thinner layer)
Ingredient Spotlight
Butter: Unsalted is key here — it lets you control the salt level. I always use a high-fat European-style butter (like Plugrà) for the richest flavor and most tender crumb. It gives the brownie that melt-in-your-mouth quality essential for a great sandwich. In a pinch, a good-quality American unsalted butter works fine.
Cocoa Powder: Dutch-processed cocoa powder has been treated with an alkali to neutralize its acidity, resulting in a smoother, more mellow chocolate flavor. It’s the secret to the deep, dark richness of these brownies. Natural cocoa powder will work, but the flavor will be slightly sharper and the brownies may not be as tender.
Ice Cream: This is where you can get creative! A classic vanilla bean or chocolate works beautifully. For a Moroccan-inspired twist, try a saffron and honey ice cream or a rosewater and pistachio flavor. Just make sure it’s a good quality brand with a creamy texture, as cheap ice cream can become icy after refreezing. 💡 mia’s Pro Tip: Let the ice cream soften for 5-10 minutes at room temperature before spreading — never microwave it, as that can create uneven melting and icy crystals.
Salt: Don’t skimp on the salt in the brownie batter. It enhances the chocolate and balances the sweetness of both the brownie and the ice cream. I use fine sea salt for the batter and a light sprinkle of flaky Maldon salt on top after baking (before freezing) for a delightful pop of crunch.
| Original Ingredient | Best Substitution | Flavor / Texture Impact |
|---|---|---|
| Unsalted Butter | Coconut oil (solid, room temp) | Slightly coconut flavor, less rich, more fragile |
| Cocoa Powder | Equal parts unsweetened baking chocolate (melted) | Richer chocolate flavor, less tender crumb |
| All Purpose Flour | Gluten-free 1-to-1 baking blend | Slightly denser, more crumbly texture |
| Granulated Sugar | Coconut sugar | More caramel flavor, slightly less sweet |
| Ice Cream (Dairy) | Coconut milk or oat milk ice cream | May become icier, less creamy — best for same-day serving |
How to Make Homemade Ice Cream Sandwiches — Step-by-Step
Let’s walk through each step together — I promise it’s easier than it sounds. Start with a deep breath and a clear counter. This easy ice cream sandwiches recipe rewards a little patience with a spectacular payoff.
Step 1: Prepare the Pans
Preheat your oven to 350°F. Grease two 8×8 inch square baking pans thoroughly with butter or baking spray. Line each pan with a large sheet of parchment paper, leaving about 4-6 inches of paper hanging over two opposite sides. This creates “handles” that will make lifting the brownies out a breeze later. Make sure the paper is pressed into the corners snugly.
⚠️ Common Mistake to Avoid: Using too little parchment overhang. If you can’t grasp it firmly, the brownies may tear when you lift them. Give it 4-6 inches as directed!
Step 2: Mix the Wet Ingredients
In a large mixing bowl, combine the melted butter, granulated sugar, and light brown sugar. Beat with a hand mixer on medium speed for about 2 minutes until well combined and slightly fluffy. Now, add the eggs one at a time, mixing well after each addition. This is a crucial step — the mixture should become thick, pale, and glossy after all eggs are added, which helps create that coveted crackly top.
💡 mia’s Pro Tip: Beat the eggs and sugar together for a full 3 minutes on medium-high speed. This is a classic French technique called “blanchir” — it aerates the batter and ensures a beautiful, shiny crust on your brownies.
Step 3: Combine Dry Ingredients
In a separate medium bowl, whisk together the all-purpose flour, cocoa powder, and salt. With the mixer on low speed, gradually add the dry mixture to the wet mixture, mixing in three additions until just incorporated. Be careful not to overmix — a few streaks of flour are fine. Overmixing will develop the gluten and result in tough, cakey brownies, which is not what we want for a fudgy ice cream sandwich.
⚠️ Common Mistake to Avoid: Overmixing the batter after adding the flour. Stop as soon as the flour disappears. Use a rubber spatula to fold in the last bits of flour gently.
Step 4: Bake the Brownies
Divide the brownie batter evenly between the two prepared pans. Use a rubber spatula to spread it into an even layer, right into the corners. Bake for 30-40 minutes, or until a toothpick inserted into the center comes out with just a few moist crumbs attached — not wet batter. The edges should look set and slightly pulled away from the pan. Do not overbake; the brownies will continue to set as they cool.
💡 mia’s Pro Tip: For perfectly fudgy brownies, start checking at 30 minutes. The toothpick should come out with a few moist crumbs — if it’s clean, you’ve overbaked them. Remember, they’ll firm up in the freezer!
Step 5: Cool and Lift
Remove the pans from the oven and let the brownies cool in the pans for exactly 10 minutes. Using the parchment paper handles, carefully lift the brownies out onto a wire cooling rack. Here’s the special trick: only peel the parchment paper off one of the brownie slabs. Leave the parchment on the other one. Let both cool completely to room temperature.
⚠️ Common Mistake to Avoid: Peeling parchment off both slabs. You need the parchment on one half to help lift the final assembled sandwich out of the pan later. Leave it on!
Step 6: Soften and Spread Ice Cream
Take your ice cream out of the freezer and let it soften on the counter for 5-10 minutes until it’s spreadable but not melting. Return the brownie slab that has the parchment paper still attached back into the pan (parchment side down). Using a large spoon or an offset spatula, spread the softened ice cream evenly over the top of the brownie layer. Use about 3/4 of the ice cream first, then add more if you want a thicker layer.
💡 mia’s Pro Tip: For a professional finish, spread the ice cream into an even layer about 1-1.5 inches thick. Use a ruler to check. Consistent thickness means every sandwich is perfect.
Step 7: Assemble and Freeze
Carefully invert the second brownie slab (the one without parchment) and place it, top-side down, over the layer of ice cream. Press down gently to adhere. Cover the entire pan tightly with aluminum foil or plastic wrap. Place it in the freezer for at least 6 hours, but overnight is best for a clean slice.
⚠️ Common Mistake to Avoid: Freezing for less than 6 hours. The core needs to be fully solid for clean cuts. If you cut too soon, the ice cream will squish out the sides and you’ll have a mess.
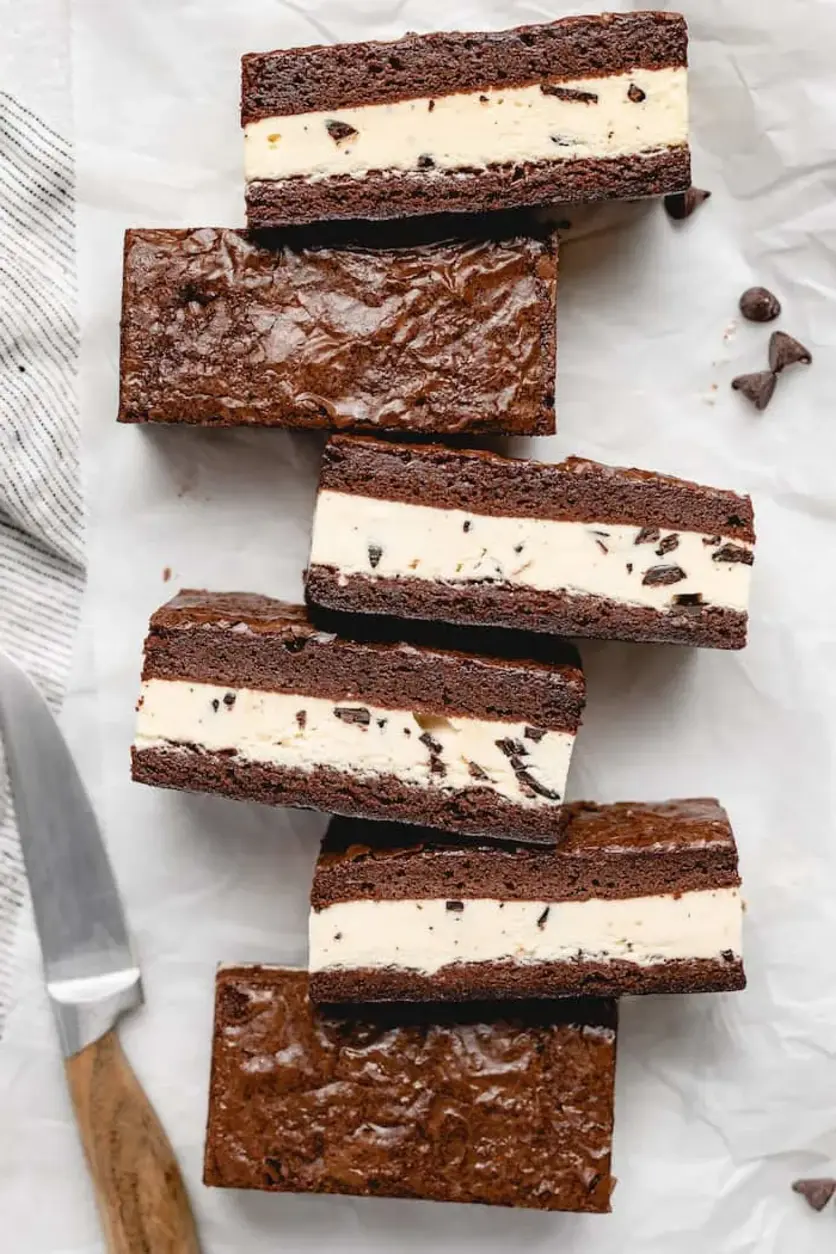
Step 8: Slice and Serve
When ready to serve, remove the pan from the freezer and let it sit at room temperature for 5-10 minutes to soften the edges slightly. Lift the entire block out using the parchment paper handles. Place it on a cutting board. Using a sharp, long knife, cut into 8 even squares. For the cleanest cuts, run the knife under hot water and wipe it dry between each slice. Serve immediately and enjoy!
💡 mia’s Pro Tip: For those picture-perfect slices, use a knife dipped in warm water and wiped dry. It glides through the cold brownie and ice cream without dragging. Between cuts, repeat the dip and wipe.
| Step | Action | Duration | Key Visual Cue |
|---|---|---|---|
| 1 | Prepare pans | 5 mins | Parchment handles 4-6 inches overhang |
| 2 | Mix wet ingredients | 5 mins | Thick, pale, glossy batter |
| 3 | Combine dry ingredients | 3 mins | Just combined, no dry streaks |
| 4 | Bake brownies | 30-40 mins | Toothpick with moist crumbs |
| 5 | Cool and lift | 10 mins + cool | Parchment on one slab only |
| 6 | Soften & spread ice cream | 10 mins | Even, thick ice cream layer |
| 7 | Assemble & freeze | 6+ hrs (overnight best) | Fully solid block |