Table of Contents
Ice Cream Sandwich Cake: The Ultimate No-Bake Dessert
Growing up in Morocco, my mother’s kitchen was a place of slow-cooked tagines and fragrant spices—but on hot summer days, she would surprise us with a cold, creamy dessert that felt like pure magic. That memory of simple, no-fuss sweetness is exactly what I bring to this Easy Ice Cream Sandwich Cake. It’s the simplest way to make your own homemade ice cream cake using ice cream sandwiches, and it has become a staple in my New York City apartment, where I’m always looking for a quick dessert that feels like a celebration. No oven needed, just a few layers of pure joy.
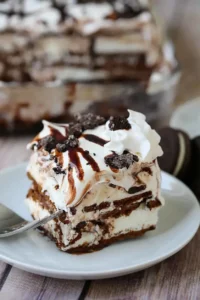
The first time I made this no bake ice cream cake in my tiny NYC kitchen, the entire apartment filled with the smell of chocolate and caramel—not from baking, but from the sheer possibility of such an easy dessert. Every bite is a perfect harmony: the cold, creamy ice cream sandwiches soften just enough to become cake-like, while the Cool Whip adds a cloud-like fluffiness. The chocolate syrup creates ribbons of richness, and the caramel sauce brings a buttery sweetness that reminds me of the honey-drizzled pastries I ate in Paris. It’s a dessert that tastes impressive but takes almost no effort.
I’ve tested this recipe over a dozen times for my blog, exorecipes.com, and I can confidently say it’s the best ice cream sandwich dessert you’ll make. The key is in the layering and freezing time—something I learned from my Parisian pastry training. One common mistake is rushing the process, which leads to a soggy mess. My pro tip: Give it a full two hours in the freezer, and you’ll get clean slices every time. This chocolate ice cream cake is foolproof, and I’m so excited to share it with you.
Why This Ice Cream Sandwich Cake Recipe Is the Best
The flavor secret here is the perfect balance of textures and temperatures. By using classic vanilla ice cream sandwiches, you get a neutral base that lets the chocolate syrup and caramel sauce shine. I always say this is a canvas for your favorite toppings—and the Cool Whip acts as the glue that holds everything together, creating a mousse-like layer between the sandwiches. Inspired by the layered pastries I learned in Paris, this no bake ice cream cake is all about building flavors in a simple, approachable way.
The texture is what makes this Easy Ice Cream Sandwich Cake truly special. The ice cream sandwiches soften just enough during assembly to meld into a single, cohesive cake, but they still retain a slight chewiness from the cookie layers. My French training taught me to respect the freeze—this is why a minimum of two hours is non-negotiable. It ensures the cake sets firmly enough to slice cleanly, without any icy crystals forming.
This recipe is foolproof and fast, making it perfect for beginners or busy parents in the US. There is no baking, no complex techniques, and no special equipment required. Just a 9×13 pan, a few ingredients from any grocery store, and a little patience. I’ve made this for birthday parties, potlucks, and even as a quick weeknight treat in my NYC kitchen. It always gets rave reviews, and everyone asks for the recipe.
Ice Cream Sandwich Cake Ingredients
One of the things I love about this Easy Ice Cream Sandwich Cake is how simple the shopping list is. I pick up almost everything from my local bodega in NYC—right next to the fresh mint I always buy. The ingredients are pantry-friendly and easy to find at any US grocery store.
Ingredients List
- 24 Ice Cream Sandwiches
- 16 oz. Container of Cool Whip (thawed)
- 8 oz. Hershey’s Chocolate Syrup
- 8 oz. Caramel Sauce
- 1 Cup Mini M&M’s (or your favorite sprinkles)
Ingredient Spotlight
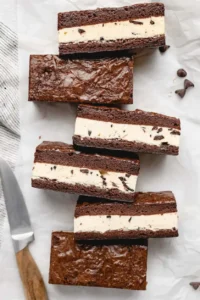
Ice Cream Sandwiches are the star of this show. I recommend using the classic rectangular vanilla ones—they stack perfectly in the pan. For the best results, let them sit out for just 5 minutes before unwrapping so they are pliable but not melting. In a pinch, you can use chocolate or strawberry, but vanilla is the most versatile for this cake.
Cool Whip is what gives this cake its light, airy texture. It spreads easily and creates a beautiful contrast with the denser ice cream sandwiches. Make sure it is fully thawed in the refrigerator—not on the counter—so it stays stable. If you prefer, you can use stabilized homemade whipped cream, but Cool Whip is a classic for a reason.
Hershey’s Chocolate Syrup is a nostalgic choice for me—it reminds me of the sundaes I had as a child. It adds a rich, sweet chocolate flavor that perfectly complements the caramel. For a deeper chocolate taste, you can use a hot fudge sauce, but note that it will be thicker. Caramel Sauce brings the buttery, salty sweetness that balances the cake. I love using a store-bought premium caramel, but homemade works beautifully too.
Mini M&M’s add a pop of color and a satisfying crunch. They are completely optional, but I love the way they look against the white Cool Whip. You can substitute with rainbow sprinkles or crushed cookies for a different texture.
| Original Ingredient | Best Substitution | Flavor / Texture Impact |
|---|---|---|
| 24 Ice Cream Sandwiches (vanilla) | 24 Ice Cream Sandwiches (chocolate or strawberry) | Chocolate gives a richer, darker flavor; strawberry adds a fruity twist. Texture remains the same. |
| 16 oz. Cool Whip | 2 cups stabilized homemade whipped cream (1 cup heavy cream, 2 tbsp powdered sugar, 1 tsp vanilla, 1 tsp gelatin) | Homemade is lighter and less sweet; more stable for slicing if using gelatin. Slightly more effort. |
| 8 oz. Hershey’s Chocolate Syrup | 8 oz. hot fudge sauce (warmed slightly) | Hot fudge is thicker and richer, producing a more decadent chocolate layer. May need a spoon to drizzle. |
| 8 oz. Caramel Sauce | 8 oz. dulce de leche (warmed to drizzling consistency) | Dulce de leche is thicker and has a deeper, more caramelized flavor. Less sweet, more complex. |
| 1 Cup Mini M&M’s | 1 cup crushed Oreos, sprinkles, or chopped peanuts | Oreos add a cookies-and-cream twist; sprinkles for color; peanuts for crunch. All great, adjust quantity. |
How to Make Ice Cream Sandwich Cake — Step-by-Step
Follow these simple steps, and you’ll have a stunning Easy Ice Cream Sandwich Cake in no time. I promise, it’s as easy as it sounds!
Step 1: Prepare the Pan
Line a 9×13-inch cake pan with parchment paper, leaving some overhang on the sides. This will make it easy to lift the cake out once it’s frozen. Make sure the paper is smooth on the bottom to avoid creases.
💡 mia’s Pro Tip: Use two long strips of parchment paper that cross in the center—like a sling. This helps you lift the entire cake out cleanly without it breaking.
Step 2: First Layer of Sandwiches
Unwrap 12 ice cream sandwiches and place them tightly in the bottom of the prepared pan, covering the entire surface. If you need to, break one in half to fill any gaps. Press them down gently so they form an even layer.
⚠️ Common Mistake to Avoid: Leaving gaps between the sandwiches can lead to uneven layers. Fill every space, even with broken pieces, to ensure a solid cake structure.
Step 3: Add the Cream and Syrups
Spread 1/2 of the Cool Whip evenly over the first layer of ice cream sandwiches. Use a spatula to make it smooth, almost to the edges. Then, drizzle with half of the chocolate syrup and half of the caramel sauce. Be generous—the syrups will seep into the cream and create delicious ribbons.
💡 mia’s Pro Tip: For a more even drizzle, put the syrups in a small squeeze bottle or a piping bag with a small tip. This gives you control and prevents puddling.
Step 4: Second Layer and Topping
Repeat the process: place another 12 ice cream sandwiches on top of the cream and syrup layer. Press them down gently. Then, spread the remaining Cool Whip over the top, and drizzle with the remaining chocolate and caramel sauces.
⚠️ Common Mistake to Avoid: Don’t press the second layer too hard—you might squish the cream out the sides. A gentle, even press is all you need.
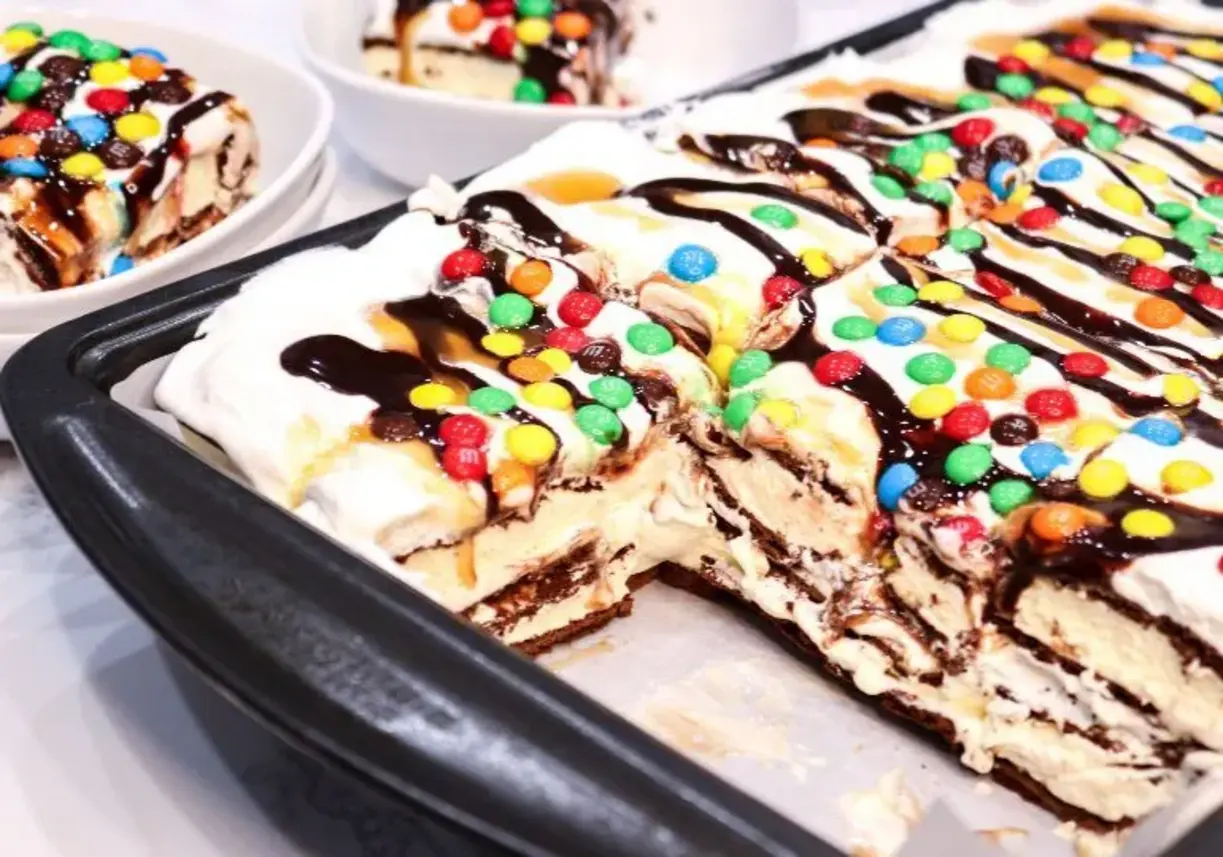
Step 5: Garnish and Freeze
Sprinkle the mini M&M’s (or your favorite sprinkles) over the top. Make sure they stick to the wet Cool Whip. Place the pan in the freezer for a minimum of 2 hours, or until the cake is completely firm to the touch. For best results, freeze overnight.
💡 mia’s Pro Tip: Cover the pan with plastic wrap or foil after the first hour to prevent freezer burn. This also protects the top from absorbing any other odors in your freezer.
Step 6: Serve
Once frozen solid, lift the cake out of the pan using the parchment paper sling. Let it sit at room temperature for about 5 minutes to soften slightly for easier slicing. Use a sharp, warm knife (dip it in hot water and dry it) to get clean cuts. Serve immediately out of the freezer!
⚠️ Common Mistake to Avoid: If the cake is too hard to slice, it’s too cold. Let it sit for 5-10 minutes. If it starts to melt, it’s been out too long—pop it back in the freezer for 15 minutes.
| Step | Action | Duration | Key Visual Cue |
|---|---|---|---|
| 1 | Line pan with parchment | 2 minutes | Paper sits flat, overhanging on both long sides |
| 2 | Place first layer of sandwiches | 3 minutes | Tight, even layer with no gaps |
| 3 | Spread half the Cool Whip and drizzle syrups | 5 minutes | Smooth cream with ribbons of chocolate and caramel |
| 4 | Repeat layers (second batch) | 5 minutes | Clear two-layer structure visible from side |
| 5 | Add M&M’s and freeze | 2+ hours | Cake is firm to the touch, M&M’s are set |
| 6 | Slice and serve | 5 minutes rest | Clean slices with visible layers |
Serving & Presentation
When this Easy Ice Cream Sandwich Cake comes out of the freezer, it’s a showstopper. I love serving it on a large wooden board or a simple white platter, with the parchment paper peeled back just before slicing. The layers of chocolate and caramel peeking through the white Cool Whip are stunning. For a touch of elegance, I sometimes add a few fresh strawberries or mint leaves from the Union Square farmers market around the base—it pays homage to the fresh garnishes my mother used in Morocco.
To serve, use a warm knife as I mentioned, and place each slice on a chilled plate. This is a perfect dessert for a summer picnic, a birthday party, or even a casual dinner with friends. In NYC, I pair it with a strong espresso or a cold glass of milk. The contrast of the cold cake with a hot drink is pure heaven. If you’re hosting a gathering, let the cake sit out for 10 minutes before serving—it will soften just enough to be creamy, but not runny.
For a truly memorable presentation, drizzle a little extra chocolate syrup and caramel over each slice right before serving. Sprinkle with additional M&M’s or flaky sea salt for a sweet-and-salty finish. This is the kind of dessert that makes people close their eyes and smile—and that’s my favorite part of being a food blogger.
| Pairing Type | Suggestions | Why It Works |
|---|---|---|
| Side Dish | Fresh strawberries, a light fruit salad, or a slice of pound cake | The acidity of berries cuts through the richness; pound cake adds texture contrast. |
| Sauce / Dip | Extra hot fudge, a dollop of whipped cream, or a drizzle of raspberry coulis | Adds a layer of indulgence; raspberry adds fruity brightness. |
| Beverage | Iced coffee, cold milk, or a tall glass of horchata | Cold drinks keep the dessert cool; horchata adds a cinnamon-spice note that complements the caramel. |
| Garnish | Fresh mint, flaky sea salt, crushed cookies, or toasted coconut flakes | Mint adds freshness; sea salt enhances the sweet-salty balance; coconut adds a tropical twist. |
Ice Cream Sandwich Cake

This Easy Ice Cream Sandwich Cake is the Simple way to make your Own Homemade Ice Cream Cake using Ice Cream Sandwiches.
Ingredients
- 24 Ice Cream Sandwiches
- 16 oz. Container of Cool Whip
- 8 oz. Hershey's Chocolate Syrup
- 8 oz. Caramel Sauce
- 1 Cup Mini M&M's
Instructions
- Line a 9×13 Cake Pan with Parchment Paper
- Place 12 Unwrapped Ice Cream Sandwiches in the bottom of the Cake Pan
- Spread 1/2 of the Cool Whip over the first layer of Ice Cream Sandwiches
- Drizzle with Chocolate Syrup and Caramel
- Repeat steps 2-4 again adding another layer of Ice Cream Sandwiches, Cool Whip and Chocolate and Caramel Drizzle.
- Sprinkle with Mini M&M's or your favorite sprinkles
- Place in the freezer for a minimum of 2 hours to harden
- Serve immediately out of the freezer!
Nutrition
- Calories: 380 calories
- Sugar: 36.1 grams sugar
- Fat: 16 grams fat
- Carbohydrates: 53.7 grams carbohydrates
- Protein: 4.9 grams protein

Tried This Recipe? Leave a Comment!
Did you make this recipe? I’d love to hear how it turned out! Please leave a comment and a rating below. Your feedback helps other home cooks and supports cheerychop.com!
For more delicious inspiration, follow me on Pinterest!