Table of Contents
Crispy Lemon Pepper Chicken Sandwich – Parisian Crunch, NYC Flavor

Let me take you straight to my kitchen in New York City, where the scent of sizzling lemon pepper fried chicken mingles with the hum of the subway and the distant honk of taxis. I’m Lora, and this crispy lemon pepper chicken sandwich is the recipe I turn to when I need something deeply satisfying, fast, and full of crunch. Growing up in Morocco, my mother would marinate chicken in bright citrus and warm spices before frying it in a heavy pan — and that memory of tangy, golden perfection stayed with me through culinary school in Paris and every farmers market I’ve haunted here in NYC. This homemade crispy chicken sandwich recipe is my love letter to all three worlds: the zing of preserved lemons from my childhood, the precise breading technique I learned in my Parisian pastry classes, and the bold, unapologetic flavor that New Yorkers demand. Whether you’re looking for an easy chicken dinner recipe for a busy Tuesday or a showstopper for game day, this crispy lemon pepper chicken sandwich delivers every single time — juicy inside, shatteringly crisp outside, and bright with lemon in every bite.
Imagine this: you bite through a golden, craggly crust that shatters with a gentle crack, revealing tender, buttermilk-marinated chicken that’s impossibly juicy. A burst of black pepper heat hits your tongue, quickly followed by the sunny brightness of fresh lemon zest and a whisper of garlic and paprika. The creamy, tangy sauce — kissed with Dijon and more lemon — balances the richness, while cool shredded lettuce and a ripe tomato slice add freshness and crunch. Every component of this crispy chicken sandwich recipe works in harmony, and the best part? You can have it on the table in about 35 minutes flat if you’re organized. I’ve perfected the double-dredge method during my years cooking in tiny NYC apartment kitchens, and I promise you, the texture is wildly superior to anything you’ll pick up from a fast-food bag. It’s a homemade chicken sandwich that tastes like a splurge but fits right into a weeknight rotation.
What makes this crispy lemon pepper chicken sandwich different from every other fried chicken recipe out there? Two things: the buttermilk marinade does double duty, tenderizing the meat while infusing it with a subtle tang that echoes the lemon, and I use a three-station breading setup — seasoned flour, egg wash, then breadcrumbs — that locks in moisture and creates that signature craggy crust. I’ve tested every variation so you don’t have to, and I’m sharing my best lemon pepper fried chicken secrets, including how to keep the coating crisp even while the sandwich sits. If you’re new to frying at home, don’t worry — I’ll walk you through every step, from the perfect oil temperature to the most common mistake that makes breading fall off. This is the easy chicken dinner recipe you’ll return to again and again, and I can’t wait for you to taste it. From my NYC kitchen to yours, let’s make the best crispy lemon pepper chicken sandwich of your life.
Why This Crispy Lemon Pepper Chicken Sandwich Recipe Is the Best
The Flavor Secret — This isn’t just pepper and lemon thrown together. I start with a buttermilk soak that’s never acidic enough to toughen the meat, then build a flour blend with garlic powder, onion powder, paprika, and cayenne for warmth. The lemon zest goes into the sauce and as a final garnish, so you get that bright note in every single bite. My time at Le Cordon Bleu taught me that layering flavors is the real secret to memorable food, and this crispy lemon pepper chicken sandwich is a textbook example. Every element — from the buttermilk fried chicken technique to the creamy lemon-Dijon spread — is designed to complement rather than overpower. If you’re searching for an easy chicken dinner recipe that tastes like a chef made it, this is your winner.
Perfected Texture — The hallmark of a great crispy chicken sandwich recipe is that irresistible crackle when you bite in. I achieve that by pressing breadcrumbs firmly into the egg-washed chicken, then letting the coated pieces rest for five minutes before frying. That short rest helps the breading adhere, so you never get that sad, bald patch of skin. Frying in a shallow layer of oil — about ¼ inch deep — means you get even browning without the need for a deep fryer. The crust stays audibly crunchy for a good twenty minutes after cooking, which is an eternity in sandwich time. I tested this lemon pepper fried chicken more times than I can count, and this method consistently produces the crunchiest, most reliable results of any homemade chicken sandwich I’ve ever made.
Foolproof & Fast — I know how intimidating frying at home can be, especially if you’re new to it. That’s why I’ve stripped away every unnecessary step. The buttermilk marinade needs only 20 minutes — not an overnight commitment. The breading station uses three bowls and common pantry ingredients. And the stovetop frying method means you don’t need any special equipment. This crispy lemon pepper chicken sandwich is designed to be approachable for beginner cooks while still impressing seasoned home chefs. It’s the easy chicken dinner recipe that makes everyone feel like a pro. Plus, I’ve included my foolproof oil-temperature test (a pinch of flour that sizzles right away) so you never guess whether the pan is ready.
Crispy Lemon Pepper Chicken Sandwich Ingredients
I pick up my chicken from the butcher at the Union Square farmers market, grab fresh lemons from the greenmarket stand, and use a good-quality Dijon that I fell in love with during my Paris days. Every ingredient in this crispy lemon pepper chicken sandwich is chosen for a reason — no fillers, no shortcuts, just honest, flavorful cooking. Here’s exactly what you’ll need to create this homemade crispy chicken sandwich recipe in your own kitchen.
Ingredients List
- 2 boneless, skinless chicken breasts (about 1½ lbs total)
- 1 cup buttermilk (well-shaken)
- 1 cup all-purpose flour
- 1 tsp salt
- 1 tsp black pepper (plus extra for the lemon pepper finish)
- 1 tsp garlic powder
- 1 tsp onion powder
- 1 tsp paprika (sweet or smoked)
- ¼ tsp cayenne pepper (optional, for heat)
- 1 large egg
- 1 tbsp water
- 1 cup plain breadcrumbs (panko works beautifully for extra crunch)
- Vegetable oil for frying (about 2 cups, depending on pan size)
- 4 hamburger buns (brioche or potato rolls are my favorites)
- ¼ cup mayonnaise
- 1 tbsp Dijon mustard
- 1 tbsp fresh lemon juice
- 1 tsp lemon zest
- Shredded lettuce (iceberg or butter lettuce)
- Sliced tomato (1 large, ripe)
- Chopped fresh parsley for garnish
Ingredient Spotlight
Buttermilk — This is the heart of the marinade. The acidity in buttermilk tenderizes the chicken without making it mushy, and it adds a subtle tang that pairs beautifully with the lemon pepper seasoning. If you don’t have buttermilk, mix 1 cup of whole milk with 1 tablespoon of white vinegar or lemon juice and let it sit for 5 minutes — it works perfectly in this crispy lemon pepper chicken sandwich recipe. I always use full-fat buttermilk for the richest flavor, but low-fat will do in a pinch.
Breadcrumbs — I use plain breadcrumbs for a fine, even crust, but panko breadcrumbs take the crunch factor to another level. If you want an extra-craggy coating, combine half panko and half plain breadcrumbs. Gluten-free breadcrumbs also work well here — just keep in mind they may brown a little faster, so keep an eye on the pan. This is one of those small choices that can make or break your crispy chicken sandwich recipe, so experiment and find your favorite.
Lemon — Fresh lemon zest and juice are non-negotiable in this lemon pepper fried chicken recipe. The zest carries the essential oils that give you that bright, sunny aroma, while the juice cuts through the richness of the fried chicken and mayonnaise. Always zesting before juicing, and use a microplane for the finest, most fragrant zest. Never use bottled lemon juice — it has a flat, metallic taste that will dull the entire sandwich. A good, heavy lemon is your best friend here.
| Original Ingredient | Best Substitution | Flavor / Texture Impact |
|---|---|---|
| Buttermilk | Whole milk + 1 tbsp vinegar or lemon juice | Slightly less tangy; tenderizing effect remains strong |
| All-purpose flour | Gluten-free all-purpose blend (with xanthan gum) | Slightly less crispy; still holds coating well |
| Breadcrumbs | Panko breadcrumbs | Much crunchier, lighter crust; excellent for texture |
| Vegetable oil | Canola oil or peanut oil | Neutral flavor; peanut oil adds subtle nuttiness |
How to Make Crispy Lemon Pepper Chicken Sandwich – Step-by-Step
I’ve broken down every stage of this crispy lemon pepper chicken sandwich into simple, actionable steps. Follow along and you’ll have golden, restaurant-quality lemon pepper fried chicken in about half an hour. Trust the process — and don’t skip the buttermilk soak!
Step 1: Prep the Chicken
Place the chicken breasts on a cutting board and carefully slice them horizontally to create thinner pieces. This not only speeds up cooking but also gives you more surface area for that irresistible crispy coating. Aim for even thickness — about ½ inch — so every piece cooks at the same rate. If the breasts are very large, you can cut each into two pieces.
💡 Lora’s Pro Tip: Lay the chicken flat and cover it with a sheet of plastic wrap before slicing. This keeps the chicken steady and prevents any knife slips, giving you clean, even cutlets every time.
Step 2: Marinate in Buttermilk
Place the chicken pieces in a bowl or zip-top bag and pour the buttermilk over them, making sure every piece is fully submerged. Let them sit for at least 20–30 minutes (or up to a few hours in the fridge). The buttermilk tenderizes the chicken and adds a subtle tang that’s essential for this crispy chicken sandwich recipe.
⚠️ Common Mistake to Avoid: Don’t marinate longer than 4 hours — the acid in buttermilk can eventually make the chicken texture too soft. Thirty minutes is the sweet spot for a quick weeknight, but 2 hours is even better.
Step 3: Season and Set Up Your Dredging Station
In a shallow bowl, combine the flour with salt, black pepper, garlic powder, onion powder, paprika, and a pinch of cayenne. In another bowl, whisk the egg and water until smooth. Place breadcrumbs in a third bowl. Arrange them in a line: flour → egg wash → breadcrumbs. This assembly line makes coating fast and mess-free.
💡 Lora’s Pro Tip: Season the flour generously — most of the flavor in the coating comes from this layer. Taste a pinch of the flour mixture before you start; it should taste well-seasoned but not overwhelmingly salty.
Step 4: Coat the Chicken
Remove the chicken from the buttermilk, letting any excess drip off. Dip each piece first in the flour mixture, pressing gently to coat both sides. Shake off any loose flour, then dunk it in the egg wash, letting the excess drip off. Finally, press it firmly into the breadcrumbs, turning to coat every surface. Don’t be afraid to really press the crumbs on — they’re what give that gorgeous crunch.
⚠️ Common Mistake to Avoid: Skipping the “rest” after breading! Place the coated chicken on a wire rack for 5 minutes before frying. This helps the breading adhere and prevents it from slipping off in the hot oil.
Step 5: Heat the Oil
Pour vegetable oil into a large skillet, enough to cover the bottom about ¼ inch deep. Heat over medium-high until shimmering. To test if it’s ready, drop in a tiny bit of flour — if it sizzles right away, you’re good to go. The oil should be around 350–365°F for optimal crisping.
💡 Lora’s Pro Tip: If you have an instant-read thermometer, use it. Maintaining oil temperature between 350°F and 365°F is the single most important factor for a crispy, non-greasy crispy lemon pepper chicken sandwich.
Step 6: Fry the Chicken
Carefully lay the chicken pieces into the hot oil, leaving space between them so they crisp instead of steam. Cook 4–5 minutes per side until golden brown and the internal temp hits 165°F. Use tongs to flip gently — don’t pierce the crust or you’ll lose the juices.
⚠️ Common Mistake to Avoid: Overcrowding the pan! Frying too many pieces at once drops the oil temperature, leading to soggy, greasy chicken. Cook in batches if needed, and let the oil come back up to temperature between batches.
Step 7: Drain and Rest
Transfer the chicken to a paper towel-lined plate to drain excess oil. Let it rest for a couple of minutes — it stays crispier this way. Don’t cover it with foil, or the steam will soften that beautiful crust you just created.
💡 Lora’s Pro Tip: Place a wire rack over a baking sheet and set the chicken on that instead of paper towels. Air circulates underneath, keeping the crust crunchy for much longer — essential when you’re assembling multiple homemade chicken sandwich orders.
Step 8: Toast the Buns
While the chicken rests, lightly toast your hamburger buns in a dry skillet or toaster. Toasting gives a nice crunch and helps prevent soggy sandwiches. I like to toast the cut sides only until they’re golden — about 1 minute over medium heat.
💡 Lora’s Pro Tip: Brush the cut sides of the buns with a little melted butter or olive oil before toasting for extra flavor and a gorgeous golden color. This small step elevates your crispy chicken sandwich recipe from good to unforgettable.
Step 9: Make the Sauce
In a small bowl, mix mayonnaise, Dijon mustard, lemon juice, and zest until creamy and smooth. Taste and adjust the lemon if you like it extra zippy. This sauce is the perfect bridge between the crunchy chicken and the fresh vegetables — creamy, tangy, and bright.
💡 Lora’s Pro Tip: Let the sauce sit for 5 minutes after mixing so the lemon zest can infuse the mayonnaise. The flavor deepens and becomes more aromatic — a trick I picked up from a saucier in Paris.
Step 10: Assemble Your Masterpiece
Spread a generous layer of the sauce on each bun bottom. Place a piece of crispy chicken on top, then add shredded lettuce, tomato slices, and a sprinkle of parsley for color and freshness. Add a final crack of black pepper and a tiny pinch of lemon zest right on top of the chicken for that signature lemon pepper hit.
⚠️ Common Mistake to Avoid: Too much sauce! A generous tablespoon per bun is plenty — any more and the bread will get soggy, and the chicken’s crunch will be lost. You want the sauce to complement, not overwhelm.
Step 11: Finish and Serve
Cap it with the top bun and serve right away while everything is warm, crispy, and perfect. Trust me, these are best eaten immediately — no one likes cold soggy chicken! Pair with crispy fries, a simple side salad, or crunchy pickles for a complete meal that everyone will love.
| Step | Action | Duration | Key Visual Cue |
|---|---|---|---|
| 1 | Slice chicken breasts | 2 minutes | Even ½-inch pieces |
| 2 | Buttermilk soak | 20–30 minutes | Chicken fully submerged |
| 3 | Set up dredging station | 3 minutes | Three bowls in a line |
| 4 | Coat each piece | 5 minutes | Thick, even breading layer |
| 5 | Heat oil | 3–4 minutes | Oil shimmers, flour sizzles |
| 6 | Fry chicken | 4–5 mins per side | Deep golden brown, 165°F |
| 7 | Drain and rest | 2 minutes | No pooling oil on plate |
| 8 | Toast buns | 1–2 minutes | Golden cut sides |
| 9 | Make sauce | 2 minutes | Creamy, well-blended |
| 10 | Assemble sandwich | 2 minutes | Layered evenly, not overstuffed |
| 11 | Finish and serve | 1 minute | Served warm and crisp |
Serving & Presentation
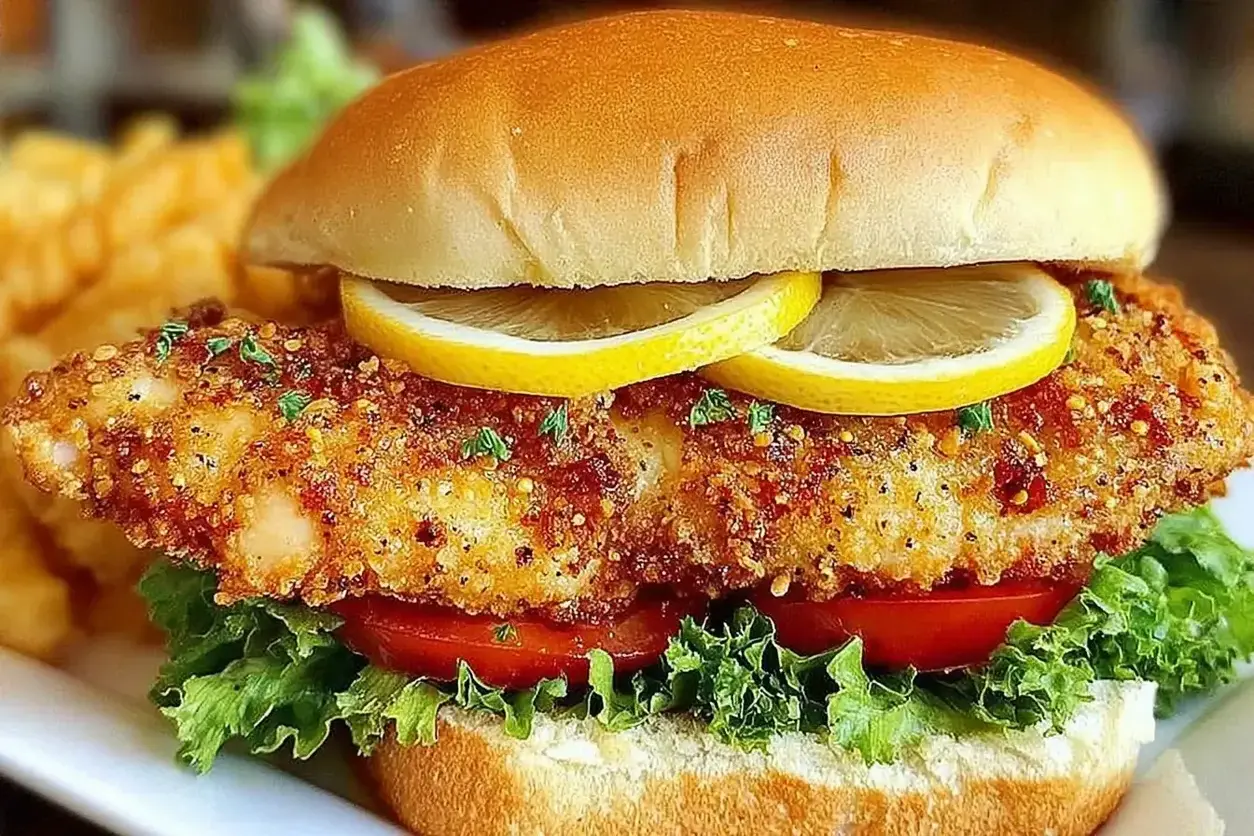
In my NYC apartment, I love serving this crispy lemon pepper chicken sandwich with a pile of hand-cut fries and a side of crunchy dill pickles — it’s the kind of meal that makes even a Tuesday night feel like a celebration. The sandwich itself is tall and gorgeous, with the golden chicken peeking out from the toasted bun, bright green lettuce and a red tomato slice adding color. I sometimes add a sprinkle of fresh parsley and an extra pinch of lemon zest on top for a pop of brightness that signals what’s inside. For an easy chicken dinner recipe that looks like it took hours, this presentation is hard to beat.
When I’m feeling nostalgic for my Moroccan roots, I serve the sandwich alongside a side of harissa-spiced roasted potatoes or a simple tomato-cucumber salad dressed with lemon and olive oil. The cool, crunchy salad is a lovely counterpoint to the warm, crispy chicken, and the tangy dressing echoes the lemon notes in the lemon pepper fried chicken. For a true NYC touch, I sometimes add a handful of arugula instead of lettuce and a smear of spicy mustard on the top bun — it’s the kind of bold, layered flavor that reminds me why I love living and cooking in this city.
No matter how you serve it, this homemade chicken sandwich shines brightest when it’s fresh and hot. If you’re making these for a crowd, set up a little sandwich bar with the sauce, extra lemon wedges, pickled jalapeños, and crisp lettuce so everyone can customize their own. It’s fun, interactive, and guarantees that every person gets exactly the crispy chicken sandwich recipe they’re craving. And don’t forget the napkins — things are about to get gloriously messy.
| Pairing Type | Suggestions | Why It Works |
|---|---|---|
| Side Dish | Hand-cut fries, sweet potato wedges, coleslaw | Crisp-on-crisp texture; creamy slaw contrasts the crunch |
| Sauce / Dip | Extra lemon-Dijon sauce, honey mustard, ranch | Adds creaminess and tang; extra lemon brightens the sandwich |
| Beverage | Iced tea, lemonade, crisp lager beer | Refreshing acidity cuts through richness; beer pairs with fried food |
| Garnish | Fresh parsley, extra lemon zest, pickled jalapeños | Adds color, freshness, and a pop of acidity or heat |
Make-Ahead, Storage & Reheating
I know life in New York moves fast, so I’ve figured out how to get ahead of this crispy lemon pepper chicken sandwich without sacrificing quality. Whether you’re meal-prepping for a busy week or saving leftovers from a weekend cookout, here’s exactly how to store and reheat every component so it tastes as close to fresh as possible. The key is to store components separately — never assemble the sandwich until you’re ready to eat.
| Method | Container | Duration | Reheating Tip |
|---|---|---|---|
| Refrigerator | Airtight container, chicken on a paper towel-lined plate | Up to 3 days | Air fryer at 375°F for 4–5 minutes; or oven at 400°F for 8–10 minutes |
| Freezer | Freezer-safe bag with parchment between layers | Up to 2 months | Thaw in fridge overnight; reheat in air fryer at 375°F for 6–7 minutes |
| Make-Ahead | Marinate chicken in buttermilk (fridge); prep sauce (fridge) | Marinate up to 4 hours; sauce up to 3 days | Bread and fry just before serving for maximum crunch |
The single most important rule for reheating fried chicken — and I learned this the hard way during my first year in NYC — is never, ever use a microwave. It turns that beautiful, hard-won crust into a sad, steamy mess. Instead, reheat the chicken in an air fryer or a 400°F oven on a wire rack set over a baking sheet. The wire rack lets hot air circulate all around the chicken, reviving that shatteringly crisp texture. For the buns, toast them fresh — they take only a minute. And the sauce, lettuce, and tomato should always be added cold right before serving. This way, every component of your crispy chicken sandwich recipe tastes like it was just made.
If you’re planning ahead for a gathering, I recommend breading the chicken up to 4 hours in advance and keeping it on a parchment-lined tray in the fridge. Fry it right before your guests arrive, and you’ll have hot, crunchy lemon pepper fried chicken ready in minutes. The sauce can be made up to 3 days ahead and stored in a jar in the fridge — the flavors actually meld and deepen over time, which makes the homemade chicken sandwich even better. Just give it a good stir before using.
Variations & Easy Swaps
One of the things I love most about this crispy lemon pepper chicken sandwich is how adaptable it is. Whether you’re cooking for dietary restrictions, seasonal cravings, or just a change of pace, these variations keep the soul of the recipe intact while letting you make it your own. I’ve tested every single one in my own kitchen — some inspired by my Moroccan heritage, others by what I find at the Union Square farmers market.
| Variation | Key Change | Best For | Difficulty Impact |
|---|---|---|---|
| Spicy Southwest Twist | Add chipotle powder to flour; use pepper jack cheese | Heat lovers & game-day crowds | Easy — same method, different spices |
| Gluten-Free Version | Use gluten-free flour blend & gluten-free breadcrumbs | Gluten-free diners | Easy — same technique |
| Moroccan Lemon Preserve Twist | Add chopped preserved lemon to the sauce; use ras el hanout in flour | Adventurous eaters & North African flavor fans | Medium — needs preserved lemon, but method is same |
Spicy Southwest Twist
Add 1 teaspoon of chipotle powder and ½ teaspoon of cumin to the flour mixture for a smoky, earthy heat that pairs beautifully with the lemon. Swap the Dijon in the sauce for a chipotle-lime crema (mayo, lime juice, chipotle in adobo, and a pinch of salt). Top with pepper jack cheese, pickled jalapeños, and a handful of fresh cilantro. This variation turns your crispy lemon pepper chicken sandwich into a bold, Southwest-inspired creation that’s perfect for game day. The smokiness of the chipotle echoes the paprika in the original, while the lime and cilantro keep things fresh. I love serving this one with a side of black bean salad and a cold Mexican lager.
Gluten-Free Version
Use a 1:1 gluten-free all-purpose flour blend (one that contains xanthan gum) in place of regular flour, and gluten-free breadcrumbs or crushed gluten-free crackers for the coating. Everything else — the buttermilk marinade, the egg wash, the frying method — stays exactly the same. I’ve tested this with several brands, and the texture is remarkably close to the original. The crust is a touch less crispy, but still deeply satisfying. This is a fantastic option if you’re cooking for friends with celiac disease or gluten sensitivity, and it means nobody misses out on the joy of a homemade chicken sandwich. Just be sure to check that your Dijon mustard and other condiments are also gluten-free.
Moroccan Lemon Preserve Twist
This variation is a love letter to my childhood. Finely chop 1 tablespoon of preserved lemon peel (discard the pulp) and stir it into the mayonnaise along with a pinch of ras el hanout — a warm Moroccan spice blend with ginger, cinnamon, turmeric, and saffron. Add a tiny pinch of cinnamon to the flour mixture for warmth. The preserved lemon adds an intense, salty-citrusy depth that you can’t get from fresh lemon alone, while the ras el hanout brings a fragrant complexity that makes this crispy chicken sandwich recipe truly unforgettable. Finish with fresh mint instead of parsley for an authentic Moroccan touch. This version always transports me straight back to my mother’s kitchen in Marrakech.
Share Your Version!
I absolutely love hearing how this crispy lemon pepper chicken sandwich turns out in your kitchen. Did you stick with the classic, or try one of the variations? Maybe you came up with your own twist — a new spice blend, a different sauce, a unique topping combination. Drop a comment below and let me know! Your feedback helps other home cooks discover what works, and I personally read every single comment. If you’re feeling generous, a 5-star rating would mean the world to me and helps more people find this easy chicken dinner recipe.
And if you make this crispy lemon pepper chicken sandwich, I’d love to see it! Snap a photo and share it on Instagram or Pinterest tagging @ingredientidea. I’m always scrolling through the tags and sharing my favorites — there’s nothing better than seeing that golden crust and knowing another kitchen is filled with the smell of lemon pepper fried chicken. Tag me with your creation, and don’t forget to tell me what you paired it with. Did you go with fries, a salad, or something unexpected? I’m genuinely curious. Thank you for cooking from my blog and for being part of this delicious, beautiful community.
From my NYC kitchen to yours — I hope this recipe brings as much warmth to your table as it does to mine. — Lora 🧡
How do you get the chicken coating to stay crispy on a lemon pepper chicken sandwich?
The key to keeping the coating crispy on a crispy lemon pepper chicken sandwich starts with the breading technique. After you coat the chicken in breadcrumbs, let it rest on a wire rack for 5 minutes before frying — this helps the breading adhere and prevents it from slipping off in the oil. Frying at the right temperature (350–365°F) is critical; oil that’s too cool will absorb into the breading and make it soggy. After frying, drain the chicken on a wire rack rather than paper towels so air circulates all around. For serving, toast the buns to create a barrier against moisture, and don’t overload the sandwich with sauce. If you’re making multiple sandwiches, keep the cooked chicken on a wire rack in a 250°F oven while you finish the rest.
What is the best type of chicken to use for a crispy chicken sandwich?
For the best crispy chicken sandwich recipe, I recommend boneless, skinless chicken breasts sliced horizontally into even cutlets about ½ inch thick. This gives you a large, flat surface area that cooks quickly and evenly while maximizing that crunchy coating-to-meat ratio. You can also use boneless, skinless chicken thighs — they’re more forgiving and stay juicier, but they have a slightly different shape and may need an extra minute of cooking time. Whichever you choose, make sure to pound or slice the chicken to an even thickness so the cutlets cook at the same rate. For this crispy lemon pepper chicken sandwich, breasts are my go-to because they create that classic, wide, bun-filling shape that feels like a real restaurant-style sandwich.
Can I make a crispy lemon pepper chicken sandwich in an air fryer instead of deep frying?
Yes, you can absolutely make a crispy lemon pepper chicken sandwich in an air fryer, and I’ve tested this method extensively in my NYC kitchen. Preheat your air fryer to 375°F. Spray the breaded chicken lightly with cooking spray or a light mist of oil — this is essential for achieving that golden, crispy crust. Arrange the pieces in a single layer in the air fryer basket, leaving space between them for air circulation. Cook for 10–12 minutes, flipping halfway through, until the internal temperature reaches 165°F and the coating is deep golden brown. The crust won’t be quite as shatteringly crisp as pan-fried, but it’s still delicious and significantly lighter. I actually prefer this method on busy weeknights when I don’t want to deal with a pan of hot oil.
What sauce goes well with a lemon pepper chicken sandwich?
The sauce I use in this crispy lemon pepper chicken sandwich recipe is a creamy lemon-Dijon mayonnaise — it’s bright, tangy, and perfectly complements the black pepper and lemon notes in the fried chicken. But there are plenty of other fantastic options. A classic honey mustard adds sweetness that balances the pepper heat, while a spicy chipotle mayo brings smoky depth. For a lighter option, a Greek yogurt-based sauce with lemon juice, garlic, and fresh dill works beautifully. If you’re a fan of bold flavors, try a sriracha-lime mayo or a harissa-yogurt sauce for a North African twist. I have a whole guide to the best dipping sauces for chicken that pairs perfectly with this homemade chicken sandwich — check it out for more inspiration.
Can I use chicken thighs instead of breasts for this recipe?
Absolutely, chicken thighs work wonderfully for this crispy lemon pepper chicken sandwich. Boneless, skinless thighs are naturally juicier and more flavorful than breasts, and they’re harder to overcook — which makes them a very forgiving choice for beginners. The main difference is shape: thighs are smaller and more irregular, so you may end up with a slightly smaller sandwich or you can use two thighs per bun for a double-stacker. Adjust the cooking time slightly — thighs typically need 5–6 minutes per side instead of 4–5 because they’re a bit thicker. Always check for an internal temperature of 165°F. I sometimes use thighs when I find them on sale at the Union Square market, and the results are always tender, juicy, and absolutely delicious.
Why do you use buttermilk in this crispy chicken sandwich recipe?
Buttermilk serves two crucial purposes in this crispy lemon pepper chicken sandwich. First, its mild acidity gently tenderizes the chicken without making it mushy — it breaks down some of the proteins, resulting in meat that’s juicier and more tender after frying. Second, buttermilk adds a subtle tangy flavor that pairs beautifully with the lemon and pepper, creating a more complex, layered taste. The thickness of buttermilk also helps the flour and breadcrumbs adhere better to the chicken, giving you a thicker, crunchier crust. If you don’t have buttermilk, you can make a quick substitute by adding 1 tablespoon of white vinegar or lemon juice to 1 cup of whole milk and letting it sit for 5 minutes. This DIY version works very well and won’t compromise the texture of your lemon pepper fried chicken.
How do I prevent the breading from falling off during frying?
Breading that falls off is one of the most common frustrations when making a homemade chicken sandwich, and I’ve definitely had my share of sad, bare chicken in the past. Here are my non-negotiable tips for keeping the coating intact. First, pat the chicken dry before the buttermilk soak — excess moisture creates steam that pushes the breading off. Second, follow the dredging order strictly: flour, then egg wash, then breadcrumbs, and press firmly at each stage. Third, let the breaded chicken rest for 5–10 minutes on a wire rack before frying; this gives the coating time to set and adhere. Fourth, don’t overcrowd the pan — dropping the oil temperature causes the breading to absorb oil and become heavy, which makes it slide off. Finally, use tongs to gently lower the chicken into the oil and flip it carefully without piercing the crust.
Can I bake this crispy lemon pepper chicken instead of frying?
Yes, you can bake this crispy lemon pepper chicken sandwich for a lighter version that still delivers plenty of crunch. Preheat your oven to 425°F and line a baking sheet with parchment paper. Place a wire rack on the baking sheet and arrange the breaded chicken pieces on the rack — this allows hot air to circulate underneath, which helps the coating crisp up. Spray the chicken generously with cooking spray or brush with a light layer of oil. Bake for 18–22 minutes, flipping halfway through, until the internal temperature reaches 165°F and the coating is golden and crisp. The result won’t be quite as shatteringly crunchy as pan-fried, but it’s still delicious and much lower in fat. I sometimes use this method when I’m cooking for a crowd and don’t want to stand over a skillet. For the best texture, I still recommend pan-frying if you’re chasing that classic crispy chicken sandwich recipe experience.
What can I serve with a lemon pepper chicken sandwich for a complete meal?
This crispy lemon pepper chicken sandwich pairs beautifully with a wide range of sides, making it perfect for everything from casual weeknight dinners to weekend entertaining. My classic NYC-style pairing is a pile of hand-cut French fries tossed in salt and a pinch of lemon zest — double down on that lemon theme! For a lighter option, a crisp coleslaw with a lemon-Dijon dressing echoes the sandwich’s flavors and adds a refreshing crunch. Sweet potato wedges roasted with paprika and garlic are another favorite, especially in the fall. On the vegetable side, I love grilled asparagus, a simple arugula salad with lemon vinaigrette, or roasted broccoli with garlic. For beverages, an ice-cold lemonade, a crisp lager, or even a tangy lemon seltzer keeps the meal bright and refreshing. If you’re looking for more pairing ideas, check out my guide to homemade chicken sandwich buns — the right bun makes all the difference.
How do I freshen up leftover crispy chicken for lunch the next day?
Leftover crispy lemon pepper chicken sandwich components are a gift for next-day lunch, but you need to reheat the chicken properly to revive that crunch. Never microwave leftover fried chicken — it turns the crust into a sad, rubbery mess. Instead, preheat your air fryer to 375°F and reheat the chicken pieces for 4–5 minutes until they’re hot and crisp again. If you don’t have an air fryer, use a 400°F oven with the chicken placed on a wire rack over a baking sheet for 8–10 minutes. Store the sauce, lettuce, and tomato separately in the fridge, and toast a fresh bun before assembling. This way, every component of your leftover homemade chicken sandwich tastes as close to fresh as possible. I often double the recipe just so I have leftover chicken for lunch the next day — it’s one of my favorite meal-prep strategies for busy NYC weeks.
Love This Recipe? Save It to Pinterest!
If you enjoyed this Crispy Lemon Pepper Chicken Sandwich recipe, don’t let it get lost in your browser tabs! 😄 Pin it now so you can find it again anytime — and explore hundreds more tried-and-tested recipes waiting for you on my Pinterest boards.
👉 Follow Lora on Pinterest @ingredientidea📌 Pin this recipe · 🔁 Re-pin your favorites · 💬 Tag me when you make it — I love seeing your creations!
Crispy Lemon Pepper Chicken Sandwich

This Crispy Lemon Pepper Chicken Sandwich is packed with juicy, golden-fried chicken, zesty lemon flavor, and a creamy tangy sauceperfect for an easy, crowd-pleasing meal.
Ingredients
- 2 boneless, skinless chicken breasts
- 1 cup buttermilk
- 1 cup all-purpose flour
- 1 tsp salt
- 1 tsp black pepper
- 1 tsp garlic powder
- 1 tsp onion powder
- 1 tsp paprika
- 1/4 tsp cayenne pepper
- 1 large egg
- 1 tbsp water
- 1 cup breadcrumbs
- Vegetable oil for frying
- 4 hamburger buns
- 1/4 cup mayonnaise
- 1 tbsp Dijon mustard
- 1 tbsp lemon juice
- 1 tsp lemon zest
- Shredded lettuce
- Sliced tomato
- Chopped fresh parsley
Instructions
- Step 1: Prep the chickenPlace the chicken breasts on a cutting board and carefully slice them horizontally to create thinner pieces. This not only speeds up cooking but also gives you more surface area for that irresistible crispy coating.
- Step 2: Marinate in buttermilkPlace the chicken pieces in a bowl or zip-top bag and pour the buttermilk over them. Let them sit for at least 2030 minutes (or up to a few hours in the fridge). The buttermilk tenderizes the chicken and adds flavor.
- Step 3: Season and set up your dredging stationIn a shallow bowl, combine the flour with salt, black pepper, garlic powder, onion powder, paprika, and a pinch of cayenne. In another bowl, whisk the egg and water until smooth. Place breadcrumbs in a third bowl.
- Step 4: Coat the chickenRemove the chicken from the buttermilk, letting any excess drip off. Dip each piece first in the flour mixture, making sure to cover both sides. Then dunk it in the egg wash, letting the excess drip off, and finally press it firmly into the breadcrumbs. Dont be afraid to really press the crumbs ontheyre what give that gorgeous crunch.
- Step 5: Heat the oilPour vegetable oil into a large skillet, enough to cover the bottom about 1/4 inch deep. Heat over medium-high until its shimmering. To test if its ready, drop in a tiny bit of flourif it sizzles right away, youre good to go.
- Step 6: Fry the chickenCarefully lay the chicken pieces into the hot oil, leaving space between them so they crisp instead of steam. Cook 45 minutes per side until golden brown and the internal temp hits 165°F.
- Step 7: Drain and restTransfer the chicken to a paper towel-lined plate to drain excess oil. Let it rest for a couple of minutesit stays crispier this way.
- Step 8: Toast the bunsWhile the chicken rests, lightly toast your hamburger buns in a dry skillet or toaster. Toasting gives a nice crunch and helps prevent soggy sandwiches.
- Step 9: Make the sauceIn a small bowl, mix mayonnaise, Dijon mustard, lemon juice, and zest until creamy and smooth. Taste and adjust the lemon if you like it extra zippy.
- Step 10: Assemble your masterpieceSpread a generous layer of the sauce on each bun bottom. Place a piece of crispy chicken on top, then add shredded lettuce, tomato slices, and a sprinkle of parsley for color and freshness.
- Step 11: Finish and serveCap it with the top bun and serve right away while everything is warm, crispy, and perfect. Trust me, these are best eaten immediatelyno one likes cold soggy chicken!
Nutrition
- Calories: 520 kcal
- Sugar: 5 g
- Fat: 21 g
- Carbohydrates: 50 g
- Protein: 30 g

Tried This Recipe? Leave a Comment!
Did you make this recipe? I’d love to hear how it turned out! Please leave a comment and a rating below. Your feedback helps other home cooks and supports cheerychop.com!
For more delicious inspiration, follow me on Pinterest!